Genuine Chrysler PT Cruiser Brake Booster
Brake Power BoosterEnter your vehicle info to find more parts and verify fitment
- Select Vehicle by VIN
- Select Vehicle by Model
Select by VIN
orEnter your VIN for the most accurate results.Enter your VIN for the most accurate results.
Select by Model
-- Select Make --
-- Select Model --
-- Select Year --
2 Brake Boosters found
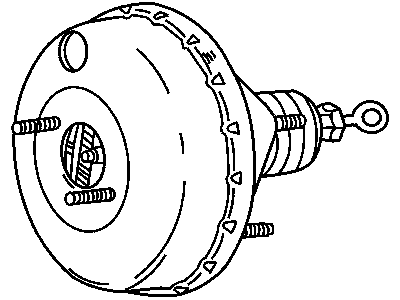

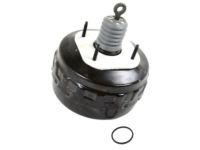
Chrysler PT Cruiser Booster-Power Brake
Part Number: 5072833AA- Other Name: Booster Power Brake; Booster Assembly, Brake Booster
$281.89 MSRP: $358.71You Save: $76.82 (22%)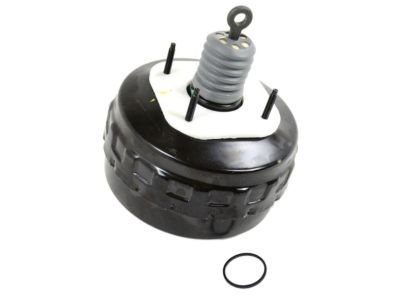
Chrysler PT Cruiser Booster-Power Brake
Part Number: 5142499AA- Other Name: Booster Power Brake; Booster Assembly, Brake Booster
Chrysler PT Cruiser Brake Booster Parts Questions & Answers
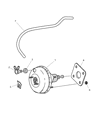
- Q: How to Remove and Install a Power Brake Booster?A: Depress the brake pedal several times with the engine off and make sure that there is no change in the pedal reserve distance. Depress the pedal and start the engine. If the pedal goes down slightly, operation is normal. AIRTIGHTNESS CHECK: Start the engine and turn it off after one or two minutes. Depress the brake pedal several times slowly. If the pedal goes down farther the first time but gradually rises after the second or third depression, the booster is airtight. Depress the brake pedal while the engine is running, then stop the engine with the pedal depressed. If there is no change in the pedal reserve travel after holding the pedal for 30 seconds, the booster is airtight.REMOVAL: Disconnect the cable from the negative battery terminal. Remove the air filter housing. Unbolt the underhood fuse/relay box and position it out of the way. Disconnect the vacuum hoses from the power brake booster vacuum fitting. Label and disconnect the vacuum hoses and electrical connector from the EGR valve transducer. Remove the EGR valve transducer. Remove the master cylinder from the vehicle. Working inside the vehicle under the dash, disconnect the power brake push rod from the top of the brake pedal by prying off the retaining clip. Remove the nuts attaching the booster to the firewall. Working inside the engine compartment, carefully withdraw the power brake booster unit from the firewall and out of the engine compartment. On vehicles with anti-lock brakes or with turbocharged engines, it will be necessary to remove the Integrated Power Module and bracket before removing the booster.INSTALLATION: To install the booster, place it into position on the firewall and tighten the retaining nuts. Connect the push rod to the brake pedal. Install the master cylinder and bleed the brake hydraulic system. The remaining installation steps are the reverse of removal. Carefully test the operation of the brakes before placing the vehicle in normal operation.
Related Chrysler PT Cruiser Parts
 Chrysler PT Cruiser Brake Line
 Chrysler PT Cruiser Brake Proportioning Valve
 Chrysler PT Cruiser Brake Disc
 Chrysler PT Cruiser Brake Light Switch
 Chrysler PT Cruiser Brake Bleeder Screw
 Chrysler PT Cruiser Brake Caliper Bracket
 Chrysler PT Cruiser Brake Fluid Level Sensor
 Chrysler PT Cruiser Brake Master Cylinder