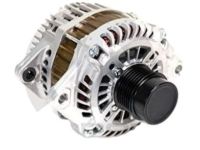
Genuine Dodge Avenger Alternator
GeneratorEnter your vehicle info to find more parts and verify fitment
- Select Vehicle by VIN
- Select Vehicle by Model
Select by VIN
orEnter your VIN for the most accurate results.Enter your VIN for the most accurate results.
Select by Model
-- Select Make --
-- Select Model --
-- Select Year --
15 Alternators found
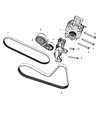
Dodge Avenger Generator-Engine
Part Number: 68272108AA- Other Name: Generator Kit Engine
- Replaced by: 68272108AD
$615.38 MSRP: $934.00You Save: $318.62 (35%)
Dodge Avenger ALTERNATO-Engine
Part Number: 4801323AD- Other Name: Generator Engine
- Replaced by: 4801323AK
$494.38 MSRP: $750.00You Save: $255.62 (35%)
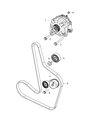
Dodge Avenger Generator-Engine
Part Number: R4801624AF- Replaced by: R4801624AG
$367.52 MSRP: $538.00You Save: $170.48 (32%)
Dodge Avenger ALTERNATR-Engine
Part Number: 4801477AA- Other Name: Generator Engine
- Replaced by: 4801477AG
$439.39 MSRP: $782.00You Save: $342.61 (44%)
Dodge Avenger ALTERNATO-Engine
Part Number: R4801323AD- Other Name: Generator Engine; Alternator
$331.58 MSRP: $504.00You Save: $172.42 (35%)Dodge Avenger ALTERNATR-Engine
Part Number: R4801477AA- Other Name: Generator Engine; Alternator
$249.68 MSRP: $374.00You Save: $124.32 (34%)
Dodge Avenger ALTERNATR-Engine
Part Number: R5033756AB- Other Name: Generator Engine
$228.53 MSRP: $341.00You Save: $112.47 (33%)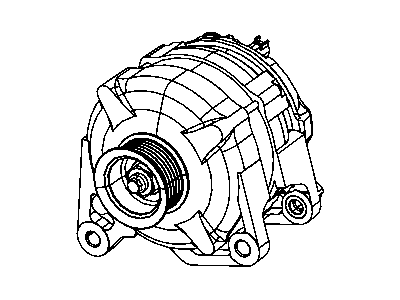
Dodge Avenger ALTERNATR-Engine
Part Number: R5033759AB- Other Name: Generator Engine
$260.95 MSRP: $390.00You Save: $129.05 (34%)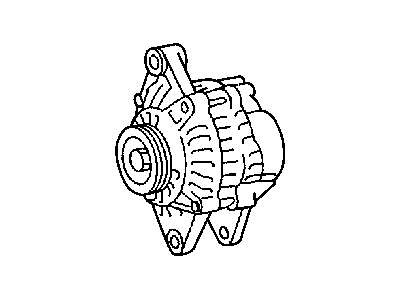
Dodge Avenger ALTERNATOR
Part Number: 4661998- Other Name: Generator Engine
$206.82 MSRP: $263.19You Save: $56.37 (22%)Dodge Avenger ALTERNATR-Engine
Part Number: 5033756AB- Other Name: Generator Engine; Alternator
$342.58 MSRP: $519.00You Save: $176.42 (34%)Dodge Avenger ALTERNATR-Engine
Part Number: 5033759AB- Other Name: Generator Engine; Alternator
$298.86 MSRP: $446.00You Save: $147.14 (33%)

Dodge Avenger Alternator Parts Questions & Answers
- Q: How to Remove the Alternator on Dodge Avengers?A: To remove the alternator on different engine models, first, disconnect the negative Battery Cable from the terminal or remote ground terminal. For the 2.4L engine (2014 and earlier), remove the right front wheel, raise the vehicle, and remove the underbody air dam and drive belt. On 2014 and earlier models, remove the drive belt idler pulley and loosen the lower alternator bolt. Unbolt and relocate the air conditioning compressor to allow alternator removal. Unplug the field connector and remove the B+ wire terminal nut. Remove the upper and lower alternator mounting bolts and slide out the alternator from the bottom of the vehicle. For 2.7L and 3.5L engines (2014 and earlier), remove the air filter housing, engine oil dipstick tube (3.6L), and the radiator cooling fan. Remove the drive belt and disconnect the field wire electrical connector. Remove the upper and lower alternator mounting bolts. For the 3.5L V6 engine, remove the engine cover, disconnect the field wire electrical connector, and remove the drive belt. Take out the two mounting bolts at the bottom of the alternator. For 2015 and later 3.6L V6 engines, release fuel system pressure, disconnect the negative battery cable, and remove the air filter housing. Raise the vehicle, remove the drive belt, fresh air inlet tube, and air conditioning compressor mounting bolts. Disconnect the field wire electrical connector and battery positive (B+) cable from the alternator. Support the engine, disconnect the fuel line, and remove the lower and upper alternator mounting bolts. Carefully guide the alternator out from the fenderwell. Installation is the reverse of removal, tightening the alternator mounting bolts to the torque.