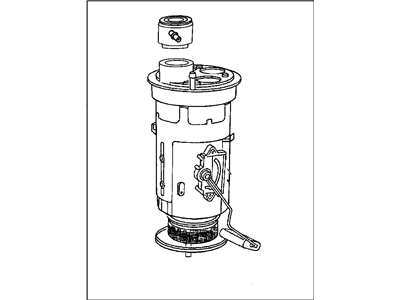
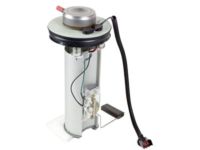
Genuine Jeep Wrangler Fuel Pump
Gas PumpEnter your vehicle info to find more parts and verify fitment
- Select Vehicle by VIN
- Select Vehicle by Model
Select by VIN
orEnter your VIN for the most accurate results.Enter your VIN for the most accurate results.
Select by Model
-- Select Make --
-- Select Model --
-- Select Year --
22 Fuel Pumps found

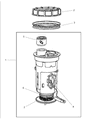
Jeep Wrangler Fuel Pump/Level Unit Module
Part Number: 68413956AA- Other Name: Module-Fuel Pump/Level Unit
- Replaced by: 68413956AD
$82.41 MSRP: $119.00You Save: $36.59 (31%)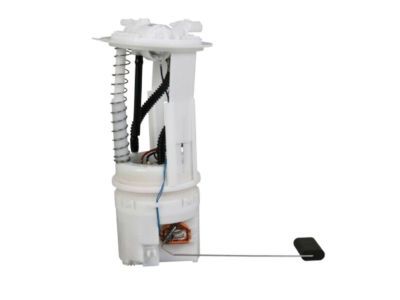

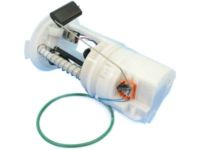
Jeep Wrangler Fuel Pump/Level Module Kit
Part Number: 5161335AB- Other Name: Module Kit Fuel Pump/Level Unit
- Replaced by: 5161335AK
$307.66 MSRP: $450.00You Save: $142.34 (32%)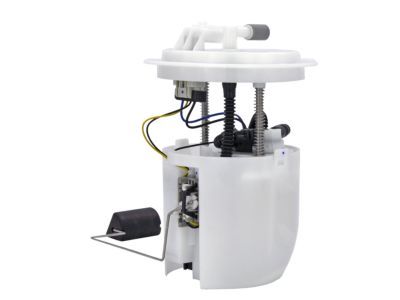

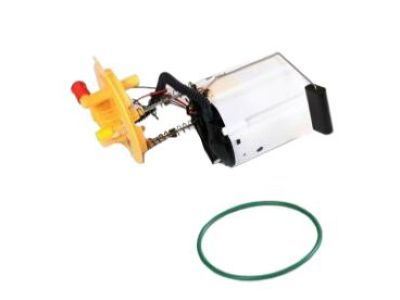
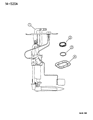
Jeep Wrangler Fuel Pump Module/Level Unit
Part Number: 68003339AB- Other Name: Module Kit Fuel Pump/Level Unit Package Contains Fuel Pump Module, Sending Unit And O-Ring
- Replaced by: 68003339AF
$306.52 MSRP: $448.00You Save: $141.48 (32%)
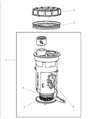
Jeep Wrangler Fuel Pump/Level Module Kit
Part Number: 5161335AC- Other Name: Module Kit Fuel Pump/Level Unit
- Replaced by: 5161335AK
$307.66 MSRP: $450.00You Save: $142.34 (32%)
Jeep Wrangler Fuel Pump Control Module
Part Number: 68434538AA- Other Name: Module-Fuel Pump Control; Control Module, Fuel Pump Controller
$91.84 MSRP: $137.00You Save: $45.16 (33%)
Jeep Wrangler Fuel Pump/Level Module Kit
Part Number: 68403980AB- Other Name: Module Ki-Fuel Pump/Level Unit
- Replaced by: 68403980AE
$292.92 MSRP: $441.00You Save: $148.08 (34%)

Jeep Wrangler Module Ki-Fuel Pump/Level Unit
Part Number: 68403974AC- Replaced by: 68403974AD
- Replaces: 68403974AB
$313.04 MSRP: $467.00You Save: $153.96 (33%)
Jeep Wrangler Fuel Pump
Part Number: 68356448AA- Other Name: Pump-Fuel
- Replaces: 68286214AA, 68303262AA
$1062.60 MSRP: $1625.00You Save: $562.40 (35%)
Jeep Wrangler Fuel Pump Module/Level Unit
Part Number: 68065575AB- Other Name: Module Kit Fuel Pump/Level Unit
- Replaced by: 68065575AD
$411.54 MSRP: $605.00You Save: $193.46 (32%)
Jeep Wrangler Fuel Pump/Level Unit Module
Part Number: 68413956AB- Other Name: Module-Fuel Pump/Level Unit
- Replaced by: 68413956AD
$82.41 MSRP: $119.00You Save: $36.59 (31%)
Jeep Wrangler Fuel Pump
Part Number: 68418183AA- Other Name: Pump-Fuel
$787.74 MSRP: $1155.00You Save: $367.26 (32%)
Jeep Wrangler Module-Fuel Pump/Level Unit
Part Number: 68413956AC- Other Name: Fuel Pump, Fuel Pump Assembly
- Replaced by: 68413956AD
$82.41 MSRP: $119.00You Save: $36.59 (31%)Jeep Wrangler Fuel Pump/Level Module Kit
Part Number: 68403980AC- Other Name: Module Ki-Fuel Pump/Level Unit
- Replaced by: 68403980AE
$332.74 MSRP: $441.00You Save: $108.26 (25%)Jeep Wrangler Module Ki-Fuel Pump/Level Unit
Part Number: 68403980AD- Other Name: Fuel Pump, Fuel Pump Assembly
- Replaced by: 68403980AE
$332.74 MSRP: $441.00You Save: $108.26 (25%)
Jeep Wrangler Pump-Fuel Injection
Part Number: 5281484AA- Other Name: Fuel Pump
- Replaced by: 5281484AB
$422.50 MSRP: $567.00You Save: $144.50 (26%)
Jeep Wrangler Fuel Pumps And Related Components
Part Number: 4637192- Other Name: Pump/Kit-Fuel In-Tank ; Pump, Fuel; Fuel Gauge Sending Unit, Fuel Pump


Jeep Wrangler Fuel Pump Module Assembly
Part Number: 4897754AB- Other Name: Module Package Fuel Tank; Fuel Pump, Fuel Pump Assembly
- Replaces: 4897754AA
Jeep Wrangler Fuel Module Air And Fuel Delivery
Part Number: 5093788AA- Other Name: Module Package Fuel Tank
Jeep Wrangler Fuel Pump/Level Unit Module
Part Number: R5003867AB- Other Name: Module-Fuel Pump/Level Unit ; Unit, Fuel Pump And Sending
- Replaced by: R5003867AC
Jeep Wrangler Fuel Pump/Level Unit Module
Part Number: R5003867AC- Other Name: Module-Fuel Pump/Level Unit ; Unit, Fuel Pump And Sending
- Replaces: R5003867AB
| Page 1 of 2 |Next >
1-20 of 22 Results
Jeep Wrangler Fuel Pump Parts Questions & Answers
- Q: How to Perform a Quick Check on a Mechanical Pump for 4.2L Carbureted Engines?A: For the quick check on the mechanical pump for 4.2L carbureted engines, begin by disconnecting the negative battery cable. Remove the air cleaner assembly and detach the fuel inlet fitting from the carburetor, placing the end of the inlet line in a container. Reattach the cable to the battery terminal. Use a remote starter switch or an assistant to crank the engine while the fuel line discharges into the container. Fuel should be emitted in well-defined spurts. Perform the pressure test by attaching a fuel pressure gauge, a hose restrictor, and a flexible hose between the fuel inlet fitting and the carburetor. Reattach the coil primary lead wires and start the engine at curb idle rpm. Discharge the fuel into a container and note the pressure, which should be 4-to-5 psi. Perform the capacity test by operating the engine at curb idle rpm and discharging fuel into a container for 30 seconds, aiming to discharge at least one pint of fuel. The vacuum tests can be conducted using either the direct connection or indirect connection method, depending on the availability of a vacuum gauge and a T-fitting. For electric pumps in 1995 and earlier fuel-injected engines, conduct the TBI pressure test by installing a fuel pressure gauge to the pressure test fitting on the Throttle Body and adjusting the fuel pressure accordingly. For MPI pressure test, attach a fuel pressure gauge to the fuel rail, detach and plug the vacuum tube from the Fuel Pressure Regulator, and note the gauge readings at curb idle rpm with and without the vacuum line attached. To perform the leak-down test, attach a gauge capable of reading 0-to-100 psi to the pressure test port fitting on the fuel rail, start the vehicle, and let the engine idle, comparing the fuel pressure readings after 30 minutes. For electric pumps in 1997 and later models, relieve the fuel pressure, remove the cap from the fuel pressure test port on the fuel rail, attach a fuel pressure gauge, and start the engine to check the pressure. Perform additional tests to diagnose potential fuel line leaks, fuel injector issues, or defective fuel pump modules based on pressure readings and drop rates.
- Q: How to Replace a Fuel Pump?A: For the mechanical pump, start by detaching the negative battery cable, and remove the Fuel Tank filler cap to relieve fuel pressure. Wrap shop towels around the fuel pump inlet hose and outlet line fitting to absorb any spilled fuel during removal. Detach the fuel inlet hose and outlet line fitting from the fuel pump, unscrew the fuel pump mounting bolts, and remove the fuel pump and gasket. Scrape away any old gasket material from the fuel pump and engine block sealing surfaces. For electric pumps, relieve the fuel system pressure, detach the cable from the negative battery terminal, raise the vehicle, and remove the fuel tank. Disconnect the fuel vent, supply, and return hoses from the fittings on the fuel pump/sending unit. Detach the fuel pump/sending unit electrical harness connector from the main harness. The fuel pump/sending unit assembly is inside the fuel tank and held in place by a lock ring mechanism. Unlock and remove the fuel pump/sending unit assembly carefully, making sure not to damage the fuel level float and sending unit. Inspect the gasket (O-ring) around the mouth of the lock ring mechanism and the inside of the tank, and clean if needed. Disassemble and reassemble the fuel pump for 1996 and earlier models, if necessary. Use a new O-ring on the fuel tank before installing the fuel pump module. Insert the fuel pump/sending unit assembly into the fuel tank, aligning the stopper if necessary, and tighten the lock ring securely. Finally, install the fuel tank.
Related Jeep Wrangler Parts
 Jeep Wrangler Fuel Tank
 Jeep Wrangler Throttle Body
 Jeep Wrangler Throttle Cable
 Jeep Wrangler Fuel Rail
 Jeep Wrangler Throttle Body Gasket
 Jeep Wrangler Turbocharger
 Jeep Wrangler Fuel Level Sensor
 Jeep Wrangler Accelerator Cable
 Jeep Wrangler Vacuum Pump
Browse by Year
2021 Fuel Pump 2020 Fuel Pump 2019 Fuel Pump 2018 Fuel Pump 2017 Fuel Pump 2016 Fuel Pump 2015 Fuel Pump 2014 Fuel Pump 2013 Fuel Pump 2012 Fuel Pump 2011 Fuel Pump 2010 Fuel Pump 2009 Fuel Pump 2008 Fuel Pump 2007 Fuel Pump 2006 Fuel Pump 2005 Fuel Pump 2004 Fuel Pump 2003 Fuel Pump 1997 Fuel Pump 1995 Fuel Pump 1994 Fuel Pump 1993 Fuel Pump 1992 Fuel Pump 1991 Fuel Pump