My Garage
My Account
Cart
Genuine Chrysler 200 CV Boot
Axle Boot- Select Vehicle by Model
- Select Vehicle by VIN
Select Vehicle by Model
orMake
Model
Year
Select Vehicle by VIN
For the most accurate results, select vehicle by your VIN (Vehicle Identification Number).
2 CV Boots found

Chrysler 200 Half Shaft Boot Package
Part Number: 68245069AA$60.01 MSRP: $85.15You Save: $25.14 (30%)Chrysler 200 Half Shaft Boot Package
Part Number: 68245068AA$58.54 MSRP: $86.85You Save: $28.31 (33%)
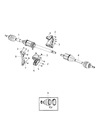
Chrysler 200 CV Boot
That is why the CV Boot in Chrysler 200 vehicles is such an important component to protect the Constant Velocity or CV joints in FCA's vehicles, which helps to transmit power to the wheels by means of the transaxle. This flexible rubber or plastic cover maintains a proper quantity of the interacting fluids of the CV joints and at the same time serves to exclude undesirable intrusion of the dirt and dust that can reduce the efficiency of the given subsidiary equipment. Like other cars, Chrysler 200 employ different types of CV joints, Rzeppa joints for the outer end and tripod and double offset for the inner end. The outer joints are meant for larger angle movements while the inboard joints cater for changes in shaft length due to suspension motion. This is because damage on the CV Boot, such as cracks or tears can lead to complete failure of the CV joint hence affecting the operation of the car.
Looking for affordable and high-quality auto parts? Then you have already arrived at the proper online shop. We offer all Chrysler 200 CV Boot at great affordable prices. Moreover, all genuine Chrysler 200 CV Boot come with a manufacturer's warranty. In the long run, you would realize you have saved a lot of trouble and money with OEM parts from here.
Chrysler 200 CV Boot Parts Questions & Experts Answers
- Q: How to Replace a CV Boot on Chrysler 200?A:If the CV joints or boots need to be replaced, it is recommended to explore all options before starting the job. Complete, rebuilt CV boots are available on an exchange basis, which can save time and effort. Before disassembling the vehicle, it is important to check the cost and availability of parts. To remove the front CV boot, mount it in a vice with wood-lined jaws to prevent damage to the Axle Shaft. Check the CV joints for excessive play and smooth operation. If a boot is torn, disassemble the joint, clean the components, and inspect for damage. If the CV joint is in good condition, lubricate it with CV joint grease and install a new boot. For the outer CV joint, cut the boot clamps and remove them. Use a screwdriver to pry up the edge of the boot and slide it down the axleshaft. Strike the edge of the CV joint housing with a soft-face hammer to dislodge the joint from the shaft. Remove and discard the bearing retainer clip and the large stop-ring. Slide the boot off the shaft and clean all components with solvent. Inspect the cage and races for wear and damage. To reassemble, wrap the splines on the axle shaft with tape and slide the clamps and boot onto the shaft. Remove the tape and install a new stop-ring and circlip. Place half the grease provided in the outer CV joint assembly housing and the remaining grease in the sealing boot. Align the splines and gently drive the CV joint onto the axle shaft. Slide the boot into place, ensuring proper positioning. Equalize the pressure in the boot and make sure it is seated properly. Install the boot clamps using the appropriate method. For the inner CV joint, replacement boots may not be available, and the entire CV boot may need to be replaced if the inner boot is torn. The same applies to the rear CV boots in AWD models. It is recommended to check with local auto parts stores and dealer parts departments for availability of replacement boots.
