Why choose MoparPartsGiant
- Speedy Delivery
MoparPartsGiant.com ensures rapid delivery of genuine Chrysler parts and accessories, backed by the manufacturer's warranty. With a strategic network of authorized dealers across the nation, we guarantee minimal delays in order fulfillment. Choose us for a seamless experience that gets your vehicle up and running in half the time.
- Professional Service
MoparPartsGiant.com has long been the top choice for Chrysler parts due to our exceptional customer support. Our team of skilled representatives is readily available to assist you through email, live chat, or phone calls, ensuring a smooth and hassle-free shopping experience. Trust in our dedication to providing unparalleled service for all your Chrysler part needs.
- Unbeatable Prices
Experience unbeatable prices without compromising on quality at MoparPartsGiant.com. We are committed to offering the highest standard of Chrysler parts and accessories at prices that won't break the bank. Shop with confidence, knowing that you won't find better deals on genuine Chrysler products anywhere else.
Popular Genuine Chrysler Parts
- Engine Parts View More >
- Electrical Parts View More >
- Fuel Parts View More >
- Body - Sheet Metal Except Doors Parts View More >
- Cooling Parts View More >
- Steering Parts View More >
- Doors, Door Mirrors And Related Parts View More >
- Interior Trim Parts View More >
- Differential And Drive Line Parts View More >
- Transmission Parts View More >
- Brakes Parts View More >
- Suspension & Drive Parts View More >




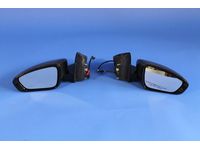
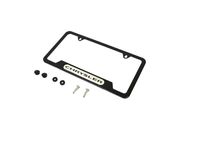
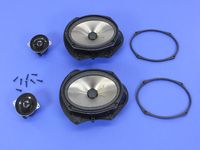
Shop Genuine Chrysler Parts with MoparPartsGiant.com
Chrysler is an iconic American auto brand, for nearly a century. Creating iconic vehicles such as the Plymouth and DeSoto. In 1998 Chrysler merged with Daimler-Benz and again with Fiat in 2014, resulting in the latest branding as Fiat Chrysler Automobiles. Chrysler has long been renowned for Chrysler parts innovations such as six-cylinder engines, and the Mopar parts division, which consistently is the epitome of luxury, durability, and peak performance in the auto industry.
The Chrysler 300, is a remarkable luxury full-size sedan, known for its bold design and hefty engine choices. The Chrysler Pacifica has been a revolutionary player in the minivan market with its cutting edge features, spacious interiors, and even a hybrid variant perfect for eco minded families. The Chrysler 200 has been an important part of the midsize sedan market with stylish appearance. And the Chrysler Town & Country, was synonymous with family outings, by offering unparalleled versatility, and integral features. Models such as these further emphasize Chrysler's blend of evocative styling, and smart minded practicality.
Chrysler has long been emphasizing rigorous innovation, as well as unrivaled efficiency in its drivetrain solutions. The Chrysler Pacifica, has a plug-in hybrid powertrain that combines a 3.6L Pentastar V6 with an electric motor, delivering 260 horsepower, at a range of 32 Miles all-electric, and a total range of 500 miles. Non-hybrid pacifica variants employ a 3.6L V6 engine at 287 horsepower, and 262 lb-ft of torque. These engines when paired with Chrysler parts such as the refined 9-speed automatic transmission ensure seamless shifting and highly optimized fuel efficiency. Chrysler's unwavering focus on Chrysler parts, like drivetrains such as these, have underscored their undying commitment to blending performance with eco-conscious choices catering to every modern family's needs.
In terms of quality, OEM Chrysler parts are the wise choice for Chrysler owners who want to keep their vehicles at peak performance. They are manufactured to follow official strict factory specifications and are made in world-class facilities. They undergo rigorous tests to ensure that they are durable and safe to use. Should you require brand new OEM Chrysler parts, including Emission Systems, Exhaust, MoparPartsGiant is an excellent option that won't let you down. We offer an extensive range of genuine Chrysler parts, such as Air Conditioners & Heater, Wiper & Washers And Cylinder & Keys, from radiators to steering wheels, all at the most competitive prices in the market. Moreover, all our parts come with a manufacturer's warranty and are delivered at fast speed. Shop MoparPartsGiant today!
Chrysler Parts Questions & Answers
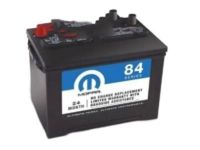
- Q:How to Remove and Replace Car Batteries and Their Trays on Chrysler 200?A:Disconnect and isolate the remote battery cable. Loosen the left front wheel lug nuts, raise the front of the vehicle and support it securely on jackstands, then remove the wheel. Remove the push pins and the inner-fender splash shield from the left front wheel well. Remove and isolate the negative battery cable before doing the same to the positive battery cable. Remove the battery retaining bracket nut, then remove the bracket and the battery from the wheel well. Be careful. 2015 and later models: Open the hood, disconnect the intelligent Battery Sensor (lBS) connector, then loosen the nut and disconnect the cable from the negative battery terminal. Loosen the nut and disconnect the cable from the positive battery terminal. Remove the battery cover by pulling it straight up. Remove the battery hold-down clamp. Lift the battery up and out of the engine compartment. If you are replacing the battery, make sure you get one that's identical, with the same dimensions, amperage rating, cold cranking rating, etc. Installation is the reverse of removal. Always connect the positive cable first and the negative cable last. Battery tray: Remove the battery. Remove the four battery tray mounting bolts retaining the tray to the left front frame rail. Remove the battery tray through the wheel opening. Thoroughly wash the battery tray in clean water, then dry it with compressed air. Installation is the reverse of removal. 2015 and later models: Loosen the left-front wheel lug nuts, then raise the front of the vehicle and support it on jackstands. Remove the left-front wheel and inner fender splash shield. Also remove the engine under cover. Remove the fuse box assembly mounting bolts and position it to the side. Remove the Powertrain Control Module (PCM) mounting bolts, then position it to the side. If necessary, also remove the PCM mount for better access. Detach any wiring harness clips from the battery tray, then remove the battery tray mounting bolts - accessed by working from the engine compartment, fenderwell, and from below the vehicle. Remove the battery tray, rotating it as necessary. Installation is the reverse of removal.
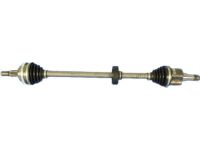
- Q:How to Replace an Axle Shaft on Chrysler PT Cruiser?A:Loosen the rear wheel lug nuts, raise the rear of the vehicle, and support it on jackstands. Block the front wheels and remove both rear wheels. Disconnect the cable from the negative terminal of the battery. Remove the center console. Pull up on the parking brake cable, directly behind the parking brake lever, and insert a punch to relieve tension. Detach the parking brake cables from the equalizer. Unbolt the brake line brackets from the trailing arms. On models with rear disc brakes, remove the brake calipers, brake disc, hub, bearing assemblies, and parking brake shoes. On models with rear drum brakes, remove the brake drums and shoes. For models with an Anti-lock Braking System (ABS), remove the wheel speed sensors and detach the sensor harnesses. Detach the parking brake cables from retaining clips, actuators, or levers, and backing plates. If replacing the axle, remove the hub, bearing assemblies, and spindles. Remove the coil springs. Position a floor jack beneath the axle and mark the position of trailing arm brackets to the floor pan. Unbolt the trailing arm brackets, lower the jack, and remove the axle assembly. Inspect the axle pivot bushings for damage. For installation, reverse the removal process ensuring brackets are reinstalled correctly, brake lines and cables are routed properly, marks align, fasteners are tightened to the correct torque, and the brake system is bled.
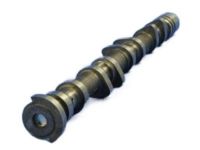
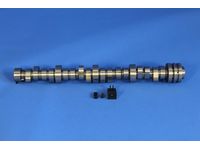
- Q:How to remove and install Camshaft in 3.5L V6 engine on Chrysler Sebring?A:To dismantle different parts such as the valve cover, timing belt as well as the rocker arm, one must first take out the valve cover, then the timing belt and lastly the rocker arm. If the camshaft is having to be removed from the rear cylinder head, then the PCM must also be pulled. Lock the camshaft from rotating by placing the 1-7116 inch box end wrench on the sprocket, then torquing off the camshaft sprocket bolt and removing the sprocket from the lobe. At the other end of the cylinder head remove the camshaft thrust plate and O-ring seal, and gently pull out the camshaft being careful not to scratch the cam bearings or journals and the camshaft oil seal will also need to be removed. Following the removal of the camshaft, it is proper practice to clean it with a solvent, especially the bearing journals, which should be examined for uneven wear, pitting or seizure. In the event one is identified the cylinder head should also be checked. Take measurements on the bearing journals with the help of micrometer to know the magnititute-wear and out of round condition and similarly check the journal diameter on the cylinder head by using inside micrometer. Cam lobe heights-take the measurement of each cam lobe on the intake camshaft, take notes and observations of the measurements and compare them for excessive variance whose standard measurement is 0.001 inch (0.025mm) If the lobe heights are different by more then 0.010 inch (0.254 mm) the camshaft has to be replaced. Perform the same for the exhaust camshaft; it is crucial not to mix the intake and exhaust camshafts dimensions. The camshaft lobes should be inspected for signs of heat, cracks, chipped areas, pits and uneven wear; if the lobes are not damaged and the lobe lift variation figures are within acceptable range, the camshaft can be reused. For installation, it is advisable to apply camshaft installation lube on the camshaft bearing journals and the cams as well as applying some force to fit the camshaft into the cylinder head. Also, one should fit a new camshaft end seal at the front of the head by applying the use of a seal driver, or a deep socket. Last is to place the camshaft cover at the rear of the head but it needs a new O-ring before it is placed in the right position and that completes the process in a backward manner of the removal process.