Why choose MoparPartsGiant
- Fast Delivery
Your Chrysler Laser deserves only genuine parts from MoparPartsGiant.com. There's zero risk involved when buying from us because all our Chrysler Laser parts are expedited directly from authorized dealers and backed by the manufacturer's warranty. For years, we've been the #1 online parts store. Interested in faster shipping? We offer expedited shipping on corresponding orders!
- Dedicated Service
Our outstanding customer service team is here to help you by email, live chat, or phone call with any inquiries regarding your purchase. Dedicated representatives are standing by to assist you with your shopping needs. With a complete Chrysler Laser parts catalog and a full selection of inventory, your parts are ready to be expedited anywhere in the nation without delays.
- Unbeatable Prices
For any genuine parts you need for standard maintenance or repair, we carry them. With our unbelievably low prices on parts, you won't go anywhere else for Chrysler Laser parts. We are your one-stop shop for Chrysler Laser parts without breaking the bank!
Popular Genuine Chrysler Laser Parts
- Engine Parts View More >
- Electrical Parts View More >
- Fuel Parts View More >
- Body - Sheet Metal Except Doors Parts View More >
- Cooling Parts View More >
- Steering Parts View More >
- Brakes Parts View More >
- Transmission Parts View More >
- Suspension & Drive Parts View More >
- Exhaust Parts View More >
- Heater & Air Conditioning Parts View More >
- Body - Doors And Related Parts View More >
Shop Genuine Chrysler Laser Parts with MoparPartsGiant.com
Introduced in 1984, the Chrysler Laser was the brand's first foray into the sports car market. Positioned as an executive personal luxury coupe, it was a rebadged variant of the Dodge Daytona and was available in two trim levels initially: the standard model and the more advanced XE. In 1985, the high-end XT trim was introduced. Distinguished by its large rear hatchback, deck-lid spoiler, and distinctive black hood louvers in its turbo version, the Laser offered options for Mark Cross leather seats and a six-way power system. The XE and XT models were equipped with standard 2.2L Turbo I engines, which delivered an increased power output of 146 horsepower from 1985 onwards, while the base model offered this engine as an optional extra. In 1986, the Laser was replaced by the Mitsubishi-built, rear-wheel-drive Chrysler Conquest, designed to compete with the Toyota Celica Supra. The same year also saw the redesign of the Chrysler LeBaron coupe, negating the company's need for the Laser. Nevertheless, the model saw a revival in 1990 under the Plymouth brand, manufactured by Diamond Star Motors, a joint venture between Chrysler and Mitsubishi. With a comprehensive five-year or 50,000-mile warranty, including outer body rust-through protection, based on the United States Automobile Club tests, the Chrysler Laser offered buyers assurance in their investment.
If you want to save money in the long run on maintenance and repairs, you should choose OEM products because they're of the highest level of durability. Our vast inventory of OEM Chrysler Laser parts, including Wiper & Washers And Cylinder & Keys, supported by the manufacturer's warranty and offered at the unmatched market prices, is sure to meet your needs. Moreover, our committed customer service team is here to assist you throughout your shopping experience for parts. Enjoy your purchase journey with us, backed by our hassle-free return policy and expedited delivery service.
Chrysler Laser Parts Questions & Answers
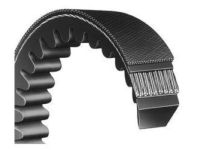
- Q: How Should Drivebelts Be Inspected and Replaced on Chrysler Laser?A: The drivebelts should be inspected periodically for wear, cuts, and contamination by oil, gasoline, or coolant, as well as for signs of glazing, indicating improper adjustment. To replace a drivebelt, loosen the bolts and push the pivoting component away from the belt until it can be removed. Do not pry on the pulley as it might damage the new belt. Install and adjust it if needed.
- Q: How to Remove and Install a Pressure Regulator on Chrysler Laser?A: To remove the pressure regulator, start by removing the air cleaner assembly. Then, release the fuel system pressure and disconnect the negative cable at the battery. On certain models, remove the fuel inlet chamber and vacuum tube from the regulator and throttle body. Wrap a cloth around the fuel inlet chamber to catch any residual fuel, and carefully withdraw the pressure regulator from the throttle body. Remove the O-ring and gasket. To install the pressure regulator, place a new gasket and O-ring, and on specific models, install the regulator onto the throttle body with retaining screws. Install the vacuum tube and fuel inlet chamber if applicable. Finally, connect the negative battery cable and reinstall the air cleaner assembly.


