Why choose MoparPartsGiant
- Dedicated Customer Service
MoparPartsGiant.com prioritizes customer satisfaction by offering unwavering support and assistance. Our success is built on fostering dedicated relationships with all clients, ensuring they receive personalized attention for every Jeep parts or accessories inquiry. Trust our knowledgeable team to guide you through your Jeep needs with expert advice and genuine care.
- Affordable Quality
MoparPartsGiant.com is the top destination for competitively priced, genuine Jeep parts and accessories. We understand the importance of affordability without compromising quality, making it possible for all customers to purchase top-notch Jeep parts without breaking the bank. Discover the perfect balance of cost and excellence at MoparPartsGiant.com.
- Prompt Shipping
Experience fast delivery with MoparPartsGiant.com's strategic distribution centers spread throughout the United States. We guarantee quick access to genuine Jeep parts, providing the convenience of doorstep delivery. Our commitment to getting your Jeep vehicle back on the road in just a few days sets us apart, ensuring a seamless shopping experience every time.
Popular Genuine Jeep Parts
- Engine Parts View More >
- Electrical Parts View More >
- Fuel Parts View More >
- Body - Sheet Metal Except Doors Parts View More >
- Cooling Parts View More >
- Steering Parts View More >
- Interior Trim Parts View More >
- Transmission Parts View More >
- Brakes Parts View More >
- Emission Systems Parts View More >
- Suspension & Drive Parts View More >
- Exhaust Parts View More >



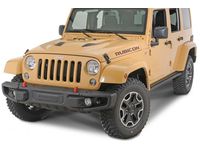


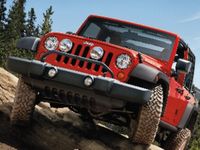
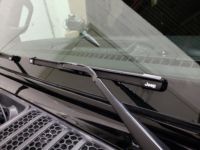
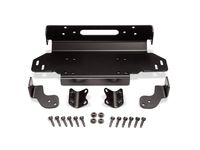
Shop Genuine Jeep Parts with MoparPartsGiant.com
Jeep was created to serve the U.S. Army in World War II. Jeep, now a Stellantis brand, has evolved over the years into an iconic American brand symbolizing tenacious four-wheel-drive capability. Ever since the beginning, Jeep designs have combined elements from Bantam, Ford, and Willys-Overland. Jeep has been a pioneer in the compact SUV market, known for its performance, reliable Jeep parts, involvement in military campaigns, farming and off-road transportation. Jeeps are renowned for their durability and adaptability. Jeep is a standout auto brand, known not just for its vehicles but also for its genuine Jeep parts, deploying advanced interiors, athletic exteriors, and many accessories to fit many different kinds of lifestyles.
The Jeep Wrangler is an emblematic part of the brand's history, celebrated for its unmatched off-roading abilities, and its distinctly rugged design. The Jeep Gladiator has become recognized for melding the adventurous spirit of other models with the practicality of a pickup. The Jeep Grand Cherokee, has elevated Jeep's luxury midsize SUV offerings, by blending high comfort with off-road might. The Jeep Renegade offers urban drivers a smaller, city friendly Jeep experience, while still keeping the core Jeep spirit the brand has been known for. Models like these demonstrate Jeep's unwavering commitment to versatility and exploration, whether it be off-roading, or in urban environments.
Jeep has been a forerunner in innovation, by integrating both performance and efficiency in its cars and genuine Jeep parts. The 2021 Jeep Wrangler 4xe, is a standout with its plug-in hybrid system, which pairs a 2.0L turbocharged inline-four engine with two electric motors, which offers the convenience of both fully electric and hybrid driving modes at 375 horsepower and 470 lb-ft of Torque. The Jeep Grand Cherokee enjoys a 3.6L Pentastar V6 and a more potent 5.7L V8, which delivers mighty performance for off-roading or daily drivers alike. Both Jeep engines are combined with an 8-speed automatic transmission, which offers smooth gear transitioning, while enjoying improved fuel efficiency. Advancements such as these illustrate Jeep's unstoppable commitment to blending their vehicles traditional rugged capabilities, with modern technology and sustainability.
To achieve maximum perfection, OEM Jeep parts are manufactured and tested in accordance with Jeep's official factory standards. Obtaining Jeep parts, like Doors, Door Mirrors And Related Parts, Air Conditioners & Heater from MoparPartsGiant would be your wise choice. We carry a huge selection of genuine Jeep parts, such as Wiper & Washers And Cylinder & Keys, Differential And Drive Line at unbeatable prices. You would save a lot of trouble and money as all OEM parts are backed by the manufacturer's warranty. Shop MoparPartsGiant today!
Jeep Parts Questions & Answers
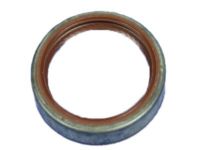
- Q:How to remove and replace the crankshaft seal in a six-cylinder engine on Jeep Cherokee?A:Remove the vibration damper. Carefully pry the oil seal out of the timing chain cover with a seal removal tool or screwdriver. Don't scratch the cover bore or damage the crankshaft in the process, as if the crankshaft is damaged the new seal will end up leaking. Clean the bore in the cover and coat the outer edge of the new seal with engine oil or multi-purpose grease. Using a socket with an outside diameter slightly smaller than the outside diameter of the seal, carefully drive the new seal into place with a hammer. If a socket isn't available, a short section of large diameter pipe will work. Check the seal after installation to be sure that the spring didn't pop out of place. Reinstall the vibration damper. The parts removed to gain access to the damper can now be reinstalled. Run the engine and check for leaks.
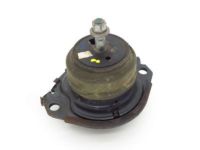
- Q:What does the engine mounting system consist of, and how should broken or deteriorated mounts be addressed in 3.6L V6 engine on Jeep Grand Cherokee?A:In these models the engine mounting system has three moulded mounts where the right and left mounts transform the power train torque and the rear mount supports the engine/transmission combination. Despite the fact that engine mounts can be practically trouble-free, if some them are broken or worn-out, they must be replaced instantly to avoid affecting other driveline components or worsening the rate of wear. To see the status of the mounts, might be done by lifting the rear of the engine thus off the mounts this can be done by placing the car securely on jack stands, placing jack under the oil pan and putting a wooden plank between the jack and the oil pan to avoid damaging the oil pan then you slowly jack up the engine. The mounts should be as checked for cracks, harden or separated rubber and any movement between the mount plates and the engine or frame. If there is such movement it is advisable to lower the engine and tighten the mount fasteners and apply rubber preservative to reduce rate of deterioration. For replacement, the negative battery cable has to be disconnected, the air filter and the housing will have to be also removed. To lift the engine, both left and right mounting nuts must be loosened at the same time to provide enough clearance to insert an engine hoist bar which is installed as a cross bar on the engine. Before hoisting the engine, the intake manifold and Camshaft Position sensor connectors should be disconnected together with any interference electrical connectors. Where applicable, the vehicle should be supported and other components such as the drive belt and the alternator have to be removed to allow for easy installation of the engine hoist, after which the engine can be lifted in order to do the mounts. The mounts may be then replaced, all the bolts and screws fastened properly and then the engine can be placed in its rightful position. Removal is the exact opposite of installation and it involves making sure that all electrical connectors and harness retainers where reconnected properly and other components were tightened properly. For the rear mount, the negative terminal of the battery has to be detached; the car has to be raised and placed on a jack stand securely. Floor jack should then be placed under the transmission so that the rear mount is relieved of weight while crossmember braces and fasteners should be unbolted. Rear engine/transmission mount should be removed from the vehicle along with its nuts and bolts and while reinstalling it the procedure is vice versa but all nuts and bolts should be tightened properly.
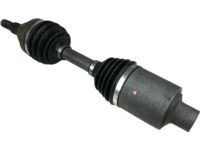
- Q:How to remove and install the axle shaft in a front axle assembly on Jeep Liberty?A:Raise the vehicle and support it securely on jack stands. On 2007 and earlier models, remove the lower control arms. On 2008 and later models, remove the stabilizer bar links, the shock absorber-to-control arm bolts and the steering knuckles. Remove the drive axles. If equipped, remove the front axle skid plate. Drain the differential lubricant. Detach the vent hose from the differential cover. Remove the front driveshaft from the differential companion flange. Support the front axle assembly with a floor jack placed underneath the differential. Remove the bracket-to-frame bolts/nuts on the right side, front and rear of the axle housing. After supporting the axle assembly with a floor jack, remove the bracket-to-frame bolts/nuts from the right side of the axle assembly. Slowly lower the axle assembly to the ground and remove the assembly out from under the vehicle. If necessary, remove the brackets from the axle housing. Installation is the reverse of removal. Tighten the axle assembly fasteners to the torque. Refill the differential with lubricant. Lower the vehicle and tighten the lug nuts to the torque. Check the vehicle wheel alignment.
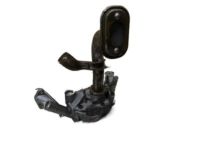
- Q:How to remove and reinstall the oil pump assembly and related components in 2.4L four cylinder engine on Jeep Wrangler?A:Remove the timing belt, timing belt covers, and the crankshaft front seal. Next, take off the oil pan and pick-up tube/screen assembly. Detach the oil pump assembly from the engine by removing the mounting bolts; if it doesn't come off easily, tap it gently with a soft-faced hammer or pry on a casting boss. Extract the crankshaft oil seal from the oil pump using a screwdriver wrapped in a rag. Remove the mounting screws and the cover, then take out the inner and outer rotor from the body. Clean all components, including the block surfaces, with solvent and inspect for excessive wear or damage. To disassemble the relief valve, take out the cap bolt, washer, spring, and relief valve, checking the piston sliding surface and valve spring for damage; if either is damaged, replace them as a set, otherwise reassemble the parts, coat them with oil, and reinstall in the oil pump body, tightening the cap bolt. Check the clearance of the oil pump components with a micrometer and feeler gauge. For installation, lubricate the housing and rotors with clean engine oil, install both rotors in the body, and prime the oil pump by filling the rotor cavities with clean engine oil. Install the cover and tighten the screws to the specified torque. Place a new O-ring in the oil discharge passage, apply sealant to the oil pump body, and raise the pump assembly to the block, aligning the rotor flats with the crankshaft flats before tightening the bolts to the specified torque. Install the crankshaft seal, pick-up tube/strainer assembly, oil pan, crankshaft sprocket, rear timing belt cover, and timing belt. Finally, install a new oil filter and engine oil, start the engine, check for oil pressure and leaks, and recheck the engine oil level.