My Garage
My Account
Cart
Genuine Chrysler Town & Country Hood
Engine Hood- Select Vehicle by Model
- Select Vehicle by VIN
Select Vehicle by Model
orMake
Model
Year
Select Vehicle by VIN
For the most accurate results, select vehicle by your VIN (Vehicle Identification Number).
9 Hoods found


Chrysler Town & Country Hood Panel
Part Number: 4589880AD$882.20 MSRP: $1340.00You Save: $457.80 (35%)
Chrysler Town & Country Hood Panel
Part Number: 4589880AB$882.20 MSRP: $1340.00You Save: $457.80 (35%)

Chrysler Town & Country Hood Panel
Part Number: 4894794AE$353.40 MSRP: $518.00You Save: $164.60 (32%)
Chrysler Town & Country Hood Panel
Part Number: 4894794AD$353.40 MSRP: $518.00You Save: $164.60 (32%)
Chrysler Town & Country Hood Panel
Part Number: 4860455AB$469.68 MSRP: $689.00You Save: $219.32 (32%)

Chrysler Town & Country Hood Panel
Part Number: 4860455AD$469.68 MSRP: $689.00You Save: $219.32 (32%)
Chrysler Town & Country Hood Panel
Part Number: 4860455AF$469.68 MSRP: $689.00You Save: $219.32 (32%)
Chrysler Town & Country Hood Panel
Part Number: 4860455AC$469.68 MSRP: $689.00You Save: $219.32 (32%)
Chrysler Town & Country Hood Panel
Part Number: 4674627AB$339.53 MSRP: $392.00You Save: $52.47 (14%)
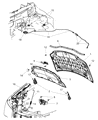
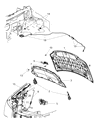
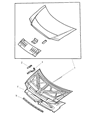
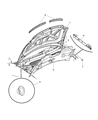
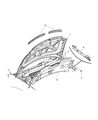
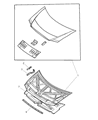
Chrysler Town & Country Hood
Chrysler Town & Country Hood protects the minivan's vital engine bay while offering quick tool-free access to the engine compartment for routine checks. Early models applied stamped steel, but lighter aluminum or fiberglass is applied in later editions. The Hood attaches with a front latch and rear hinges, making it safe to lift and be propped open by drivers. This straightforward system prevents road spray and weather debris from touching the wires and belts while giving owners access to the spark plugs and fluids in seconds. Over the decades, Chrysler has produced two dominant types of Hood: the heftier steel Hood, which is prized for its dent resistance, while the newer composite or aluminum Hood is favored for its weight savings, which enhance fuel efficiency and allow kinder crumple behavior in a crash. Every model year, Chrysler put a coating on the inner panel so a Town & Country would be protected from rust from road salt. The crumple zones of both styles reshape upon impact to absorb energy. A bent Hood on a Town & Country should be replaced immediately to maintain the aerodynamics, airflow, and Chrysler Town & Country silhouette.
Looking for affordable and high-quality auto parts? Then you have already arrived at the proper online shop. We offer all Chrysler Town & Country Hood at great affordable prices. Moreover, all genuine Chrysler Town & Country Hood come with a manufacturer's warranty. In the long run, you would realize you have saved a lot of trouble and money with OEM parts from here.
Chrysler Town & Country Hood Parts Questions & Experts Answers
- Q: How should the hood be removed and installed safely and effectively on Chrysler Town & Country?A:The hood is rather massive and somewhat cumbersome to dismantle and assemble, it is advised to have at least two people do this. To start with one should cover the cowl area and Fenders with the blankets or pads especially when removing the hood to avoid damaging the body and the paint. When drilling the bolts head locations and the hinge attachment points, it is imperative to put alignment marks around these specific areas which will be the specific reference point during the bolt installation, Scribe alignment marks around the bolt heads and hinge attachment locations to assist in the alignment during the bolt installation process, and this may be done by using a permanent type of felt pen. Take out the upper bolts that hold the hood in place with the hinge and loosen the lower bolts until they can be hand twisted out of place. Set an assistant on the other side of the hood to help you hold the hood steady and also, while holding the hood using your shoulder, have an assistant unbolt the bottom part and pull off the hood. Installation is done in the reverse order to removal. To not tighten, the hood can be adjusted front-and-back and side-to-side by moving it in reference to the hinge plate, after loosening the bolts. Some models have ports that allow the user to scribe or trace a line around the hinge plate to observe its movement, then the bolt or nut should be loosened and the hood adjusted by a slight degree at a time, the hinge bolts or nuts are then tightened before checking the alignment. Align the hood with fenders when closed by fine tuning the hood bumpers on the radiator support and align the Hood Latch by marking its position, unbolt them and shift to the appropriate position when the hood is closed. Oil the hook latch assembly and the hinges with white lithium-base grease from time to time in order to avoid sticking and wearing out.


