My Garage
My Account
Cart
Genuine Jeep Wrangler Engine Mount
Engine Motor Mount- Select Vehicle by Model
- Select Vehicle by VIN
Select Vehicle by Model
orMake
Model
Year
Select Vehicle by VIN
For the most accurate results, select vehicle by your VIN (Vehicle Identification Number).
69 Engine Mounts found


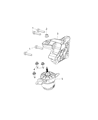
Jeep Wrangler Transmission Mount Insulator
Part Number: 68236162AB$107.38 MSRP: $162.00You Save: $54.62 (34%)


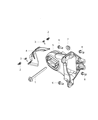
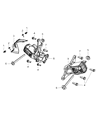
Jeep Wrangler Engine Mount Support
Part Number: 5147191AC$317.78 MSRP: $482.00You Save: $164.22 (35%)


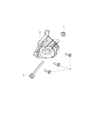
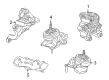
Jeep Wrangler Engine Mount Support
Part Number: 68236159AB$186.75 MSRP: $282.00You Save: $95.25 (34%)

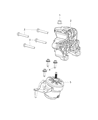


Jeep Wrangler Engine Mount Insulator
Part Number: 52059943AD$239.14 MSRP: $356.00You Save: $116.86 (33%)


Jeep Wrangler Engine Mount Insulator
Part Number: 68622628AA$157.50 MSRP: $236.00You Save: $78.50 (34%)


Jeep Wrangler Engine Mount Insulator
Part Number: 68284620AD$153.00 MSRP: $231.00You Save: $78.00 (34%)

Jeep Wrangler Engine Mount Insulator
Part Number: 68284621AC$177.75 MSRP: $267.00You Save: $89.25 (34%)

Jeep Wrangler Engine Mount Insulator
Part Number: 68284621AB$178.22 MSRP: $267.00You Save: $88.78 (34%)

Jeep Wrangler Engine Mount Insulator
Part Number: 68622629AA$160.18 MSRP: $239.00You Save: $78.82 (33%)


Jeep Wrangler Engine Mount Insulator
Part Number: 52059943AE$239.14 MSRP: $356.00You Save: $116.86 (33%)
Jeep Wrangler Engine Mount Insulator
Part Number: 52059940AD$221.09 MSRP: $331.00You Save: $109.91 (34%)


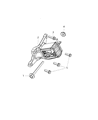
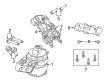
Jeep Wrangler Engine Mount Support
Part Number: 68240765AB$218.83 MSRP: $327.00You Save: $108.17 (34%)
| Page 1 of 4 |Next >
1-20 of 69 Results
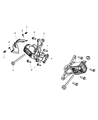
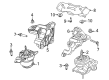
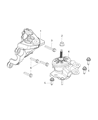
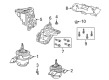
Jeep Wrangler Engine Mount
The Engine Mount in Jeep Wrangler vehicles serves two primary functions: It helps to isolate the noise and Vibrations produced by the Engine also to support and locate the position of the Engine within the Chassis of the vehicle. This helps in the enhancement of comfort and the placements of the engines are important to ensure that safety is achieved and to prevent damaging of parts. In this article, Jeep Wrangler has applied different kinds of Engine Mounts, such as Rubber Bushes, Standard Fluid Filled Hydraulic Type, and advanced type of Electronic Active Type. The traditional kind of mounts can have metal-on-metal contact with rubber spacers in between while hydraulic ones are much more effective in shock absorption. The new active mounts are now more sensitive, changing their stiffness according to the engine speed and ensuring more effective vibration isolation. All types of Engine Mounts are unique in that they have variations in the vibration damping and engine surge control, thus Jeep Wrangler does not compromise on the performance and comfort.
Looking for affordable and high-quality auto parts? Then you have already arrived at the proper online shop. We offer all Jeep Wrangler Engine Mount at great affordable prices. Moreover, all genuine Jeep Wrangler Engine Mount come with a manufacturer's warranty. In the long run, you would realize you have saved a lot of trouble and money with OEM parts from here.
Jeep Wrangler Engine Mount Parts Questions & Experts Answers
- Q: How to inspect and replace engine mounts, ensuring proper installation and alignment in 2.4L four cylinder engine on Jeep Wrangler?A:Engine mounts seldom require attention, but broken or deteriorated mounts should be replaced immediately to avoid damage or wear on the drive line components. To check the mounts, the engine must be raised slightly to remove the weight from them. Begin by raising the vehicle and securely supporting it on jack stands, then position a jack under the engine oil pan with a large wood block in between to prevent damage. Carefully raise the engine just enough to relieve the weight from the mounts, then inspect them for any cracks, hardened rubber, or separation from the metal backing, noting that splits can occur down the center. Check for any relative movement between the mount plates and the engine or frame using a large screwdriver or pry bar; if movement is detected, lower the engine and tighten the mount fasteners. Applying rubber preservative can help slow deterioration. For replacement, disconnect the cable from the negative terminal of the battery, raise the vehicle, and support it securely on jack stands if not already done. Place a floor jack under the engine with a wood block in between and raise the engine slightly to relieve the weight from the mounts. Remove the through-bolt from the engine mount and take the mount off the side of the engine block, ensuring not to disconnect more than one mount at a time unless removing the engine. Install the new engine mount assembly to the engine block and tighten the bolts securely. Slowly lower the engine while ensuring proper mount-to-frame alignment, then install the through-bolt and hand-tighten the nut. Completely lower the engine and securely tighten the through-bolt. If necessary, repeat the process for the motor mount on the other side of the engine, with the remainder of the installation being the reverse of removal.

Related Jeep Wrangler Parts
 Jeep Wrangler Exhaust Manifold
 Jeep Wrangler Engine Cover
 Jeep Wrangler Exhaust Flange Gasket
 Jeep Wrangler Exhaust Manifold Gasket
 Jeep Wrangler Engine Cooling Fan
 Jeep Wrangler Engine Mount Bracket
 Jeep Wrangler Exhaust Clamp
 Jeep Wrangler Exhaust Hanger
 Jeep Wrangler Exhaust Heat Shield
 Jeep Wrangler Exhaust Nut
Browse by Year
2025 Engine Mount 2024 Engine Mount 2023 Engine Mount 2022 Engine Mount 2021 Engine Mount 2020 Engine Mount 2019 Engine Mount 2018 Engine Mount 2017 Engine Mount 2016 Engine Mount 2015 Engine Mount 2014 Engine Mount 2013 Engine Mount 2012 Engine Mount 2011 Engine Mount 2010 Engine Mount 2009 Engine Mount 2008 Engine Mount 2007 Engine Mount 2006 Engine Mount 2005 Engine Mount 2004 Engine Mount 2003 Engine Mount 2002 Engine Mount 2001 Engine Mount 2000 Engine Mount 1999 Engine Mount 1998 Engine Mount 1997 Engine Mount 1995 Engine Mount 1994 Engine Mount 1993 Engine Mount 1992 Engine Mount 1991 Engine Mount 1990 Engine Mount 1989 Engine Mount 1988 Engine Mount 1987 Engine Mount