Make sure this part fits

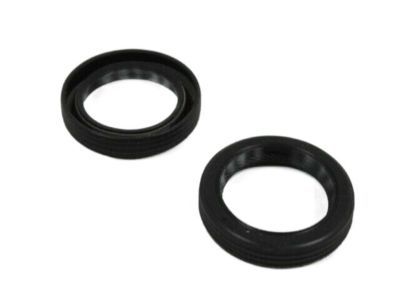
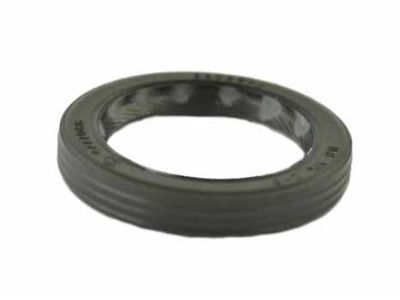
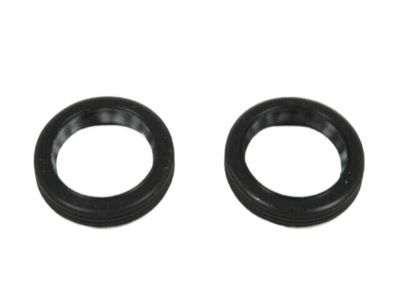
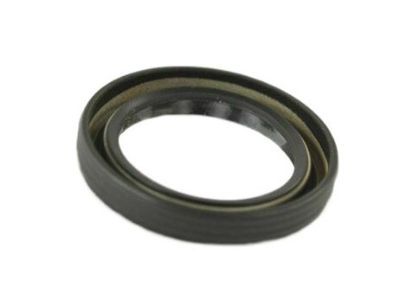
Chrysler 4777086 Seal-CAMSHAFT

1995-2010 Chrysler 4777086

Customer Questions & Expert Answers (10)
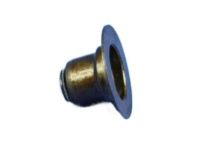
4777086 Mopar Seal-CAMSHAFT Product Photo 1 of 4
  • Part Description
    Seal Camshaft
  • Manufacturer
    Mopar
Make sure this part fits
$11.01 MSRP: $15.95
You Save: $4.94 (31%)
1
ADD TO CART
  • Related Parts
  • Specifications
  • Fitment
  • Q&A
  • Product Specifications

    BrandGenuine Chrysler
    Manufacturer Part Number4777086
    Part DescriptionSeal Camshaft
    Other NamesCamshaft Seal, Front Seal, Oil Seal
    Item Dimensions0.6 x 2.1 x 2.2 inches
    Item Weight0.30 Pounds
    ConditionNew
    ManufacturerMopar
    SKU4777086
    WarrantyThis genuine Mopar part is guaranteed by Mopar's factory warranty.
    Shipping & ReturnShipping Policy Return Policy
    Warning: California's Proposition 65
  • Vehicle Fitment

    Year Make Model Engine Important vehicle option details
    1995-2000 Chrysler Cirrus4 Cyl 2.0L, 4 Cyl 2.4LLX, LXi
    2000 Chrysler Grand Voyager
    2001-2010 Chrysler PT Cruiser4 Cyl 2.4LBase, Base Convertible, Classic, GT, GT Convertible, Limited, Touring, Touring Convertible
    2001-2006, 1995-1999 Chrysler Sebring4 Cyl 2.0L, 4 Cyl 2.4LBase Convertible, Base Sedan, GTC Convertible, JX, JXi, Limited Convertible, Limited Sedan, LX, LX Convertible, LX Sedan, LXi Sedan, Touring Sedan
    1998-2007, 1996 Chrysler Town & CountryBase, EL, LX FWD, LX Long Wheelbase FWD, LX Short Wheelbase FWD, LXi FWD, SX
    2000-2003 Chrysler Voyager4 Cyl 2.4LBase, EC, LX
  • Customer Questions & Expert Answers

    Q:
    Is this part guaranteed to fit my truck ? Posted by MoparPartsGiant Specialist
    A:
    You can Select Your Vehicle to check if 4777086 fits your vehicle.
    Posted by MoparPartsGiant Specialist
    Installation and Repair Tips
    Q:
    How to replace Camshaft Seal in four cylinder engine on Chrysler Cirrus? Posted by Customer
    A:
    Do not rotate the camshaft(s) or crankshaft when the timing belt is removed or damage to the engine may occur. Begin by removing the timing belt. Rotate the crankshaft counterclockwise until the crankshaft sprocket is three teeth BTDC to prevent engine damage if the camshaft sprocket is inadvertently rotated during sprocket bolt removal. While holding the camshaft sprocket, remove the camshaft sprocket bolt, then use two large screwdrivers to lever the sprocket off the camshaft. To hold the camshaft/sprocket while loosening the bolt, a strap-type damper/pulley holder tool is recommended and is available at most auto parts stores; if unavailable, remove the valve cover to access the wrenching flats on the camshaft for 2.4L engines only. For 2.0L engines, remove the two bolts securing the tensioner pulley bracket to the engine block and remove the pulley and bracket assembly without attempting to loosen the center bolt on the pulley or the pulley pivot bolt. For 2.4L engines, remove the idler pulley. For 2.0L engines equipped with a hydraulic timing belt tensioner, remove the tensioner pulley. Remove the bolts securing the rear cover to the engine block and cylinder head, then take off the rear cover. Carefully pry out the camshaft oil seal using a small screwdriver, ensuring not to nick or scratch the camshaft or seal bore. Clean the bore and coat the outer edge of the new seal with engine oil or multi-purpose grease, also lubricating the seal lip. Using a socket with an outside diameter slightly smaller than the outside diameter of the seal and a hammer, carefully drive the new seal into the cylinder head until it's flush with the face of the cylinder head; if a socket isn't available, a short section of pipe can be used. If engine location makes it difficult to use a hammer, fabricate a seal installation tool from a piece of pipe cut to the appropriate length, a bolt, and a large washer to press the seal into the bore by tightening the bolt. Install the rear timing belt cover, tensioner pulley/bracket, idler pulley, and tensioner pulley as applicable. Install the camshaft sprocket, aligning the pin in the camshaft with the hole in the sprocket, and use an appropriate tool to hold the camshaft sprocket while tightening the sprocket bolt to the specified torque. Reinstall the timing belt and run the engine to check for oil leaks.

    Posted by MoparPartsGiant Specialist
    Q:
    How to replace Camshaft Seal in V6 engine on Chrysler Cirrus? Posted by Customer
    A:
    Do not rotate the camshafts or crankshaft when the timing belt is removed or damage to the engine may occur. Begin by removing the timing belt. Rotate the crankshaft counterclockwise until the crankshaft sprocket is three notches BTDC to prevent engine damage if the camshaft sprocket is inadvertently rotated during removal. While keeping the camshaft from rotating, remove the camshaft sprocket bolt, then use two large screwdrivers to lever the sprocket off the camshaft. A strap-type damper/pulley holder tool is recommended for this procedure, but if the old timing belt is not being reused, wrapping a piece of it around the sprocket and using a chain wrench can also hold the sprocket in place. Carefully pry out the camshaft oil seal using a small hooked tool or screwdriver, taking care not to scratch the bore or damage the camshaft, as damage will cause the new seal to leak. Clean the bore and coat the outer edge of the new seal with engine oil or multi-purpose grease, also lubricating the seal lip. Using a socket with an outside diameter slightly smaller than the seal and a hammer, carefully drive the new seal into the cylinder head until it's flush with the face. If a socket isn't available, a short section of pipe can be used. If engine location makes it difficult to use a hammer, fabricate a seal installation tool from a piece of pipe cut to the appropriate length, a bolt, and a large washer, placing the pipe over the seal and threading the bolt into the camshaft to press the seal into the bore by tightening the bolt. Install the camshaft sprocket, aligning the pin in the camshaft with the hole in the sprocket, and using an appropriate tool to hold the camshaft sprocket, tighten the camshaft sprocket bolt to the specified torque. Finally, install the timing belt and run the engine to check for oil leaks.
    Posted by MoparPartsGiant Specialist
    Q:
    How to replace Camshaft Seal in four cylinder engine on Chrysler Town & Country? Posted by Customer
    A:
    Do not rotate the camshaft(s) or crankshaft when the timing belt is removed or damage to the engine may occur. Begin by removing the timing belt. Rotate the crankshaft counterclockwise until the crankshaft sprocket is three notches BTDC to prevent engine damage if the camshaft sprocket rotates during sprocket bolt removal. Hold the camshaft sprocket and remove the camshaft sprocket bolt; using a strap-type pulley holder tool is recommended for this task. If unavailable, two large screwdrivers can be used to pry the sprocket off the camshaft, or the valve cover can be removed to access the camshaft wrenching flats. Next, remove the idler pulley and the bolts holding the rear cover to the engine block and cylinder head, then take off the rear cover. Pry out the camshaft oil seal carefully to avoid scratching the bore or damaging the camshaft, as damage will cause the new seal to leak. Clean the bore and coat the outer edge of the new seal with engine oil or multi-purpose grease, lubricating the seal lip. Use a socket with an outside diameter slightly smaller than the seal and a hammer to gently tap the new seal into place with the spring side facing inward, ensuring it is flush with the face of the cylinder head. If a socket isn't available, a short section of pipe can be used instead. If space is limited, fabricate a seal installation tool from a piece of pipe, a bolt, and a large washer to press the seal into place. Afterward, install the rear timing belt cover and idler pulley. Install the camshaft sprocket, ensuring the pin in the camshaft aligns with the hole in the sprocket, then hold the camshaft sprocket and tighten the sprocket bolt to the specified torque. Finally, reinstall the timing belt and run the engine to check for oil leaks at the camshaft seal.
    Posted by MoparPartsGiant Specialist
    Q:
    How to replace Camshaft Seal on Chrysler PT Cruiser? Posted by Customer
    A:
    Do not rotate the camshaft(s) or crankshaft when the timing belt is removed or damage to the engine may occur. Begin by removing the timing belt cover and timing belt. Rotate the crankshaft counterclockwise until the crankshaft sprocket is three teeth BTDC to prevent engine damage if the camshaft sprocket is inadvertently rotated during removal. If equipped with a rear timing belt cover, remove the upper part. Use a pin spanner to hold the sprocket from turning and remove the camshaft sprocket bolt(s), then lever the sprocket(s) off the camshaft with two large screwdrivers. Carefully pry the seal out with a small screwdriver, ensuring not to nick or scratch the camshaft or seal bore, as damage will cause the new seal to leak. Clean the bore and coat the outer edge of the new seal with engine oil or multi-purpose grease, also lubricating the seal lip. Using a socket with an outside diameter slightly smaller than the seal, gently tap the new seal into place with the spring side toward the engine, ensuring it is installed squarely and flush with the head; a short section of pipe can be used if a socket isn't available. If equipped with a rear timing belt cover, install the upper part. Install the camshaft sprocket, aligning the pin in the camshaft with the hole in the sprocket, and use an appropriate tool to hold the camshaft sprocket(s) while tightening the bolt(s) to the specified torque. Reinstall the timing belt and run the engine, checking for oil leaks at the camshaft seal.
    Posted by MoparPartsGiant Specialist
    Q:
    How to replace Camshaft Seal in four cylinder engine on Dodge Caravan? Posted by Customer
    A:
    Do not rotate the camshaft(s) or crankshaft when the timing belt is removed or damage to the engine may occur. Begin by removing the timing belt. Rotate the crankshaft counterclockwise until the crankshaft sprocket is three notches BTDC to prevent engine damage if the camshaft sprocket rotates during sprocket bolt removal. Hold the camshaft sprocket and remove the camshaft sprocket bolt; using a strap-type pulley holder tool is recommended for this task. If unavailable, two large screwdrivers can be used to pry the sprocket off the camshaft, or the valve cover can be removed to access the camshaft wrenching flats. Next, remove the idler pulley and the bolts holding the rear cover to the engine block and cylinder head, then take off the rear cover. Pry out the camshaft oil seal carefully to avoid scratching the bore or damaging the camshaft, as damage will cause the new seal to leak. Clean the bore and coat the outer edge of the new seal with engine oil or multi-purpose grease, lubricating the seal lip. Use a socket with an outside diameter slightly smaller than the seal and a hammer to gently tap the new seal into place with the spring side facing inward, ensuring it is flush with the face of the cylinder head. If a socket isn't available, a short section of pipe can be used instead. If space is limited, fabricate a seal installation tool from a piece of pipe, a bolt, and a large washer to press the seal into place. Afterward, install the rear timing belt cover and idler pulley. Install the camshaft sprocket, ensuring the pin in the camshaft aligns with the hole in the sprocket, then hold the camshaft sprocket and tighten the sprocket bolt to the specified torque. Finally, reinstall the timing belt and run the engine to check for oil leaks at the camshaft seal.
    Posted by MoparPartsGiant Specialist
    Q:
    How should you remove and replace the timing belt and camshaft seal to avoid engine damage on Dodge Neon? Posted by Customer
    A:
    Do not rotate the camshaft(s) or crankshaft when the timing belt is removed to avoid engine damage. Begin by removing the timing belt cover and timing belt. Rotate the crankshaft counterclockwise until the crankshaft sprocket is three notches BTDC to prevent damage if the camshaft sprocket is inadvertently rotated during removal. Use a strap wrench or a chain wrench, with shop rags to protect the sprocket teeth, to remove the camshaft sprocket bolt, then lever the sprocket off the camshaft with two large screwdrivers. Next, remove the timing belt tensioner assembly and the upper, rear timing belt cover, noting that 2001 and 2002 models with hydraulic tensioners have a timing belt pulley assembly and a separate tensioner. Carefully pry out the camshaft seal, ensuring not to nick or scratch the camshaft or seal bore, and clean the bore before coating the outer edge of the new seal with engine oil or multi-purpose grease, also lubricating the seal lip. Use a socket with a slightly smaller outside diameter than the seal to gently tap the new seal into place, ensuring it is installed squarely and to the same depth as the original; a short section of pipe can be used if a socket is unavailable. Install the upper, rear timing belt cover, followed by the timing belt tensioner assembly, torquing the bolts appropriately. Align the pin in the camshaft with the hole in the camshaft sprocket during installation, using an appropriate tool to hold the sprocket while tightening the bolts to the specified torque. Finally, reinstall the timing belt and run the engine to check for oil leaks at the camshaft seal.
    Posted by MoparPartsGiant Specialist
    Q:
    What precautions should be taken when removing and replacing the camshaft seal in four cylinder engine on Jeep Liberty? Posted by Customer
    A:
    Do not rotate the camshafts when the timing belt is removed or damage to the engine may occur. Begin by removing the timing belt, followed by the camshaft sprockets and rear timing belt cover, and then take out the exhaust camshaft target ring and sensor. Note how far the seal is seated in the bore, then carefully pry it out with a small screwdriver, ensuring not to nick or scratch the camshaft or seal bore, as damage may lead to leaks with the new seal. Clean the bore and coat the outer edge of the new seal with engine oil or multi-purpose grease, also lubricating the seal lip. Using a socket with an outside diameter slightly smaller than that of the seal, gently tap the new seal into place with the spring side toward the engine, ensuring it is installed squarely and to the same depth as the original; if a socket isn't available, a short section of pipe can be used. Afterward, install the rear timing belt cover and camshaft sprockets, followed by the timing belt. Finally, run the engine and check for oil leaks at the camshaft seal.
    Posted by MoparPartsGiant Specialist
    Q:
    How should the new Camshaft Seal be prepared before installation for the 2002 Dodge Grand Caravan? Posted by Customer
    A:
    Coat the lip of the new seal with clean engine oil or molybase grease.
    Posted by MoparPartsGiant Specialist
    Q:
    What can be used if a socket is unavailable for installing the Camshaft Seal for the 2004 Jeep Wrangler? Posted by Customer
    A:
    A short section of pipe can be used.
    Posted by MoparPartsGiant Specialist
    See Complete Installation and Repair Tips

Genuine Mopar Part 4777086, the Right Choice

To ensure reliability, purchase Mopar part # 4777086 Seal-CAMSHAFT. It is sometimes referred to as Camshaft Seal. The OEM parts should be used when the Mopar owners want to maximize their driving experience. The high-tech factories that produce these parts utilize sophisticated technology specifically designed to meet stringent factory requirements. Additionally, they are thoroughly tested and can thus be used with reliability by Mopar owners. This part fits specific Chrysler PT Cruiser, Sebring, and Town & Country models.

MoparPartsGiant.com is a leading supplier of genuine Mopar parts and accessories such as 4777086 Seal-CAMSHAFT. Wondering where to find exceptional quality and affordable OEM Mopar parts? You have already come to the right place. Our website boasts a huge selection of genuine Mopar parts at attractive prices. Further, all parts come with a manufacturer's warranty. For detailed Chrysler parts information, click here.

Why choose Mopar Parts Giant

  • Dedicated Service

    Your complete satisfaction is our #1 goal

  • Lowest Prices

    Best deals on genuine OE parts from dealerships

  • Fast Delivery

    Orders are processed and delivered promptly