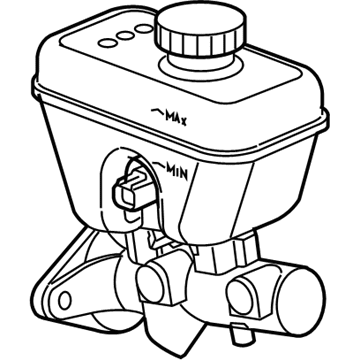
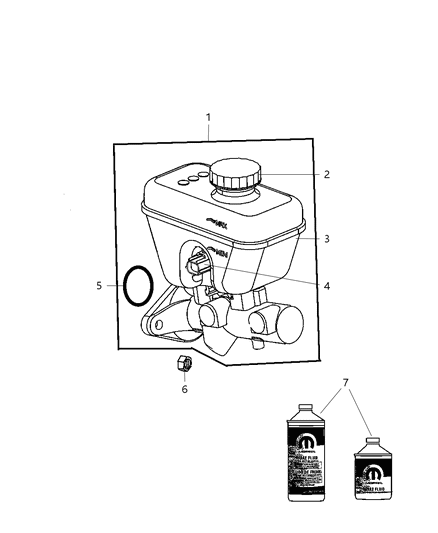
The Brake Master Cylinder is situated in the engine compartment and it is fixed on the power brake booster for vehicles up to 2010 models; it is situated inside the cowl cover assembly for the subsequent models starting from 2011. For the latter, cut a small portion of the left side cowl cover by lifting the retainer at end of the rubber insulation in order to expose the plastic cover for the brake master cylinder. Twist the plastic retainer and then push the tabs so that it is removable and take off the cover. Suck out as much of the fluid as is safely possible from the reservoir, the use of any kind of food preparation implements is unadvisable. Lay the rags where the fluid fittings stand and unwrap the caps or bags where the end of the lines are to be disconnected to prevent painted surfaces from contact with brake fluid. Lose the brake line flare nuts with a flare-nut wrench, then remove the lines approximately 1/2 inch and plug off the ends for the time being. Unplug the electrical connection of brake fluid level switch, unwind the nuts that hold the Brake Master Cylinder to the power booster, then pulling the Brake Master Cylinder off while ensuring that it remains upright not to affect the position of the power booster output rod. If replacing the Brake Master Cylinder replace the reservoir on the new unit from the old one with new seals. Prior to fitting the new Brake Master Cylinder, hold it between your vises, connect bleeder tubes to the outlet ports on the new Brake Master Cylinder and do the bench bleed with the Brake Master Cylinder after filling its reservoir with the appropriate brake fluid. Slide the pistons forward and backward gradually in the Brake Master Cylinder so as to force out air, this should be continued until the cylinders have no sign of bubbles. Upon the removal of the tubes and fitting of plugs, place the Brake Master Cylinder on the studs of the power brake booster and tighten the nuts slightly. Insert the brake line fittings to the Brake Master Cylinder, making sure that these will not stripped, then, using the specified torque, tighten the nut and fittings. Connect the brake fluid switch electrical connector, replenish the brake fluid supply in the reservoir and loose the fittings in the Brake Master Cylinder and the pneumatic brake system and have your assistant apply the brake pedal as you release the brake fluid using an hydraulic press. If the Brake Master Cylinder area has been bled, then the area should be rinsed with safe water, the cowl covers of required components for models after 2011 should be reinstalled, and the brake system's operation should be tested gently before normal use continued, or, if problems arise, the individual should seek professional help.