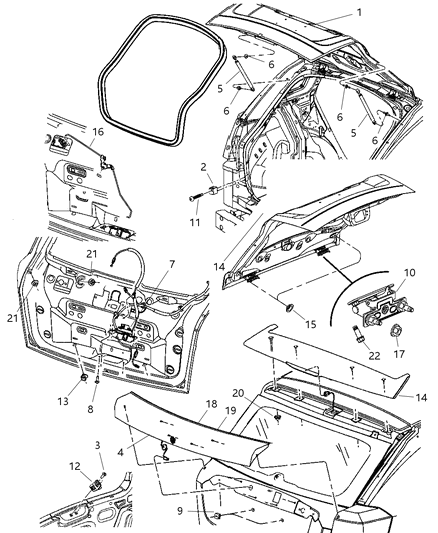
Disconnect the cable from the negative battery terminal. Using a flat-bladed trim tool, work around the edge of the side trim panels until all pressure clips have released, starting with the left side trim panel followed by the right. Remove the two screws securing the bottom edge of the rear liftgate panel and release each pressure clip around the panel perimeter. Take out the liftgate main trim panel, disconnecting any speaker electrical connectors if equipped. If the liftgate latch does not operate due to a lack of electrical power, remove the trim cap from the lower edge of the liftgate panel and use a screwdriver to unlock the latch. Mark the latch location on the liftgate, remove the latch mounting bolts, and pull the latch out while disconnecting the release cable and electrical connector. Disconnect the lock rod if equipped, and reinstall by aligning the latch to the marks drawn prior to removal. For the liftgate lock cylinder, disconnect the door lock actuator rod, remove the nuts securing the lock cylinder, and reinstall in reverse order. Replace strut support shocks in pairs, ensuring to have the replacement shock ready. Pry the retainer outward to disconnect the shock from the ball socket, check the condition of the ball sockets, and install the new shock correctly. For the outside release handle, remove the liftgate trim panel, handle mounting nuts, and disconnect the cable and electrical connector if equipped, then reinstall in reverse order. The liftgate hinges can be replaced one at a time without removing the entire liftgate; support the liftgate safely, disconnect the electrical harness connector and washer hose, and mark the hinge-to-liftgate location. Remove the hinge-to-liftgate bolts from one hinge, pull down the headliner to access and remove the lower hinge fasteners, and install the replacement hinge securely. Repeat for the other hinge if necessary, ensuring all fasteners are tightened securely.