
My Garage
My Account
Cart
This part fits
2001 Jeep Wrangler
Check another vehicle- Fitting Vehicle Options: EP0, ER0
Mopar 4798158AB Power Brake Booster
2000-2001 Jeep Wrangler 4798158AB
Customer Questions & Expert Answers (3)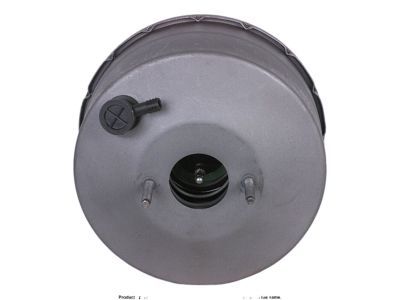
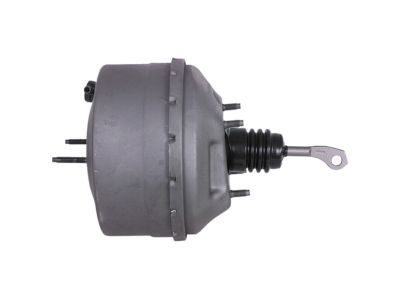
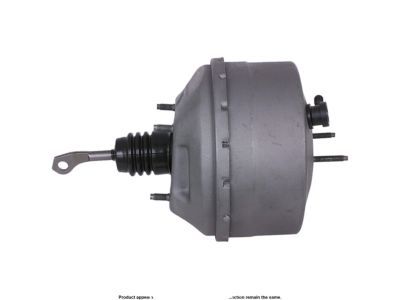
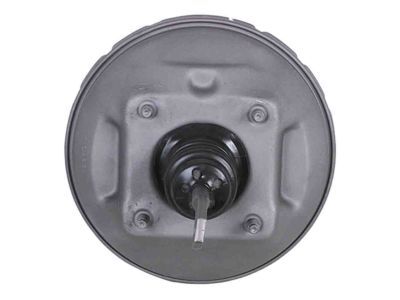
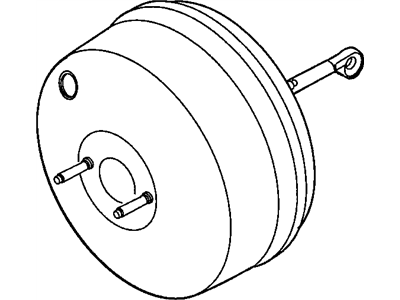
- Part DescriptionBooster Power Brake
- Replaced By
- ManufacturerMopar
- Manufacturer's NotesThis part is discontinued.
This part fits
2001 Jeep Wrangler
Check another vehicle- Fitting Vehicle Options: EP0, ER0
- Related Parts
- Specifications
- Q&A
Product Specifications
Brand Genuine Mopar Manufacturer Part Number 4798158AB Part Description Booster Power Brake Item Dimensions 13.1 x 13.1 x 15.8 inches Item Weight 9.90 Pounds Condition New Manufacturer Mopar SKU 4798158AB Warranty This genuine Mopar part is guaranteed by Mopar's factory warranty. Shipping & Return Shipping Policy Return Policy Warning: California's Proposition 65Customer Questions & Expert Answers
- Q:Is this part guaranteed to fit my truck? Posted by MoparPartsGiant Specialist
- A:You can Select Your Vehicle to check if 4798158AB fits your vehicle.Posted by MoparPartsGiant Specialist
Installation and Repair Tips- Q:How to perform an operating check and remove the power brake booster on Jeep Wrangler? Posted by Customer
- A:To perform an operating check, depress the brake pedal several times with the engine off to ensure there is no change in the pedal reserve distance, then start the engine and check for slight pedal movement, which indicates normal operation. For the air tightness check, start the engine and turn it off after one or two minutes, then depress the brake pedal several times slowly; if the pedal goes down farther initially but rises after subsequent depressions, the booster is airtight. While the engine is running, depress the brake pedal and stop the engine with the pedal held down; if there is no change in pedal reserve travel after 30 seconds, the booster is also airtight. When removing the power brake booster, do not disassemble it as special tools are required, and it is advisable to replace a defective unit with a new or rebuilt one. Begin by unbolting the brake master cylinder from the booster and carefully pulling it forward, then disconnect the vacuum hose from the booster, taking care not to damage it. Locate the pushrod connecting the booster to the brake pedal under the dash, unplug the brake light switch wire connector, and for pre-1991 models, remove the two pushrod nuts and slide out the pushrod bolt, noting the insertion direction for reassembly. For 1991 and later models, remove the retaining clip securing the pushrod to the brake pedal. Next, remove the four nuts holding the brake booster to the firewall from inside the vehicle, which may require a light to locate. On 2007 and later models, note that the booster is mounted to an adapter plate secured to the engine side of the firewall. Slide the booster straight out from the firewall, detach the old assembly from the mounting bracket, and install the bracket onto the new booster unit, tightening the mounting nuts securely. For installation, follow the reverse procedures of removal, ensuring to reinstall the spacer gasket(s) between the booster mounting bracket and the firewall, and tighten all nuts to the specified torque.Posted by MoparPartsGiant Specialist
- Additional Installation and Repair Tips by AI Expert
- Removal steps 1. Park on level ground, chock wheels, set the parking brake and wear eye protection and gloves. 2. Depress the brake pedal several times to reduce vacuum assist, then disconnect the negative battery cable. 3. Remove or protect the brake fluid reservoir cap and cover the reservoir to keep contamination out. 4. Support the master cylinder so brake lines are not stressed; if the master cylinder must be loosened, plug or cap the brake lines to prevent fluid loss. 5. Disconnect the booster vacuum hose and any electrical connectors or vacuum switches (typically at or near the booster); note or label connectors for reassembly. 6. From inside the vehicle, access the brake pedal area and remove the retaining pin/clip or fastener that connects the booster pushrod clevis to the brake pedal. 7. From the engine compartment, loosen and remove the booster mounting nuts on the firewall (mounting method varies by design); hold the booster while removing fasteners to prevent it from falling. 8. Carefully withdraw the booster straight out from the firewall, feeding the pushrod through the pedal area and avoiding damage to surrounding components. 9. Inspect the booster mounting gasket, firewall grommet, vacuum hose, and check valve for wear or damage and set old hardware aside for comparison. Installation steps 1. Compare the new booster to the removed unit and transfer any reusable check valve, grommets, or brackets if required; replace worn seals or hardware. 2. Position the booster at the firewall and feed the pushrod through to the pedal area, aligning the booster mounting studs/holes without forcing it. 3. Install the mounting nuts and snug them evenly to seat the booster against the firewall (do not apply unspecified torque values). 4. Reconnect the pushrod clevis to the brake pedal and secure with the original retaining pin/clip or specified fastener; confirm the pedal connection moves freely. 5. Reinstall or secure the master cylinder to the booster, ensuring brake lines are not twisted or strained; if lines were opened, bench-bleed the master cylinder and then prepare for system bleeding. 6. Reconnect the vacuum hose (ensuring check valve orientation as marked) and any electrical connectors previously removed. 7. Reconnect the negative battery cable. 8. Check brake fluid level and top as necessary, start the engine and verify vacuum assist operation (pedal feel should change when engine starts) and check for audible vacuum leaks or warning lights. 9. Bleed the brake system as required if the hydraulic circuit was opened, then perform a cautious low-speed road test to confirm firm pedal feel and proper braking. Repair tip: Photograph and label connections during removal, replace worn rubber grommets and the vacuum check valve while installing, and avoid getting brake fluid on painted surfaces.
- Q:
Why choose Mopar Parts Giant
- Dedicated Service
Your complete satisfaction is our #1 goal
- Lowest Prices
Best deals on genuine OE parts from dealerships
- Fast Delivery
Orders are processed and delivered promptly