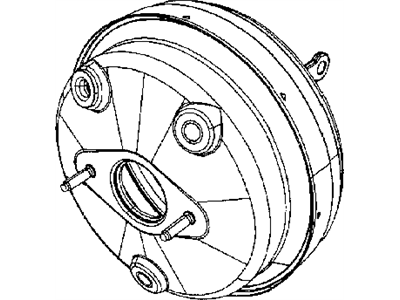
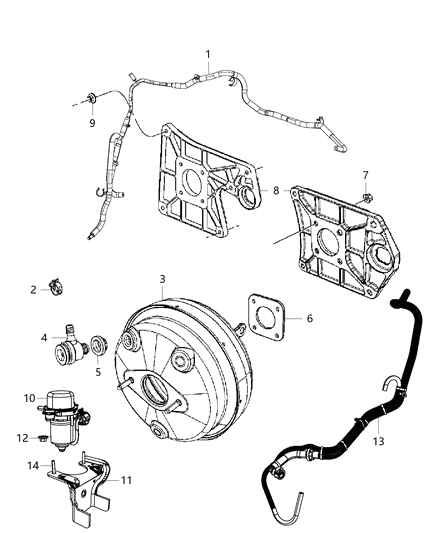
For the operating check, the brake pedal should be depressed several times with the engine switch off to allow the determination of any change in the amount of pedal reserve distance, and with the engine switch on, the brake pedal should show some slight amount of movement. For the air tightness check, begin by cranking the engine after which you switch off the engine after one or two minutes then step hard on the brake pedal several times slowly; if the pedal goes down farther initially but rises after subsequent depressions, then the booster is airtight. With the power on, apply the brake pedal and turn off the power with the brake pedal depressed; should there be no increase in the pedal reserve travel after 30 seconds the booster is also airtight. When pulling off the power brake booster, do not try to dismantle the part by using tools but just unbolt it; the single ways found to get the part off would require that a bad unit be replaced by a new or rebuilt one. Start by loosening the brake master cylinder form the booster as well as pulling it forward lightly, the next thing is to detach the vacuum hose from the booster but make sure that it is not damaged in the process. Get to the booster end of the pushrod above the brake pedal, unplug the brake light switch wire harness, and for the car models manufactured before 1991, undo the two nuts at the end of the pushrod and withdraw the bolt that came with it while observing its correct orientation which has to be followed later. For 1991 and later models release the retaining clip of the pushrod at the brake pedal. Next, four nuts of the brake booster attached at the fire wall from inside are to be loosened for which a light may perhaps be needed. On the 2007 and later models, it must be pointed out that the booster is attached to an adapter plate, which is in its turn fixed to the engine side of the firewall. Withdraw the booster directly to and away from the firewall Delicately remove the assembly from the existing mounting bracket and then separate the KEY FITTING then fasten the bracket onto the rest of the booster unit tightening the nuts respectively. To install the component, you have to reverse the removal procedure, only make sure to bolt the spacer gasket(s) between the booster mounting bracket and the firewall before tightening the nuts to the recommended torque.