
My Garage
My Account
Cart
Additional information needed to check if this part fits
1986 Jeep Comanche
Check another vehicleMopar 52000068 Cylinder Master Clutch Hydraulic
1984-1986 Mopar 52000068
Customer Questions & Expert Answers (3)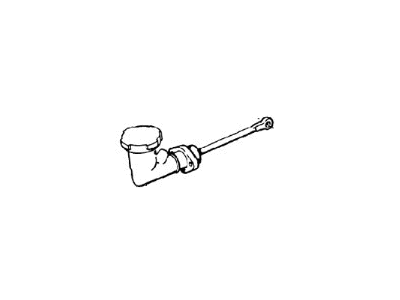
- Part DescriptionCylinder Assembly, Clutch Master
- 1984
- 2.5L Four Cylinder (1985)
- ManufacturerMopar
- Manufacturer's NotesThis part is discontinued.
Additional information needed to check if this part fits
1986 Jeep Comanche
Check another vehicle- Related Parts
- Specifications
- Q&A
Product Specifications
Brand Genuine Mopar Manufacturer Part Number 52000068 Part Description Cylinder Assembly, Clutch Master Other Names Master Cylinder Item Weight 1.30 Pounds Condition New Manufacturer Mopar SKU 52000068 Warranty This genuine Mopar part is guaranteed by Mopar's factory warranty. Shipping & Return Shipping Policy Return Policy Warning: California's Proposition 65Customer Questions & Expert Answers
- Q:Please cross check for fit. Posted by MoparPartsGiant Specialist
- A:You can Select Your Vehicle to check if 52000068 fits your vehicle.Posted by MoparPartsGiant Specialist
Installation and Repair Tips- Q:How to rebuild or replace a clutch master cylinder on Jeep Comanche? Posted by Customer
- A:Before beginning the procedure, it is important to contact local parts stores and dealer service departments to inquire about the availability and cost of a rebuild kit or a new master cylinder. This will determine whether the cylinder should be rebuilt or replaced. If the decision is made to rebuild the cylinder, the bore should be inspected for any damage. The removal process involves disconnecting the cable from the negative battery terminal, removing the clutch master cylinder reservoir cap and draining the fluid, disconnecting the hydraulic line, removing the lower master cylinder mounting nut, disconnecting the push rod from the clutch pedal, and removing the cylinder upper mounting nut. The cylinder can then be pulled out of the firewall. To overhaul the cylinder, the removable reservoir (if applicable) should be detached, and the cylinder should be mounted in a vise. The dust boot should be pried off, the snap-ring should be removed, and the plunger assembly should be pulled from the bore. The bore should be inspected for any damage, and if necessary, the cylinder should be replaced. If the cylinder is being rebuilt, the parts from the rebuild kit should be used and any specific instructions should be followed. The spring should be compressed, the valve stem retainer tab should be pried up to release the retainer, spring, and valve stem assembly. The plunger, seals, spring retainer, and valve stem should be removed and discarded. New seals, valve stem tip seal, and spring washer should be installed, and the assembly should be lubricated with clean brake fluid and installed in the cylinder bore. The push rod should be installed with a new seal, snap-ring, and dust boot, and the cylinder should be positioned against the firewall and secured with the lower mounting nut. The hydraulic line should be connected and tightened, the upper mounting bolt should be installed, and the push rod should be connected to the clutch pedal. The lower mounting nut should be tightened, the hydraulic line fitting should be securely tightened, and the fluid reservoir should be installed. Finally, the reservoir should be filled with brake fluid and the system should be bled.Posted by MoparPartsGiant Specialist
- Additional Installation and Repair Tips by AI Expert
- Removal steps 1. Park on a level surface, set the parking brake, chock wheels, wear safety glasses and gloves. 2. Disconnect the negative battery terminal to disable electrical circuits before working. 3. Clean around the clutch master cylinder reservoir, then remove the cap and, if needed, remove some fluid to minimize spills. 4. Protect painted surfaces and lay down a drip tray; have absorbent rags ready for brake fluid (it can damage paint). 5. Using appropriate tools, disconnect the hydraulic line(s) from the master cylinder and immediately cap or plug the line(s) to limit fluid loss and contamination. 6. Disconnect the pushrod or pedal linkage from the master cylinder input shaft - attachment method commonly varies by design, so follow the actual linkage hardware present. 7. Remove the master cylinder mounting fasteners and withdraw the unit from the firewall area; support the unit to avoid fluid spillage. 8. Plug or cap the open ports on the removed unit and clean the surrounding area of any fluid; properly contain and dispose of old hydraulic fluid. Installation steps 1. Compare the new master cylinder to the old one to confirm fit and transfer any necessary components (reservoir lid, fittings) as required. 2. Bench-bleed the new master cylinder before installation according to the part maker's instructions; commonly this means cycling fluid through the ports until air-free. 3. Position the master cylinder at the firewall and secure the mounting fasteners snugly; do not invent torque values-use factory specs if available. 4. Reconnect the pushrod or pedal linkage and verify free, correct engagement and pedal travel (attachment details may vary by design). 5. Reattach the hydraulic line(s) using new crush washers/seals if applicable and tighten with appropriate flare or line tools to avoid rounding fittings. 6. Refill the reservoir with the manufacturer-specified hydraulic fluid and keep the cap loosely in place while bleeding. 7. Bleed the clutch hydraulic system by an appropriate method (manual two-person, pressure or vacuum bleeder) until the pedal feels firm and no air is present; procedures vary, so follow the chosen method's steps. 8. Inspect all connections for leaks, clean any spilled fluid, then reinstall and tighten the reservoir cap. 9. Reconnect the negative battery terminal. 10. Verify operation with a low-speed functional test, checking pedal feel, engagement, and for leaks; recheck fluid level and top up as needed. Repair tip: Replace any corroded line fittings, sealing washers, or the flexible hose when accessible, and always bench-bleed a new master cylinder to reduce the amount of air in the system.
- Q:
Why choose Mopar Parts Giant
- Dedicated Service
Your complete satisfaction is our #1 goal
- Lowest Prices
Best deals on genuine OE parts from dealerships
- Fast Delivery
Orders are processed and delivered promptly