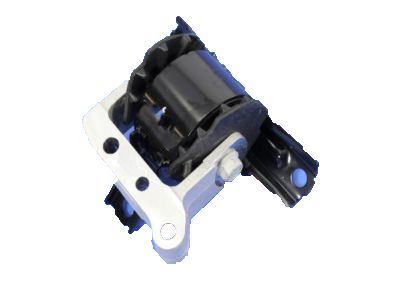
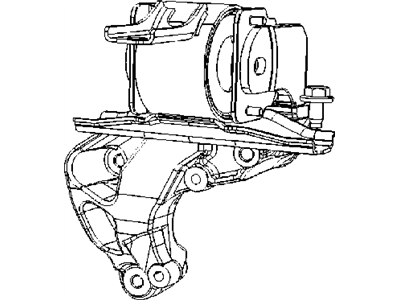
There are four powertrain mounts, The front mount sustains the transaxle to the cross member, the left mount bonds the driver side of the engine to the sub frame, the right engine mount links the engine block to the passenger side of the sub frame and the rear mount also links the engine block to the sub frame. For this the engine has to be lifted from the mounts slightly to take weight off the mounts for examination. First safely chock the car and then elevate the car and support it with jack stands and remove the front wheels and tires. Place one jack under crankshaft pulley and the other at the bottom of transaxle bellhousing putting a piece of wood or metal over both points where the jacks will be placed to protect the components while lifting the engine/transaxle just enough to relieve the mounts. With reference to the previous description there are several items that should first be looked at: The mounts should be examined for any cracking of rubber or metal, the rubber becoming hardened or if the rubber and metal sleeve are still fused together The amount of relative movement between the mount bracket and the engine, subframe or chassis should be tested using a large screwdriver or prybar. If movement is noticed, reduce the engine and loosen the mount bolts. During the front mount replacement, place a block of wood underneath the engine oil pan, disconnect the splash shield, front mount through-bolt as well as the crossmember-to-mount bolts before finally removing the mount. If the mount bracket has to be replaced, the bracket-to-block bolts will have to be removed. Disassembly too is done in the reverse order, while making certain that all the bolts and screws are tightened to the required degree. The left mount is controlled by the following process: The negative battery cable is disconnected, the air filter housing is taken off and the transaxle is supported while it is lifted to reduce the load on the mount. Take out the mount through-bolt and the mount to chassis bolts then just reverse the process and tighten the bolts to the recommended torque. If the right mount is involved, the coolant reservoir, power steering fluid reservoir, and windshield washer fluid reservoir has to be detached to get to the engine mount. Support the engine, loosen the through-bolt 7146 which joins the two engine mounts together and further the bolts 7140 you need for the removal of the mount bracket and mount from their positions. It is installed in a manner that will undo the disassembly, making sure that every bolt has been secured to the necessary tightness. For the rear mount, lift the car, first, loosen and then remove the engine splash guard and the downstream oxygen sensor then support the engine and disconnected the rear mount through bolt and mount to cross member bolts. Place the new mount into the bracket, line up with the crossmember and tighten all bolts to the required torque tightening in the reverse of the removal process.