Make sure this part fits

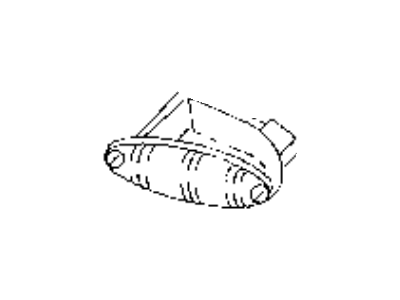
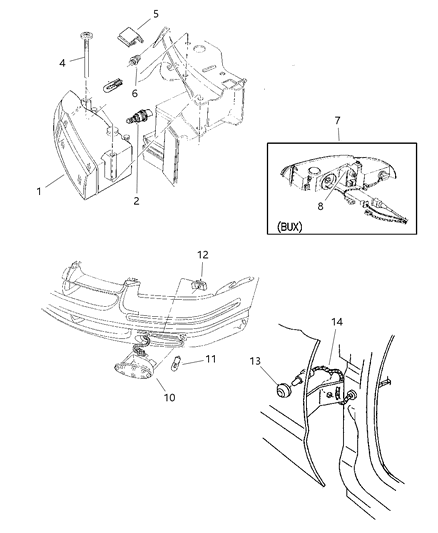
Mopar 4630562 Module, Headlamp, Right

1995-1998 Mopar 4630562

Customer Questions & Expert Answers (3)
4630562 Mopar Module, Headlamp, Right Illustration 1 of 1
  • Part Description
    Module, Headlamp, Right
  • Position
    Passenger Side
  • Manufacturer
    Mopar
  • Manufacturer's Notes
    This part is discontinued.
Make sure this part fits
  • Related Parts
  • Specifications
  • Fitment
  • Q&A
  • Product Specifications

    BrandGenuine Mopar
    Manufacturer Part Number4630562
    Part DescriptionModule, Headlamp, Right
    Item Dimensions21.7 x 8.6 x 8.0 inches
    Item Weight37.20 Pounds
    PositionPassenger Side
    ConditionNew
    Fitment TypeDirect Replacement
    ManufacturerMopar
    SKU4630562
    WarrantyThis genuine Mopar part is guaranteed by Mopar's factory warranty.
    Shipping & ReturnShipping Policy Return Policy
    Warning: California's Proposition 65
  • Vehicle Fitment

    Year Make Model Engine Important vehicle option details
    1998, 1995 Chrysler Cirrus4 Cyl 2.0L, 4 Cyl 2.4L, 6 Cyl 2.5LLX, LXi
    1998, 1995 Dodge Stratus4 Cyl 2.0L, 4 Cyl 2.4L, 6 Cyl 2.5LBase, ES
  • Customer Questions & Expert Answers

    Q:
    Is this part guaranteed to fit my truck ? Posted by MoparPartsGiant Specialist
    A:
    You can Select Your Vehicle to check if 4630562 fits your vehicle.
    Posted by MoparPartsGiant Specialist
    Installation and Repair Tips
    Q:
    How to properly adjust the fog light bulb and headlight assemblies on the Chrysler Cirrus? Posted by Customer
    A:
    Many horizontal and vertical position headlights incorporated in assemblies have graduations that are factory set. Corrections should be carried out on a flat surface and better still, the fuel tank should be full and the vehicle should neither be over loaded nor under loaded. To set the suspension, jump up and down three times side to side, and bounce the front end three times up and down. Pop the hood to check the vertical indicators, the little bubble inside the vial must be over zero and it is permissible to be 0.75 degrees up or down. If needed, spin the vertical aim screw to come to the middle of the bubble without fiddling with the screw that is on the vial. Next, look on the horizontal indicators where at the adjuster you will find a arrow that must be pointing at zero in the gauge wheel. If it does not, turn the horizontal aiming screw the other way as a detrection to correct the problem. For alignment using a screen the ground should be level and the wall on which the screen will be set should be flat, the parking distance should be 25 feet. Slightly align a vertical masking tape line to the wall to the centerline and headlights of the vehicle and this can only be easily done if the vehicle is parked closely to the wall. Once again stabilise the suspension and record the distance from the floor to the center line of each headlight lens and scribe these dimensions on the wall using horizontal masking tape lines. Take a measuring tape and using the headlight lens as a point of reference, draw a vertical masking tape line along the wall up to a particular point. For the left head light the 2-inch square piece of tape should be located 8 inches below the horizontal that was drawn and 5 inches, to the right of the vertical line. For the right head light the 2-inch square piece of tape should be located 7 inches below the horizontal that was drawn and 9 inches to the right of the vertical line. If getting to turn on the low beam make adjustment up on the screws in a way that get to focus the hot spot of every headlight to its likely aims spot. If alignment problems remain or if the beam pattern looks wrong, consult the service section of a dealer or an authorized repair shop. Again, for fog light adjustment one has to park the vehicle 25 feet from a flat wall, suspend the fog light and measure the distance from the floor to the horizontal center line of each fog light lens and use a 3 feet horizontal tape along each of the fog lights. With the fog lights engaged, turn the screws until the extreme points of the projected fog light beam are about 4 inches below the horizontal tapes line.

    Posted by MoparPartsGiant Specialist
    Q:
    How to remove and install a headlight assembly while protecting the body paint on Chrysler Cirrus? Posted by Customer
    A:
    Loosen the hood and unscrew the mounting of the headlights. In order to prevent scratching of the body paint, put a thin piece of soft material for example a credit card or cardboard between the head light assembly and the front fender. Using the flat head screwdriver inserted between the two pieces of cardboard and inserted in between the head light assembly and the fender, push it gently in order to disengage the head light assembly from the ball socket while at the same time have made sure that no area of the car's body painting is in contact with the flat head screwdriver or in contact with the fender so as to avoid scratching the painting. Pull the electrical connectors out of the headlight and park /turn signal bulb holders and pull the headlight assembly out of the car. To reinstall, follow the same process in the above steps only that the electrical connectors should be well connected and there should also be an alignment of the headlights if the necessity arises.
    Posted by MoparPartsGiant Specialist
    See Complete Installation and Repair Tips

Genuine Mopar Part 4630562, the Right Choice

To ensure reliability, purchase Mopar part # 4630562 Module, Headlamp, Right. It is sometimes referred to as Headlight. The OEM parts should be used when the Mopar owners want to maximize their driving experience. The high-tech factories that produce these parts utilize sophisticated technology specifically designed to meet stringent factory requirements. Additionally, they are thoroughly tested and can thus be used with reliability by Mopar owners. This part fits specific Chrysler Cirrus models. It fits Dodge Stratus.

MoparPartsGiant.com is a leading supplier of genuine Mopar parts and accessories such as 4630562 Module, Headlamp, Right. Wondering where to find exceptional quality and affordable OEM Mopar parts? You have already come to the right place. Our website boasts a huge selection of genuine Mopar parts at attractive prices. Further, all parts come with a manufacturer's warranty. For detailed Dodge parts information, click here.

Why choose Mopar Parts Giant

  • Dedicated Service

    Your complete satisfaction is our #1 goal

  • Lowest Prices

    Best deals on genuine OE parts from dealerships

  • Fast Delivery

    Orders are processed and delivered promptly