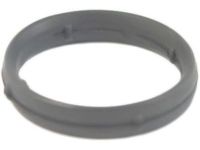
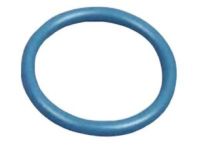
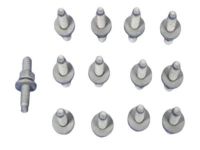
Make sure this part fits

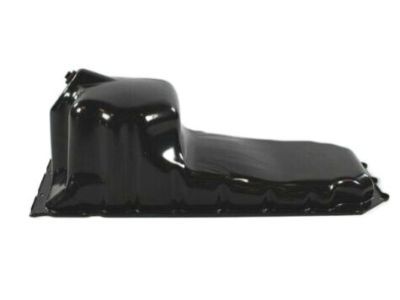
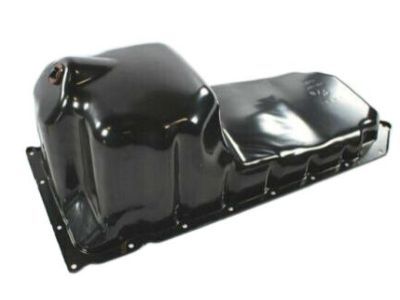
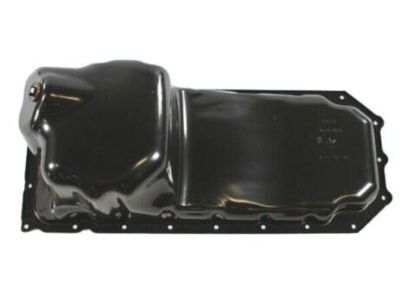
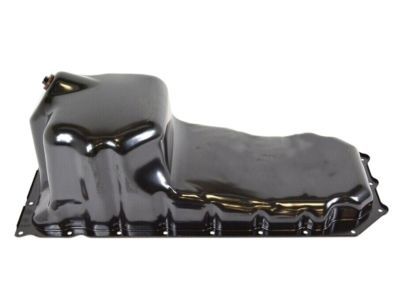
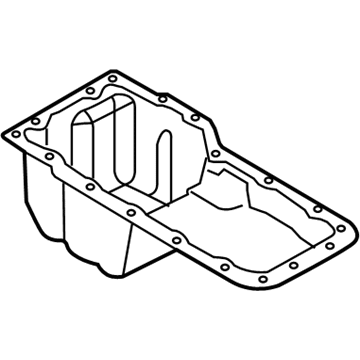
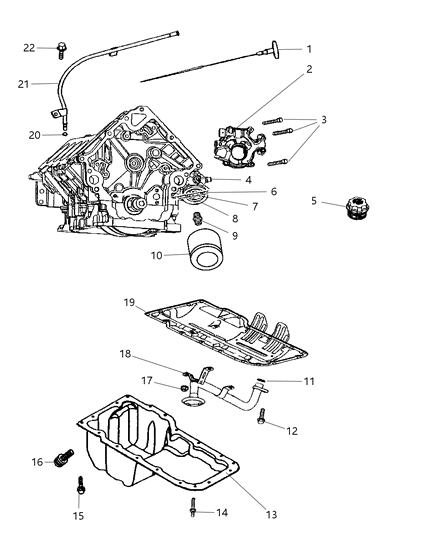
Mopar 53021334AF Engine Oil Pan

2003-2012 Mopar 53021334AF

Customer Questions & Expert Answers (7)
53021334AF Mopar Engine Oil Pan Product Photo 1 of 4
  • Part Description
    Pan Engine Oil
  • Manufacturer
    Mopar
Make sure this part fits
$204.75 MSRP: $304.00
You Save: $99.25 (33%)
1
ADD TO CART
  • Related Parts
  • Specifications
  • Fitment
  • Q&A
  • Product Specifications

    BrandGenuine Mopar
    Manufacturer Part Number53021334AF
    Part DescriptionPan Engine Oil
    Other NamesOil Pan
    Item Dimensions25.1 x 10.6 x 8.3 inches
    Item Weight7.50 Pounds
    ConditionNew
    ManufacturerMopar
    SKU53021334AF
    WarrantyThis genuine Mopar part is guaranteed by Mopar's factory warranty.
    Shipping & ReturnShipping Policy Return Policy
    Warning: California's Proposition 65
  • Vehicle Fitment

    Year Make Model Engine Important vehicle option details
    2003-2010 Dodge Ram 15008 Cyl 5.7LLaramie Crew Cab 2WD, Laramie Crew Cab 4WD, Laramie Quad Cab 2WD, Laramie Quad Cab 4WD, Laramie Regular Cab 2WD, Laramie Regular Cab 4WD, SLT Crew CAB 2WD, SLT Crew Cab 4WD, SLT HEV Crew Cab 4WD, SLT Quad Cab 2WD, SLT Quad Cab 4WD, SLT Regular Cab 2WD, SLT Regular Cab 4WD, ST Crew Cab 2WD, ST Crew Cab 4WD, ST Quad Cab 2WD, ST Quad Cab 4WD, ST Regular Cab 2WD, ST Regular Cab 4WD
    2003-2010 Dodge Ram 25008 Cyl 5.7LLaramie Crew CAB 2WD, Laramie Crew Cab 4WD, Laramie Mega Cab 2WD, Laramie Mega CAB 2WD, Laramie Mega Cab 4WD, Laramie Quad Cab 2WD, Laramie Quad Cab 4WD, Laramie Regular Cab 2WD, Laramie Regular Cab 4WD, Mega Cab 2WD, Mega Cab 4WD, SLT Crew Cab 2WD, SLT Crew Cab 4WD, SLT Mega Cab 2WD, SLT Mega Cab 4WD, SLT Quad Cab 2WD, SLT Quad Cab 4WD, SLT Regular Cab 2WD, SLT Regular Cab 4WD, ST Crew Cab 2WD, ST Crew Cab 4WD, ST Quad Cab 2WD, ST Quad Cab 4WD, ST Regular Cab 2WD, ST Regular Cab 4WD
    2003-2009 Dodge Ram 35008 Cyl 5.7LLaramie Mega Cab 2WD, Laramie Mega Cab 4WD, Laramie Quad Cab 2WD, Laramie Quad Cab 4WD, Laramie Regular Cab 2WD, Laramie Regular Cab 4WD, Quad Cab Chassis 2WD, Quad Cab Chassis 4WD, Quad Chassis CAB 2WD, Quad Chassis CAB 4WD, Regular Cab Chassis 2WD, Regular Cab Chassis 4WD, Regular Chassis CAB 2WD, Regular Chassis CAB 4WD, SLT Mega Cab 2WD, SLT Mega Cab 4WD, SLT Quad Cab 2WD, SLT Quad Cab 4WD, SLT Regular Cab 2WD, SLT Regular Cab 4WD, ST Quad Cab 2WD, ST Quad Cab 4WD, ST Regular Cab 2WD, ST Regular Cab 4WD
    2011-2012 Ram 15008 Cyl 5.7LLaramie Crew Cab 4WD, Laramie Quad Cab 4WD, Longhorn Crew Cab 4WD, SLT Crew Cab 4WD, SLT HEV Crew Cab 4WD, SLT HEV Plus Crew 4WD, SLT Quad Cab 4WD, SLT Regular Cab 4WD, Sport Crew CAB 4WD, Sport Quad Cab 4WD, Sport Regular Cab 4WD, ST Crew Cab 4WD, ST Quad Cab 4WD, ST Regular Cab 4WD
    2011-2012 Ram 25008 Cyl 5.7LLaramie Crew Cab 2WD, Laramie Crew Cab 4WD, Laramie Mega Cab 2WD, Laramie Mega Cab 4WD, Longhorn Crew Cab 2WD, Longhorn Crew Cab 4WD, Longhorn Mega Cab 2WD, Longhorn Mega Cab 4WD, Power Wagon Crew Cab 4WD, Powerwagon Crew Cab 4WD, SLT Crew Cab 2WD, SLT Crew Cab 4WD, SLT Mega Cab 2WD, SLT Mega Cab 4WD, SLT Regular Cab 2WD, SLT Regular Cab 4WD, ST Crew Cab 2WD, ST Crew Cab 4WD, ST Regular Cab 2WD, ST Regular Cab 4WD
    2011-2012 Ram 35008 Cyl 5.7LCrew Cab Chassis 4WD, Regular Cab Chassis 4WD
  • Customer Questions & Expert Answers

    Q:
    Please cross check for fit. Posted by MoparPartsGiant Specialist
    A:
    You can Select Your Vehicle to check if 53021334AF fits your vehicle.
    Posted by MoparPartsGiant Specialist
    Installation and Repair Tips
    Q:
    How to remove and reinstall the oil pan in diesel engine on Dodge Ram 2500? Posted by Customer
    A:
    Disconnect the cables from the negative terminals of the batteries. Drain the engine oil. Raise the vehicle and support it securely on jackstands. Remove the oil dipstick. For 2WD models, remove the fan and fan shroud. Remove the starter. Remove the transmission. Remove the flywheel housing and the driveplate. Remove the steering gear mounting bolts and lower the steering gear. For 4WD models, unbolt the radiator shroud but don't remove it. Attach an engine support fixture or a hoist to the engine lift brackets with a chain. Raise the engine slightly, then remove the front engine mount through-bolts. Continue raising the engine until sufficient clearance is obtained under it. Remove the two bolts from the front of the engine block support. Remove the oil pan bolts and use a putty knife between the block and the pan to break the gasket seal. Lower the pan to access and remove the two bolts retaining the oil suction tube near the front of the block. Lower the suction tube into the oil pan and remove the oil pan and suction tube together. Clean the interior of the oil pan with rags and solvent and clean the oil suction tube. Also clean the pan mounting surface of the block of any sealant, gasket material or oil. On the engine, apply a small bead of RTV sealant to the block and front cover joints, and the block and the rear seal retainer joints. Attach a new gasket to the oil suction tube mounting flange and place the suction tube into the pan, with the mounting flange at the front. Raise the oil pan up next to the block and attach the oil suction tube to the block. Install the oil pan. Tighten the bolts, starting in the center and working towards the ends, to the torque. Install the oil pan drain plug with a new sealing washer and tighten it to the torque. Refill the engine with new oil. The remainder of installation is the reverse of removal. Start the engine and check for oil leaks.
    Posted by MoparPartsGiant Specialist
    Q:
    How to remove and reinstall the oil pan in diesel engine on Dodge Ram 3500? Posted by Customer
    A:
    Disconnect the cables from the negative terminals of the batteries. Drain the engine oil. Raise the vehicle and support it securely on jackstands. Remove the oil dipstick. For 2WD models, remove the fan and fan shroud. Remove the starter. Remove the transmission. Remove the flywheel housing and the driveplate. Remove the steering gear mounting bolts and lower the steering gear. For 4WD models, unbolt the radiator shroud but don't remove it. Attach an engine support fixture or a hoist to the engine lift brackets with a chain. Raise the engine slightly, then remove the front engine mount through-bolts. Continue raising the engine until sufficient clearance is obtained under it. Remove the two bolts from the front of the engine block support. Remove the oil pan bolts and use a putty knife between the block and the pan to break the gasket seal. Lower the pan to access and remove the two bolts retaining the oil suction tube near the front of the block. Lower the suction tube into the oil pan and remove the oil pan and suction tube together. Clean the interior of the oil pan with rags and solvent and clean the oil suction tube. Also clean the pan mounting surface of the block of any sealant, gasket material or oil. On the engine, apply a small bead of RTV sealant to the block and front cover joints, and the block and the rear seal retainer joints. Attach a new gasket to the oil suction tube mounting flange and place the suction tube into the pan, with the mounting flange at the front. Raise the oil pan up next to the block and attach the oil suction tube to the block. Install the oil pan. Tighten the bolts, starting in the center and working towards the ends, to the torque. Install the oil pan drain plug with a new sealing washer and tighten it to the torque. Refill the engine with new oil. The remainder of installation is the reverse of removal. Start the engine and check for oil leaks.
    Posted by MoparPartsGiant Specialist
    Q:
    How to remove the oil pan in Hemi engine on Ram 1500? Posted by Customer
    A:
    Make sure the engine is completely cool before starting to remove the oil pan. First, disconnect the battery cable from the negative terminal then jack up and secure the vehicle using jack stands. Then drain out engine oil and replace the oil filter. Remove fan with shroud and dust cover or transmission brace. Disconnect automatic transmission cooler lines from radiator and move them aside. Take away crossmember beneath oil pan (4WD models have front crossmember mounting bolts), if any, unbolt steering gear without disconnecting fluid lines, indicating front driveshaft position prior to removing it from front axle. Safely support front axle with jacks at each end and remove axle mounting bolts in order to lower front axle sufficiently for removal of oil pan. Support engine above with either an engine hoist or a support fixture while reducing some weight on engine and taking out through-bolts from engine mounts for all models. Further raise engine if necessary, take out transmission mount and lift transmission for more clearance or space. Then unscrew all the bolts holding down oil pan ensuring that gentle force is applied until it comes loose from the engine so as not to spoil rubber gasket by hitting it with rubber mallets. Be careful when prying on gasket not to overdo it.Once there is enough space pull off oil pump pick-up tube followed by windage tray/gasket assembly which should be thrown away too. Clean sludge from inside of the pan using solvent; make sure that both surfaces of its mounting area as well as those of engine block are thoroughly cleaned; they were recently wiped clean with rag soaked in brake cleaner too. Mount a new O-ring on each side of this part before fastening bolts in sequence shown here. Replace another windage tray gasket assembly but ensure alignment studs are positioned correctly into block's holes. Positioning it on top aligning its' holes properly so as not to disrupt anything if windage tray/gasket is used while tightening bolts by hand. Finally, tight fasteners in order as specified patterns and complete the remaining steps in reverse order. Top off with correct oil type and amount, install a new oil filter, check for leaks when engine starts then return vehicle back into service.
    Posted by MoparPartsGiant Specialist
    Q:
    How to remove and install an oil pan in 3.7L V6 and 4.7L V8 engine on Ram 2500? Posted by Customer
    A:
    Disconnect the cable from the negative terminal of the battery. Apply the parking brake and block the rear wheels. Raise the front of the vehicle and place it securely on jackstands. Drain the engine oil. If equipped, remove the skid plate. Remove the transmission oil cooler lines. Remove the front crossmember. Attach an engine hoist or an engine support fixture to the lifting eyes on the engine, raise the engine just enough to take the weight of the engine off the engine mounts, then remove the engine mount through-bolts. Raise the engine until the engine fan is almost in contact with the fan shroud. Remove the bolts and nuts, noting the stud locations, then carefully separate the oil pan from the block. Don't pry between the block and the pan or damage to the sealing surfaces and gasket could occur and oil leaks may develop. Instead, tap on the side of the oil pan with a rubber mallet if necessary to break the gasket seal. Remove the two nuts and one bolt that secures the oil pump pick-up tube and windage tray. Drop the pick-up tube into the oil pan, then remove the pick-up tube, windage tray and oil pan as a unit. Clean the oil pan with solvent and remove any gasket material from the block and the pan mating surfaces. Clean the mating surfaces with lacquer thinner or acetone and make sure the bolt holes in the block are clear. Check the oil pan flange for distortion, particularly around the bolt holes. Inspect the oil pan gasket for cuts and tears, replacing it if necessary. If the gasket is in good condition, it can be reused. Place the pick-up tube and oil pan gasket/windage tray in the oil pan and position the oil pan on the engine. Always use a new 0-ring on the pick-up tube and tighten the pick-up tube-to-oil pump bolt first. Tighten the oil pump pick-up tube bolt to the torque. After the oil pan bolts are started, them in several steps in a criss-cross pattern starting from the center and working out to the ends. Tighten them to the torque. The remainder of installation is the reverse of removal. Refill the engine with oil and replace the oil filter. Run the engine until normal operating temperature is reached and check for leaks.
    Posted by MoparPartsGiant Specialist
    Q:
    How to remove and reinstall the oil pan in diesel engine on Ram 3500? Posted by Customer
    A:
    Disconnect the cables from the negative terminals of the batteries. Drain the engine oil. Raise the vehicle and support it securely on jackstands. Remove the oil dipstick. For 2WD models, remove the fan and fan shroud. Remove the starter. Remove the transmission. Remove the flywheel housing and the driveplate. Remove the steering gear mounting bolts and lower the steering gear. For 4WD models, unbolt the radiator shroud but don't remove it. Attach an engine support fixture or a hoist to the engine lift brackets with a chain. Raise the engine slightly, then remove the front engine mount through-bolts. Continue raising the engine until sufficient clearance is obtained under it. Remove the two bolts from the front of the engine block support. Remove the oil pan bolts and use a putty knife between the block and the pan to break the gasket seal. Lower the pan to access and remove the two bolts retaining the oil suction tube near the front of the block. Lower the suction tube into the oil pan and remove the oil pan and suction tube together. Clean the interior of the oil pan with rags and solvent and clean the oil suction tube. Also clean the pan mounting surface of the block of any sealant, gasket material or oil. On the engine, apply a small bead of RTV sealant to the block and front cover joints, and the block and the rear seal retainer joints. Attach a new gasket to the oil suction tube mounting flange and place the suction tube into the pan, with the mounting flange at the front. Raise the oil pan up next to the block and attach the oil suction tube to the block. Install the oil pan. Tighten the bolts, starting in the center and working towards the ends, to the torque. Install the oil pan drain plug with a new sealing washer and tighten it to the torque. Refill the engine with new oil. The remainder of installation is the reverse of removal. Start the engine and check for oil leaks.
    Posted by MoparPartsGiant Specialist
    Q:
    What initial preparations should be made before attempting to remove the Oil Pan for the 2010 Dodge Ram 1500? Posted by Customer
    A:
    Before removing the oil pan, it's important to disconnect the battery's negative terminal and securely raise the front of the vehicle on jackstands. Apply the parking brake and block the rear wheels for safety. Additionally, drain the engine oil.
    Posted by MoparPartsGiant Specialist
    See Complete Installation and Repair Tips

Genuine Mopar Part 53021334AF, the Right Choice

To ensure reliability, purchase Mopar part # 53021334AF Engine Oil Pan. It is sometimes referred to as Oil Pan. The OEM parts should be used when the Mopar owners want to maximize their driving experience. The high-tech factories that produce these parts utilize sophisticated technology specifically designed to meet stringent factory requirements. Additionally, they are thoroughly tested and can thus be used with reliability by Mopar owners. This part fits specific Dodge Ram 1500, Ram 2500, and Ram 3500 models. It fits Ram 1500, 2500, 3500.

MoparPartsGiant.com is a leading supplier of genuine Mopar parts and accessories such as 53021334AF Engine Oil Pan. Wondering where to find exceptional quality and affordable OEM Mopar parts? You have already come to the right place. Our website boasts a huge selection of genuine Mopar parts at attractive prices. Further, all parts come with a manufacturer's warranty. For detailed Ram parts information, click here.

Why choose Mopar Parts Giant

  • Dedicated Service

    Your complete satisfaction is our #1 goal

  • Lowest Prices

    Best deals on genuine OE parts from dealerships

  • Fast Delivery

    Orders are processed and delivered promptly