My Garage
My Account
Cart
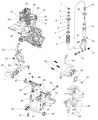
Genuine 2000 Chrysler Cirrus Control Arm
Suspension Arm- Select Vehicle by Model
- Select Vehicle by VIN
Select Vehicle by Model
orMake
Model
Year
Select Vehicle by VIN
For the most accurate results, select vehicle by your VIN (Vehicle Identification Number).
3 Control Arms found


 Product Specifications
- Other Name: Arm-Control; Lower Control Arm
- Position: Driver Side
- Item Weight: 17.20 Pounds
- Item Dimensions: 24.1 x 12.3 x 4.2 inches
- Condition: New
- Fitment Type: Direct Replacement
- SKU: 4616923
- Warranty: This genuine part is guaranteed by Mopar's factory warranty.
2000 Chrysler Cirrus Suspension Control Arm
Part Number: 4616922$233.68 MSRP: $280.00You Save: $46.32 (17%)Product Specifications- Other Name: Arm-Control; Lower Control Arm
- Position: Passenger Side
- Item Weight: 17.00 Pounds
- Item Dimensions: 17.5 x 16.6 x 4.1 inches
- Condition: New
- SKU: 4616922
- Warranty: This genuine part is guaranteed by Mopar's factory warranty.


 Product Specifications
- Other Name: Wiring Arm Upper Form ; Arm Control; Upper Control Arm
- Position: Passenger Side
- Item Weight: 9.20 Pounds
- Condition: New
- Fitment Type: Direct Replacement
- SKU: 4656240
- Warranty: This genuine part is guaranteed by Mopar's factory warranty.
2000 Chrysler Cirrus Control Arm
On our website, we proudly offer genuine 2000 Chrysler Cirrus Control Arm at the market's great competitive prices. We are confident that choosing brand new OEM 2000 Chrysler Cirrus Control Arm from our site will save you both trouble and money.
2000 Chrysler Cirrus Control Arm Parts Questions & Experts Answers
- Q: How to Remove and Install the Suspension Lower Control Arm on 2000 Chrysler Cirrus?A: To remove the front suspension lower control arm, begin by loosening the wheel lug nuts, raising the front of the vehicle, and supporting it with jackstands. Remove the wheel, then take off the brake caliper and support it with wire to prevent strain on the brake hose. Remove the brake disc from the front hub/bearing assembly. If the vehicle has 15-inch wheels, remove the ball joint heat shield from the steering knuckle by taking out the two bolts. Loosen the lower ball joint castle nut and use a hammer to strike the boss on the steering knuckle until it separates from the lower ball joint stud. Be careful not to damage the lower control arm, ball joint grease seal, or inner CV joint during this process. Once the ball joint stud is released, remove the castle nut. Next, remove the shock absorber clevis-to-lower control arm bolt and detach the clevis from the lower control arm. Then, disconnect the stabilizer bar link from the lower control arm and remove the bolts attaching the stabilizer bar bushing clamp to the front suspension cross member and the vehicle body. Lower one side of the stabilizer bar away from the lower control arm. Remove the nut and bolt attaching the lower control arm to the front suspension cross member, and then separate the front and rear of the lower control arm from the front suspension cross member, being cautious not to damage the ball joint seal against the steering knuckle during this step. Check the bushings in the lower control arm for signs of deterioration and replace them if necessary at an automotive machine shop.For installation, start by placing the rear and then the front of the lower control arm into the front suspension cradle without tightening the bolts at this time. Connect the lower ball joint to the steering knuckle and tighten the castle nut to the specified torque, then install a new cotter pin. Reverse the removal steps for the remaining components, ensuring to install the ball joint heat shield to prevent boot failure due to excessive heat from the brake disc. After installing the clevis on the lower control arm, use a floor jack under the lower ball joint to raise the lower control arm to simulate normal ride height. Tighten the lower control arm-to-cross member bolts and the shock absorber clevis-to-lower control arm bolt/nut to the specified values. Install the brake disc and caliper, tightening the caliper mounting bolts to the specified torque. Finally, install the wheel and lug nuts, lower the vehicle, and tighten the lug nuts to the specified torque.
Related 2000 Chrysler Cirrus Parts
 2000 Chrysler Cirrus Control Arm Bushing
 2000 Chrysler Cirrus Ball Joint
 2000 Chrysler Cirrus Bump Stop
 2000 Chrysler Cirrus Axle Beam
 2000 Chrysler Cirrus Coil Spring Insulator
 2000 Chrysler Cirrus Leaf Spring Bushing
 2000 Chrysler Cirrus Rear Crossmember
 2000 Chrysler Cirrus Shift Cable