My Garage
My Account
Cart
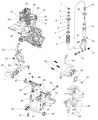
Genuine Chrysler Cirrus Control Arm
Suspension Arm- Select Vehicle by Model
- Select Vehicle by VIN
Select Vehicle by Model
orMake
Model
Year
Select Vehicle by VIN
For the most accurate results, select vehicle by your VIN (Vehicle Identification Number).
3 Control Arms found


Chrysler Cirrus Suspension Control Arm
Part Number: 4616922$233.68 MSRP: $280.00You Save: $46.32 (17%)


Chrysler Cirrus Control Arm
The Control Arm in Chrysler Cirrus cars is an important link between the frames of the car and the wheels it holds suspension parts like the shock absorbers and springs. These arms turn depending with the road fabric, enabling the wheels to rotate vertically. Depending on their design, all the control arms incorporate bushings in their connection with the frame of the vehicle and ball joints in the connection to the knuckle or axle. The latter models of Cirrus may come with stronger cast iron or aluminum control arms since they are comparatively light and long-lasting. These aspects are critical for wheel alignment, efficient handling, and the distribution of the tire's wear. For those who want additional toughness and capability in regard to performance control arms, there are other versions that are designed for, high speed adjustments, and modified ride height.
Looking for affordable and high-quality auto parts? Then you have already arrived at the proper online shop. We offer all Chrysler Cirrus Control Arm at great affordable prices. Moreover, all genuine Chrysler Cirrus Control Arm come with a manufacturer's warranty. In the long run, you would realize you have saved a lot of trouble and money with OEM parts from here.
Chrysler Cirrus Control Arm Parts Questions & Experts Answers
- Q: How to Replace the Upper Control Arm on a Chrysler Cirrus?A:Loosen the rear wheel lug nuts, raise the entire rear of the vehicle and support it securely on jackstands. Remove the rear wheels. Remove the shock absorber clevis bracket bolt and nut from both sides of the vehicle. Remove the muffler support bracket from the rear frame rail. Remove the rear exhaust pipe hangar from the suspension crossmember, then ease the exhaust system while it drops down as far as possible. Remove the cotter pin and loosen the castle nut attaching the upper control arm balljoint to the knuckle. With the castle nut loosened a few turns, detach the balljoint stud from the knuckle using a puller. Support the suspension crossmember with a hydraulic jack and a wooden block on the jack. If the vehicle has ABS, remove the routing clips for the wheel speed sensor cable from brackets on the upper control arm. Remove the nuts and bolts on each side of the vehicle which attach both rear Lateral Links and both front lateral links to the knuckles. Remove the bolts attaching the suspension crossmember to the rear frame rails. Lower the suspension crossmember using the hydraulic jack a sufficient distance to remove the upper control arm pivot bolts which attach the control arm pivot bar to the crossmember. Remove the two upper control arm mounting bolts from the suspension crossmember. Remove the upper control arm from the crossmember. The upper control arm, bushings, and pivot bar are serviced as a complete assembly. Only the balljoint and balljoint seal are replaceable. Replace the balljoint and balljoint seal with the control arm removed from the vehicle. Installation is the reverse of removal. When installing the suspension crossmember, install a drift into the positioning holes to properly locate the suspension in the vehicle body. Tighten fasteners to the torque. Remove the drifts. Drive the vehicle to an alignment shop to check rear wheel camber and toe and adjust as necessary.


