My Garage
My Account
Cart
Genuine Chrysler Cirrus Coil Springs
Strut Spring- Select Vehicle by Model
- Select Vehicle by VIN
Select Vehicle by Model
orMake
Model
Year
Select Vehicle by VIN
For the most accurate results, select vehicle by your VIN (Vehicle Identification Number).
8 Coil Springs found


Chrysler Cirrus Front Suspension Coil Spring
Part Number: 4695696$21.51 MSRP: $27.37You Save: $5.86 (22%)


Chrysler Cirrus Coil Springs
Chrysler Cirrus Coil Springs are imperative parts that bear the burden of the car and help in absorbing bumps, thus not flattening and not altering height either. These springs are of different categories such as linear rate, progressive and the dual rate springs where each of them has its advantages in the wheelchair handling systems and the general ride quality of the wheelchair. Also, Cirrus Coil Springs can be up right to Variable Rate for extra performance in loading or Cargo Coil for further loading capacity. Owners of the Chrysler Cirrus can set the ground height with adjustable coilovers, or height adjustable springs and get one's wanted gap between the tire and fender on each wheel without having to buy a completely new lowering kit you will have to buy with every change of wheel and tire type.
Looking for affordable and high-quality auto parts? Then you have already arrived at the proper online shop. We offer all Chrysler Cirrus Coil Springs at great affordable prices. Moreover, all genuine Chrysler Cirrus Coil Springs come with a manufacturer's warranty. In the long run, you would realize you have saved a lot of trouble and money with OEM parts from here.
Chrysler Cirrus Coil Springs Parts Questions & Experts Answers
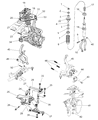
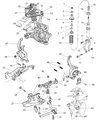
- Q: How to Disassemble a Shock Absorber Assembly and Coil Springs on Chrysler Cirrus?A:To disassemble the shock absorber assembly, start by removing it and reinstalling the clevis bracket. Clamp the shock absorber in a vise and compress the coil spring. Remove the damper rod nut, washer, upper control arm mounting bracket, and isolator bushings. Take off the upper and lower isolator bushings, sleeve, and upper spring isolator. Remove the washer, dust shield, compressed coil spring, jounce bumper, and sleeve. Inspect the shock absorber for rod binding and check the shock mount, upper spring seat/isolator, and coil spring for any damage. To assemble, reverse the steps. Install the sleeve on the shock absorber rod with the undercut side facing downward. Reinstall the top and bottom shock absorber rod bushings. Finally, install the shock absorber/coil spring assembly.

Related Chrysler Cirrus Parts
 Chrysler Cirrus Bump Stop
 Chrysler Cirrus Coil Spring Insulator
 Chrysler Cirrus Leaf Spring Bushing
 Chrysler Cirrus Rear Crossmember