My Garage
My Account
Cart
Genuine Chrysler Imperial Door Lock Cylinder
Door Lock Cylinder Tumbler- Select Vehicle by Model
- Select Vehicle by VIN
Select Vehicle by Model
orMake
Model
Year
Select Vehicle by VIN
For the most accurate results, select vehicle by your VIN (Vehicle Identification Number).
3 Door Lock Cylinders found

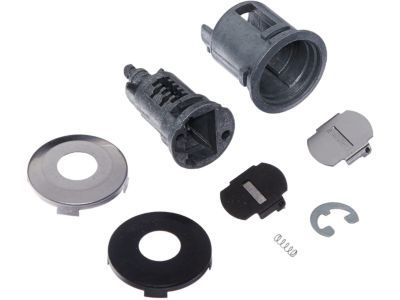
Chrysler Imperial Cylinder - Door Lock Uncoded
Part Number: 4720931$22.75 MSRP: $45.70You Save: $22.95 (51%)
Chrysler Imperial Door Lock Cylinder
The Door Lock Cylinder in Chrysler Imperial vehicles plays the role of opening and closing the doors with help of the car key. This is fitted at the front doors of the car and is highly significant for safety of the doors that give access to the interiors of the car. At times, it becomes very hard to operate and this can be evidenced from a key that either does not turn in the Chrysler Imperial Door Lock Cylinder or gets stuck due to increased wear that comes as a result of repeated use of this car part. Unlike most of the modern cars most Chrysler Imperial cars employ the door lock cylinder mechanism. Signs that suggest there is a need for Door Lock Cylinder repair or replacement include, Stiffness and lock jam in the key pad and general wear out of the Door Lock Cylinder. This article was helpful in identifying the signs of wear that could indicate a problem with the locking system for Chrysler Imperial vehicles so those problems do not get worse.
Looking for affordable and high-quality auto parts? Then you have already arrived at the proper online shop. We offer all Chrysler Imperial Door Lock Cylinder at great affordable prices. Moreover, all genuine Chrysler Imperial Door Lock Cylinder come with a manufacturer's warranty. In the long run, you would realize you have saved a lot of trouble and money with OEM parts from here.
Chrysler Imperial Door Lock Cylinder Parts Questions & Experts Answers
- Q: How do you replace the Door Handle,latch and lock cylinder on Chrysler Imperial?A:When installing a new latch, simply close the window and then take off the door trim panel and the watershield. First, if this is the earlier model, unscrew two Torx-head link rods from the latch, then remove the three Torx-head mounting screws if they are overtightened, using an impact-type screwdriver if possible. Closely unscrew the latch then place the new latch and screw it in tightly until they are tightly fixed. Connect the link rods to the latch and ensure that the door will close well, if the latch is an issue, engage the screws and adjust the latch until the door closes properly with the handle flat. After that tighten the linkage adjusting screw with a 5/32-inches hex-head wrench through the adjustment hole, after that, move the squab up in the slot to remove extra Loose from linkage. For the lock cylinder of the outside door handle, it is necessary to disconnect the connecting link and then push the retainer of the key lock cylinder with use of a screwdriver to pull the lock cylinder out of the door and the process of installation is opposite to the mentioned procedure. To remove the outside handle, push down on the end of the remote control link which disengages the latch, unscrew the two nuts on the mounting plate and remove the handle from the door. Last but not the least, position the handle, connect the link and fix the nuts properly on to the Link fixed on Link rod.


