My Garage
My Account
Cart
Genuine Chrysler PT Cruiser Hood Cable
Hood Release Cable- Select Vehicle by Model
- Select Vehicle by VIN
Select Vehicle by Model
orMake
Model
Year
Select Vehicle by VIN
For the most accurate results, select vehicle by your VIN (Vehicle Identification Number).
1 Hood Cable found


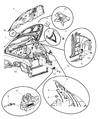
Chrysler PT Cruiser Hood Latch Cable
Part Number: 4725000AA$77.72 MSRP: $116.00You Save: $38.28 (33%)
Chrysler PT Cruiser Hood Cable
You can quickly pop the hood with the Chrysler PT Cruiser Hood Cable for hassle-free routine checks. The Hood Cable runs from the cabin release handle to a junction beneath Chrysler sheet metal before splitting toward the twin latches, pulling them open when the lever's pulled. After prolonged exposure to heat, vibrations, and moisture, the inner wire may become worn or stretched, while the outer sheath may also crack, allowing moisture to penetrate and accelerate corrosion. A cable that is maintained properly makes the release action light. If this happens, the hood will usually stay stubbornly shut, and Chrysler PT Cruiser owners are better off replacing the cable than forcing the latch. Early models of PT Cruiser were assembled with a single continuous Hood Cable, whereas later models applied two-piece Hood Cable designs with a primary lead to the junction and shorter secondary leads to each latch so that a specific Hood Cable could be replaced quicker and repair time shortened. The Chrysler mechanism is regularly checked, keeping every PT Cruiser owner confident.
Looking for affordable and high-quality auto parts? Then you have already arrived at the proper online shop. We offer all Chrysler PT Cruiser Hood Cable at great affordable prices. Moreover, all genuine Chrysler PT Cruiser Hood Cable come with a manufacturer's warranty. In the long run, you would realize you have saved a lot of trouble and money with OEM parts from here.
Chrysler PT Cruiser Hood Cable Parts Questions & Experts Answers
- Q: How to remove and install the hood cable and hood latch on the Chrysler PT Cruiser?A:This is done by opening the Hood, and using the prop rod to hold it in position then drawing marks around the new hood latch assembly to aid in alignment of the new latch. Thirdly, you have to take out the bolts, and then unbolt the latch assembly from the radiator support then, disconnect the release cable from the hood latch assembly. For installation, make sure the hood latch assembly fits into its marked position on the radiator support then put in the nuts and tighten them in order to ensure that the operation of the hood latch is smooth and as required adjust it until it assumes the right position. The cable can be removed by disconnecting it from the hood latch, unhooking it from the clips on the radiator support and taking out the left front kick panel inside the car to get access to the bolts of the handle of the hood release. You can now take out the bolts that connect the hood release handle/cable assembly to the cowl panel, then there is a push-in retainer coupled with a cable grommet that needs to be unclip from the firewall below the dash. Take a piece of heavy string or flexible wire and fix it to the engine compartment end of cables and then pull through the fire wall to the vehicle. For installation, take the string or wire and attach it to the new cable and using the same process reverse it back through the firewall in to the engine compartment then follow the rest of steps in reverse order.


