My Garage
My Account
Cart
Genuine Dodge Grand Caravan Piston
Engine Pistons- Select Vehicle by Model
- Select Vehicle by VIN
Select Vehicle by Model
orMake
Model
Year
Select Vehicle by VIN
For the most accurate results, select vehicle by your VIN (Vehicle Identification Number).
21 Pistons found


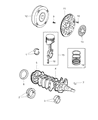
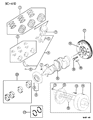
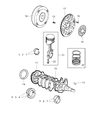
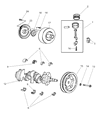
Dodge Grand Caravan Piston V6 W/PIN Std B
Part Number: MD119671$28.51 MSRP: $36.27You Save: $7.76 (22%)


| Page 1 of 2 |Next >
1-20 of 21 Results
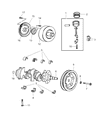
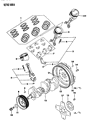
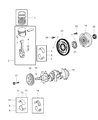
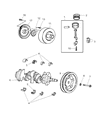
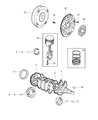
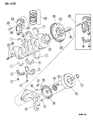
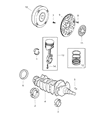
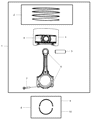
Dodge Grand Caravan Piston
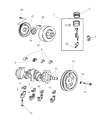
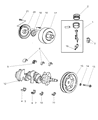
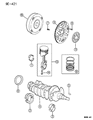
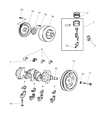
A Dodge Grand Caravan vehicle depends on its Piston as an essential internal combustion engine part applied to convert combustion energy into the power that moves the vehicle. The Piston functions as a mechanism by moving force from pressure buildup of gases toward the crankshaft to deliver maximum engine performance. The production of aluminum alloys provides strength to Pistons that also benefit from lightweight properties in their construction while designers can add cooling cavities and gas-tight Piston rings to their designs. The different Piston kinds applied throughout Grand Caravan versions consist of trunk Pistons for side force support along with crosshead parts built for large diesel engines that improve lubricating abilities and cut down friction. Slipper system parts serve high-speed applications to provide balanced operation and racing Dodge replacement units ensure lightweight strength properties for operating at maximum RPMs. The different Dodge Grand Caravan replacement part types fill distinct performance requirements that boost engine efficiency as well as product life span.
Looking for affordable and high-quality auto parts? Then you have already arrived at the proper online shop. We offer all Dodge Grand Caravan Piston at great affordable prices. Moreover, all genuine Dodge Grand Caravan Piston come with a manufacturer's warranty. In the long run, you would realize you have saved a lot of trouble and money with OEM parts from here.
Dodge Grand Caravan Piston Parts Questions & Experts Answers
- Q: What steps must be taken before removing the piston and connecting rod assemblies on Dodge Grand Caravan?A:Prior to removing the piston and connecting rod assemblies, the Cylinder Head(s), oil pan, and oil pump must be taken off. Use your fingernail to check for any ridge that may have formed at the upper limit of ring travel, approximately 1/4-inch down from the top of each cylinder. If ridges are present due to carbon deposits or cylinder wear, they must be completely removed with a special tool, as failure to do so may result in piston breakage. After removing the ridges, turn the engine upside down with the Crankshaft facing up. Before removing the connecting rods, check the endplay using feeler gauges; if the endplay exceeds the service limit, new connecting rods may be necessary. Ensure that connecting rods and caps are marked for identification, and if not, use a small center-punch to create indentations. Loosen the connecting rod cap nuts gradually until they can be removed by hand, then take off the number one connecting rod cap and bearing insert without dropping the insert. Protect the crankshaft journal and cylinder wall by slipping a short length of plastic or rubber hose over each connecting rod cap bolt as the piston is removed. Push the connecting rod/piston assembly out through the top of the engine using a wooden or plastic hammer handle, ensuring all ridge material has been removed. Repeat this process for the remaining cylinders. After removal, reassemble the connecting rod caps and bearing inserts in their respective rods and install the cap nuts finger tight to prevent damage to the bearing surfaces. Avoid separating the pistons from the connecting rods.

Related Dodge Grand Caravan Parts
 Dodge Grand Caravan Drive Belt
 Dodge Grand Caravan Drain Plug
 Dodge Grand Caravan Engine Cover
 Dodge Grand Caravan EGR Valve Gasket
 Dodge Grand Caravan Drain Plug Washer
 Dodge Grand Caravan EGR Tube
 Dodge Grand Caravan Engine Mount
 Dodge Grand Caravan Harmonic Balancer
 Dodge Grand Caravan Drive Shaft