My Garage
My Account
Cart
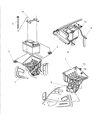
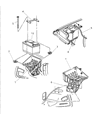
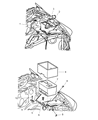
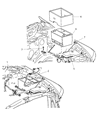
Genuine Dodge Ram 3500 Battery Cable
Car Battery Cable- Select Vehicle by Model
- Select Vehicle by VIN
Select Vehicle by Model
orMake
Model
Year
Select Vehicle by VIN
For the most accurate results, select vehicle by your VIN (Vehicle Identification Number).
71 Battery Cables found


Dodge Ram 3500 Battery Switch Cable
Part Number: 56017788AB$318.89 MSRP: $481.00You Save: $162.11 (34%)


Dodge Ram 3500 Battery Negative Wiring
Part Number: 56020688AC$129.38 MSRP: $193.00You Save: $63.62 (33%)


Dodge Ram 3500 Battery Switch Cable
Part Number: 56000976AB$259.80 MSRP: $390.00You Save: $130.20 (34%)

Dodge Ram 3500 Battery Cable Negative
Part Number: 56020665AE$191.25 MSRP: $284.00You Save: $92.75 (33%)
Dodge Ram 3500 Battery Cable Harness
Part Number: 56020665AD$191.25 MSRP: $284.00You Save: $92.75 (33%)


Dodge Ram 3500 Battery To Ground Cable
Part Number: 56000978AB$90.00 MSRP: $134.00You Save: $44.00 (33%)


Dodge Ram 3500 Battery Positive Cable
Part Number: 56020664AB$321.12 MSRP: $485.00You Save: $163.88 (34%)

Dodge Ram 3500 Battery To Ground Cable
Part Number: 56051166AA$40.48 MSRP: $57.95You Save: $17.47 (31%)

Dodge Ram 3500 Battery Negative Wiring
Part Number: 4801419AC$113.93 MSRP: $169.00You Save: $55.07 (33%)
Dodge Ram 3500 Battery Cable Harness
Part Number: 56020665AB$115.06 MSRP: $170.00You Save: $54.94 (33%)

Dodge Ram 3500 Battery Positive Wiring
Part Number: 68004564AC$165.82 MSRP: $246.00You Save: $80.18 (33%)


| Page 1 of 4 |Next >
1-20 of 71 Results
Dodge Ram 3500 Battery Cable
Dodge Ram 3500 entails Battery Cables that act as the medium through which electrical current is supplied to various parts in the vehicle so that the starter works and the engine kicks its way to life. These cables, however, may deteriorate over time, through factors such as oxidation, warping or physical damage that may affect the efficiency and the occurrence of starting problems. Different models of Dodge Ram 3500 may require different types of Battery Cables being installed, but that would be the only difference as to the type of cable and the condition of the materials being used in its construction. Superior quality replacement Battery Cables are available to guarantee that there will be no loose and poor connection between the battery and the starter due to abused connections and normal wear and tear. This is to ensure that the Battery Cables receives the periodic check up that would guarantee it the efficient performance for appropriate durations of time without developing faults along the line.
Looking for affordable and high-quality auto parts? Then you have already arrived at the proper online shop. We offer all Dodge Ram 3500 Battery Cable at great affordable prices. Moreover, all genuine Dodge Ram 3500 Battery Cable come with a manufacturer's warranty. In the long run, you would realize you have saved a lot of trouble and money with OEM parts from here.
Dodge Ram 3500 Battery Cable Parts Questions & Experts Answers
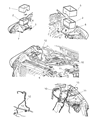
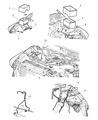
- Q: How Should I Periodically Inspect Battery Cables on Dodge Ram 3500?A:Periodically inspect the entire length of each battery cable for damage, cracked or burned insulation, and corrosion. Poor battery cable connections can cause starting problems and decreased engine performance. Check the cable-to-terminal connections at the ends of the cables for cracks, loose wire strands, and corrosion. The presence of white, fluffy deposits under the insulation at the cable terminal connection is a sign that the cable is corroded and should be replaced. Check the terminals for distortion, missing mounting bolts, and corrosion. When removing the cables, always disconnect the cable from the negative battery terminal first and hook it up last to avoid accidentally shorting the battery. Even if you're only replacing the cable for the positive terminal, always disconnect the cable from the negative battery terminal first. After disconnecting the old cables from the battery, trace each of them to their opposite ends and detach them from the starter solenoid and ground terminals. Note the routing of each cable to ensure correct installation. If a cable is bundled with another wiring harness, cut the electrical tape tying them together, remove any protective sheathing, and separate them. If you are replacing either or both of the battery cables, take them with you when buying new cables to ensure identical parts. Clean the threads of the solenoid or ground connection with a wire brush to remove rust and corrosion. Apply a light coat of battery terminal corrosion inhibitor or petroleum jelly to the threads to prevent future corrosion. Attach the cable to the solenoid or ground connection and tighten the mounting nut/bolt securely. Before connecting a new cable to the battery, make sure that it reaches the battery post without having to be stretched. Connect the positive cable first, followed by the negative cable.

Related Dodge Ram 3500 Parts


Browse by Year
2010 Battery Cable 2009 Battery Cable 2008 Battery Cable 2007 Battery Cable 2006 Battery Cable 2005 Battery Cable 2004 Battery Cable 2003 Battery Cable 2002 Battery Cable 2001 Battery Cable 2000 Battery Cable 1999 Battery Cable 1998 Battery Cable 1997 Battery Cable 1996 Battery Cable 1995 Battery Cable 1994 Battery Cable