Make sure this part fits

Chrysler 4621844 Timing Belt

1995-2010 Chrysler 4621844

Customer Questions & Expert Answers (10)
4621844 Mopar Timing Belt Product Photo 1 of 2
  • Part Description
    Belt Timing
  • Manufacturer
    Mopar
Make sure this part fits
$68.51 MSRP: $102.00
You Save: $33.49 (33%)
1
ADD TO CART
  • Related Parts
  • Specifications
  • Fitment
  • Q&A
  • Product Specifications

    BrandGenuine Chrysler
    Manufacturer Part Number4621844
    Part DescriptionBelt Timing
    Other NamesTiming Belt
    Item Dimensions20.1 x 1.5 x 1.4 inches
    Item Weight0.70 Pounds
    ConditionNew
    Fitment TypeDirect Replacement
    ManufacturerMopar
    SKU4621844
    WarrantyThis genuine Mopar part is guaranteed by Mopar's factory warranty.
    Shipping & ReturnShipping Policy Return Policy
    Warning: California's Proposition 65
  • Vehicle Fitment

    Year Make Model Engine Important vehicle option details
    1995-2000 Chrysler Cirrus4 Cyl 2.4LLX, LXi
    2000 Chrysler Grand Voyager
    2001-2010 Chrysler PT Cruiser4 Cyl 2.4LBase, Base Convertible, Classic, GT, GT Convertible, Limited, Touring, Touring Convertible
    2001-2006, 1996-1999 Chrysler Sebring4 Cyl 2.4LBase Convertible, Base Sedan, GTC Convertible, JX, JXi, Limited Convertible, Limited Sedan, LX Convertible, LX Sedan, LXi Sedan, Touring Sedan
    1998-2007, 1996 Chrysler Town & CountryBase, EL, LX FWD, LX Long Wheelbase FWD, LX Short Wheelbase FWD, LXi FWD, SX
    2000-2003 Chrysler Voyager4 Cyl 2.4LBase, EC, LX
  • Customer Questions & Expert Answers

    Q:
    Is this part guaranteed to fit my truck ? Posted by MoparPartsGiant Specialist
    A:
    You can Select Your Vehicle to check if 4621844 fits your vehicle.
    Posted by MoparPartsGiant Specialist
    Installation and Repair Tips
    Q:
    What precautions should be taken when replacing a timing belt to avoid engine damage in four cylinder engine on Chrysler Cirrus? Posted by Customer
    A:
    If the timing belt breaks while the engine is still running, valves can be damaged; an engine compression test is thus required after the belt has been fixed. The crankshaft and camshaft(s) should not be turned after the timing belt has been removed to prevent the damage to the valves. Start with the number one piston being set at the Top Dead Centre, then remove the negative battery terminal, and finally the drivebelts. Insert a large screwdriver or bar to hold the crankshaft damper pulley stationary, then, unscrew the large bolt in the center of the pulley. Replace pulley with 3-jaw puller with the right insert to safeguard the crankshaft bolt thread. Next the crankshaft pulley is removed and the crankshaft bolt is then replaced with one that has a spacer. Take off the right engine mount as well as the mounting bracket, while being keen to support the engine. Pull off the timing belt outer cover(s) and you should check the position of the camshaft sprockets and the crankshaft one which should be aligned before you remove the timing belt. Determine which of the timing belt tensioner is hydraulic or mechanical and continue with removal process. Gently remove the timing belt over the sprockets and if it's being re-used then ensure it is stored well. Check condition of crankshaft front oil seal, water pump, tensioner pulleys, timing belt; replace if worn. For installation, also ensure that the camshaft sprocket shows the appropriate timing marks before you position the crankshaft timing belt sprocket in the right position. Place the timing belt over the required elements so that no slack remains; to do this, turn the crankshaft clockwise and counter-clockwise using the tools. For those engines with the mechanical tensioner, it is advised to pull the retaining pin and rotate the crankshaft clockwise and there is some kind of stiffness, then it is paramount that there is contact between the valve and the piston. In hydraulic tensioners, the piston should be preloaded before mounting and applying tension to the pulley of the tensioner. Once aligned timing marks are correctly positioned, inspect the belt tension and then accomplish the procedure by the tightening of crankshaft pulley bolt and road test of the car.
    Posted by MoparPartsGiant Specialist
    Q:
    What steps should be taken if the timing belt fails while the engine is running on Chrysler PT Cruiser? Posted by Customer
    A:
    If the timing belt breaks while the engine is operating the valves can be bent and as a result an engine compression test must be performed to detect any such problems. Never engage the crankshaft with a camshaft sprocket bolt or rotate it with one in place, and never rotate the crankshaft in an anti-clockwise direction. First, arrange that an air conditioning technician evacuates the refrigerant and then recharge it, then place the #1 piston at the TDC and bat off the negative terminal. Pull the accessory drive belts, engage the parking brake, apply block to the rear wheels and then use jack stands to secure the front part of the vehicle. If installed, If equipped, Remove right inner fender splash shield, loosen Crankshaft Damper Pulley bolt Position pulley on a 3-Jaw Puller and remove it. Specifically for the 2.0L models it is required to remove the exhaust pipe from the manifold, and air conditioning lines, the coolant should be drained out and the upper radiator support cross member. Disconnect the ground strap, the power steering pump, as well as the torque strut and the engine has to be lifted with the help of a floor jack supporting the oil pan. Loosen the right engine mount and timing belt cover screws with camshaft sprocket timing marks in position before to releasing the tension of the timing belt. For 2001 and 2002 models, you should take the tensioner out but for 2003 models the tensioner can be slacken using a 6 mm Allen wrench. Slide the timing belt off the sprockets and gauge the wear that it has, also, ensure the crankshaft front oil seal is leaking or not. When installing, squeeze the tensioner pin that is for the models 2001 and 2002, make sure that the camshaft sprocket marks are lined correctly and that the crankshaft timing sprocket is in the correct position. Replace the timing belt and adjust the tension of the timing belt and then reset the position of the timing belt tensioner. Turn the crankshaft clockwise to ensure that the timing marks align and then replace the components in the reverse sequence, topping up the cooling system and bleeding the air before cranking the engine and assessing road-worthiness of the vehicle. As for 2.4 L the procedure is to some extent similar to explained above, make sure that all the marks are properly aligned, the tension being set right before tightening all the bolts on last stage.
    Posted by MoparPartsGiant Specialist
    Q:
    What precautions should be taken when replacing a timing belt to avoid engine damage in V6 engine on Chrysler Cirrus? Posted by Customer
    A:
    Some care is recommended as a timing belt may fail while the engine is on, which may lead to destruction of valves; an engine compression test should be conducted after the belt has been replaced to ascertain any extensive harm. Seat the piston closest to the timing belt sprocket when the timing belt has been removed, in order to avoid valve bending as a result of contact with the pistons if the crankshaft and cams are turned. For correct timing belt tensioning, the tool of MD 998767 is required, which is available in a dealership or from the Miller Special Tools. Start with the number one piston at the Top Dead Center, then, remove the negative terminal of the battery, and final drive belts. Realize and depart the crankshaft damper/pulley bolt one other and reinstall the crankshaft bolt for a turn with a spacer used after. Erase the upper left and lower timing belt shield, unbolt the power steering pump bracket and take off the upper-right timing belt shield. Remove the correct engine mount and make certain the engine is steady. Before removing the timing belt, position the timing marks on the crankshaft and camshaft sprockets and, if reinstalling the belt, indicate its direction of rotation. Unbolt and take out the timing belt tensioner and then ease off the timing belt, while avoiding to make contact with oil or water. The front crankshaft as well as the camshaft seals should be checked for signs of leakage, the water pump for leakage and the condition of the bearing and the tensioner and idler pulleys should be rotated to check for their roughness, while inspection of all the timing belt sprockets should be made to establish whether there is any damage to them. Check both the timing belt and the tensioner for cracks, signs of wear, or contamination and replace the belt if required; examine the tensioner unit for signs of leakage. For the installation check for proper alignment of the timing marks on both of the camshaft sprockets if misaligned correct, and ensure that the crankshaft sprocket is well aligned. Fit the timing belt at the right side of the right camshaft sprocket and over the water pump pulley on the left camshaft sprocket, and the idler pulley, then round the crankshaft sprocket within tension of the tensioner pulley. Screw the tensioner piston and fasten using an Allen wrench or drill bit, torque the tensioner pulley using the special tool. Place the tensioner assembly using the timing marks aligned and rotate the crankshaft two full cycles, feeling for the typical counter recoil that tells that the valves are developed an interference condition. Check the tension and alignment of the timing belt and if required adjust the same, ensure to reestablish the initial position and tighten the bolt of crankshaft damper/pulley.
    Posted by MoparPartsGiant Specialist
    Q:
    How to Remove and Install Timing Belt and Timing Cover in four cylinder engine on Chrysler Town & Country? Posted by Customer
    A:
    If the timing belt failed while the engine was running the chance of valve damage is probable, therefore an engine compression test should be carried out after the belt has been replaced. In the removal process, do not revimplify the crankshaft or camshafts once the timing belt is removed so as not to cause valve damage from impact by the piston. First, remove the negative battery terminal, properly jack up the vehicle placing jack stands and then remove the right inner splash shield and the accessory drive belts. You remove the crank shaft pulley by slackening the center bolt of the crank shaft pulley, if it cannot be held still by hand you could use a large screwdriver or bar to do this, use a three jaw puller to remove the pulley with the correct insert to protect the crank shaft threads. Retranslate the lower and upper timing belt covers, replace the crankshaft bolt with spacer and take out the right Engine Mount by using floor jack. I will make sure that the camshaft sprocket and the crankshaft are aligned in the right manner before the timing belt is removed and if one is to reuse it, the direction of the belt has to be marked. Relax the tensioner pulley in order make some space then remove the timing belt, and check the crankshaft front oil seal, the water pump, the tentioner, idler wheel and the timing belt for any signs of abrasion or wear. Ensure that the timing notches on the camshaft sprockets are properly aligned, turn the exhaust camshaft sprocket in the anticlockwise direction and fit in the timing belt by creating tension. Allen wrench should be used to turn the tensioner and tighten the lock bolt; then rotate the crankshaft two full rotations clockwise, if it is tight this may mean incorrect valve timing. If required rearrange the timing marks and replace the belt and other parts in the reverse sequence making sure that the crankshaft pulley bolt is tightened to the right torque before starting the car for road test.
    Posted by MoparPartsGiant Specialist
    Q:
    How to Remove and Install Timing Belt and Timing Cover in four cylinder engine on Dodge Caravan? Posted by Customer
    A:
    If the timing belt failed while the engine was running the chance of valve damage is probable, therefore an engine compression test should be carried out after the belt has been replaced. In the removal process, do not revimplify the crankshaft or camshafts once the timing belt is removed so as not to cause valve damage from impact by the piston. First, remove the negative battery terminal, properly jack up the vehicle placing jack stands and then remove the right inner splash shield and the accessory drive belts. You remove the crank shaft pulley by slackening the center bolt of the crank shaft pulley, if it cannot be held still by hand you could use a large screwdriver or bar to do this, use a three jaw puller to remove the pulley with the correct insert to protect the crank shaft threads. Retranslate the lower and upper timing belt covers, replace the crankshaft bolt with spacer and take out the right Engine Mount by using floor jack. I will make sure that the camshaft sprocket and the crankshaft are aligned in the right manner before the timing belt is removed and if one is to reuse it, the direction of the belt has to be marked. Relax the tensioner pulley in order make some space then remove the timing belt, and check the crankshaft front oil seal, the water pump, the tentioner, idler wheel and the timing belt for any signs of abrasion or wear. Ensure that the timing notches on the camshaft sprockets are properly aligned, turn the exhaust camshaft sprocket in the anticlockwise direction and fit in the timing belt by creating tension. Allen wrench should be used to turn the tensioner and tighten the lock bolt; then rotate the crankshaft two full rotations clockwise, if it is tight this may mean incorrect valve timing. If required rearrange the timing marks and replace the belt and other parts in the reverse sequence making sure that the crankshaft pulley bolt is tightened to the right torque before starting the car for road test.
    Posted by MoparPartsGiant Specialist
    Q:
    How to remove and install a timing belt in 2.5L four cylinder engine on Dodge Grand Caravan? Posted by Customer
    A:
    To remove the timing belt, start by detaching the cable from the negative battery terminal and removing all accessory drivebelts. Next, remove the bolts to detach the water pump pulley, followed by the crankshaft pulley bolts. Raise the vehicle securely on jackstands and remove the right inner splash shield before taking off the crankshaft pulley. Remove the screws and nuts holding the timing belt cover to the cylinder head and block, then take off both halves of the timing belt cover. Position the number one piston at Top Dead Center on the compression stroke, ensuring the marks on the crankshaft and intermediate shaft sprocket are aligned, and the arrows on the camshaft sprocket line up with the bearing cap parting line. Loosen the center bolt to release tension from the timing belt and remove it along with the tensioner. If equipped with air conditioning, remove the compressor and bracket, and support the engine with a block of wood and a floor jack to remove the engine mount. Inspect the tensioner pulley for roughness and excessive play, and replace if necessary. Check the timing belt for cracks, wear, and contamination, replacing it if damaged. Visually inspect the sprockets for wear and damage, replacing any that are compromised, and check for leaking engine oil below each sprocket, replacing seals as needed. For sprocket removal, hold the intermediate shaft sprocket with a pin spanner while loosening the bolt, then pull the sprocket off. Use a puller to remove the crankshaft sprocket and detach the camshaft sprocket by holding it and removing the bolt. Ensure the Woodruff keys are in place before installing the crankshaft and intermediate shaft sprockets, aligning the marks. Install and tighten the crankshaft sprocket bolt, followed by the intermediate shaft sprocket bolt, ensuring the marks remain aligned. Install the camshaft sprocket and bolt, tightening it to the specified torque while aligning the triangles on the sprocket hub with the camshaft bearing cap parting line. When installing the timing belt, ensure the marks on the sprockets are aligned, install the belt without turning any sprockets, and install the tensioner pulley with the bolt finger tight. With assistance, apply tension to the timing belt and temporarily tighten the tensioner bolt, measuring the deflection to approximately 5/16-inch. Turn the crankshaft two complete revolutions clockwise to align the belt on the pulleys, rechecking the belt deflection and tightening the tensioner pulley. Finally, verify the camshaft timing mark with the timing belt cover installed and the number one piston at TDC, ensuring the small hole in the camshaft sprocket is centered in the timing belt cover hole, and complete the installation in reverse order of removal.
    Posted by MoparPartsGiant Specialist
    Q:
    What steps should be followed when removing and installing a timing belt on Dodge Neon? Posted by Customer
    A:
    When removing the timing belt, ensure the engine is cool and position the number one piston at Top Dead Center. Disconnect the negative battery terminal and remove the accessory drive belts and spark plugs. Set the parking brake, block the rear wheels, and securely raise the front of the vehicle on jack stands. Remove the right inner fender splash shield if equipped, then loosen the large bolt in the center of the crankshaft damper pulley using a screwdriver or bar to keep it stationary. Install a 3-jaw puller to remove the damper pulley, ensuring to use the proper insert to protect the crankshaft threads. Drain the engine coolant, remove the ground strap from the engine mount bracket, and take out the power steering pump and bracket without disconnecting the fluid lines. Support the engine with a floor jack under the oil pan, then remove the right engine mount and engine mount bracket. Remove the timing belt cover and ensure the camshaft sprocket timing marks are aligned before releasing tension on the timing belt. Carefully slip the timing belt off the sprockets, keeping it away from oil or water if planning to reuse it. Inspect the timing belt and related components for wear or damage, replacing as necessary. For installation, compress the tensioner pin for hydraulic tensioners before installation, confirm the alignment of the camshaft sprocket timing marks, and position the crankshaft timing sprocket correctly. Install the timing belt, ensuring proper tension and alignment of the marks, and recheck the tensioner settings. After reinstalling all components in reverse order, start the engine and conduct a road test.
    Posted by MoparPartsGiant Specialist
    Q:
    How to remove and install the timing belt in 4.0L V6 engine on Jeep Liberty? Posted by Customer
    A:
    Cooled before starting this process. Caution: This is not a liberal engine; if the belt is ruined or installed erroneously, the engine will be heavily ravaged. During this particular procedure, do not rotate the crankshaft or the camshafts individually because certain valve problems may arise. There are several special tools required in doing these procedures therefore ensure that you get the special tools before starting. Detach the cable from negative terminal of the battery, remove the air filter housing and the coolant recovery bottle/washer fluid reservoir. Some of the preliminary steps include the following:The removal of cooling fan shroud fasteners,Disconnect the electric fan's time-related electrical connector, Taking off the fan shroud Second, take out the fan/viscous van drive assembly, put the number one piston at TDC on the compression stroke and eliminate the drivebelts, drivebelt tensioner. Take out all the mounting nuts/bolts of the air conditioning compressor and then fasten the compressor aside using wire. Take out the accessory drive bracket bolts and the bracket assembled with the idler pulleys on the side of the front of the engine. Take out all the bolts in the power steering pump and set the power steering pump and the bracket. Take off the crankshaft pulley and such kinds and sizes of bolts, that have to be mounted into the front timing belt cover. Lift the vehicle and place it on jackstands; disconnect the oil cooler hose by loosening the mounting bolt, and tie the hose aside. Be certain that the number one piston is still at TDC on the compression stroke by with the timing marks on a three timing belt sprockets. Take off the hydraulic tensioner mounting bolts and tensioner on the side of the rear cover, unscrew the arrow bolt and loosely push the pulley and the timing belt away before tightening the bolt again. Ensure the timing belt has get an arrow drawn on it that faces outward in case that is the same belt to be used again. Pull the timing belt off the sprockets and examine the tensioner and the belt to see whether or not it is cracked, peeled or worn which should alert one that it needs to be replaced. Before starting the engine, turn the crankshaft at least 2 times around manually speaking of sheer strength. Any sign of resistance, treat the situation as a problem and try to find out why resistance is being felt. Put the hydraulic timing belt tensioner into a vise, then tighten it to admit the 3mm Allen key for poppin' the plunger out. Put the belt on the crankshaft sprocket first and make sure it is tight on the tension side; next put the belt on the left camshaft sprocket, then the water pump pulley, and lastly the right camshaft sprocket and timing belt tensioner so long as the timing marks stay in place. Fit the tensioner to the side of the rear cover, then tighten the associated bolts to the grade four torque.Now that you have reached this step, and the belt is installed, press on the tensioner pulley downwards, extract the pin that holds the tensioner, and create space that will make the plunger to 'lock' against the pulley bracket. Turn the crankshaft slowly clockwise for two full revolutions and you will find the number one piston at TDC of the compression stroke. If such resistance is realised excess, find out whether there is contact between the pistons and valves. Make sure that all the timing marks are well lined up, tighten the tensioner bolt to the recommended torque and inspect the timing belt for any sign of deflection. If the belt looks too slack, change the tensioner spring. The installation of the other units is in an opposite sequence from the removal process.
    Posted by MoparPartsGiant Specialist
    Q:
    How to replace the timing belt and ensure proper alignment of the camshaft and crankshaft sprockets in 2.4L four cylinder engine on Jeep Wrangler? Posted by Customer
    A:
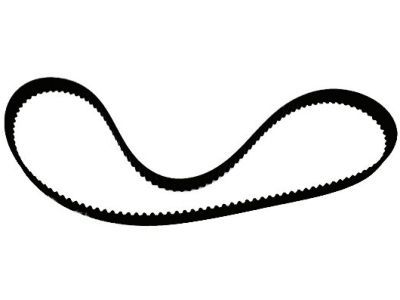
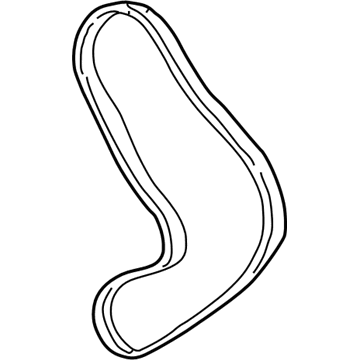
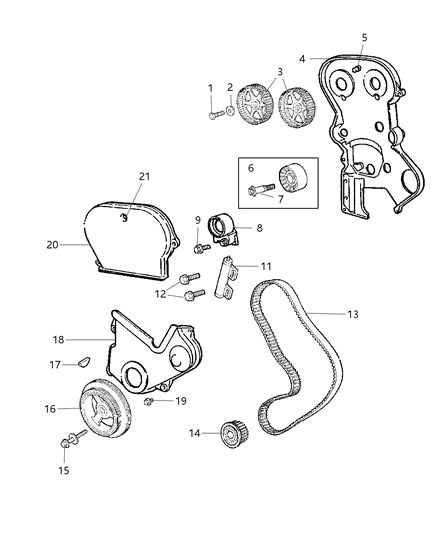
    Position the number one piston at Top Dead Center and disconnect the cable from the negative terminal of the battery. Remove the air filter housing and tube, followed by the drivebelt. Set the parking brake, block the rear wheels, raise the front of the vehicle, and support it securely on jackstands. Remove the drivebelt splash shield from underneath the vehicle. Loosen the large bolt in the center of the crankshaft damper pulley, using a large screwdriver or bar to keep the pulley stationary while loosening the bolt with a socket and breaker bar. Install a 3-jaw puller onto the damper pulley to remove it from the crankshaft, ensuring to use the proper insert to avoid damaging the crankshaft threads. If the pulley is difficult to remove, tap the center bolt of the puller with a brass mallet. Remove the drive belt tensioner and pulley assembly located below the alternator, then remove the lower and upper timing belt cover bolts and covers. Before removing the timing belt, ensure that the camshaft timing marks and the TDC mark on the crankshaft timing belt sprocket are aligned with the stationary index mark on the oil pump housing. Release tension on the timing belt by inserting a 1/4-inch Allen wrench into the belt tensioner and using a 1/8-inch Allen wrench to lock it in place. Carefully slip the timing belt off the sprockets and set it aside, placing it in a plastic bag if planning to reuse it. Rotate the tensioner pulley and idler pulley by hand to check for roughness and excess play, replacing parts as necessary, and visually inspect the sprockets for damage and wear. Inspect the timing belt for cracks, separation, wear, missing teeth, and oil contamination, replacing it if in questionable condition. Check the automatic tensioner for leaks or damage, ensuring the TDC mark on the crankshaft timing belt sprocket remains aligned with the stationary index mark on the oil pump housing. Turn the exhaust camshaft sprocket clockwise until its timing mark is slightly below the timing mark on the intake camshaft sprocket. Install the timing belt starting at the crankshaft sprocket, threading it onto the water pump sprocket, idler pulley, camshaft sprockets, and finally the tensioner, taking up tension by moving the exhaust camshaft sprocket counterclockwise until the timing marks are realigned. Use a 6 mm Allen wrench to rotate the belt tensioner counterclockwise until tension is applied to the timing belt, aligning the setting notch with the spring tang, then torque the tensioner bolt and recheck the alignment marks. Rotate the crankshaft 720 degrees to verify that the TDC marks and camshaft sprocket timing marks remain aligned; if not, reinstall the belt. Install the upper and lower timing belt covers, tighten the fasteners, install the drivebelt idler pulley, and tighten the idler pulley bolt. Finally, install the crankshaft vibration damper, washer, and pulley bolt, tightening the pulley bolt to the specified torque, with the remainder of the installation being the reverse of removal.
    Posted by MoparPartsGiant Specialist
    See Complete Installation and Repair Tips

Genuine Mopar Part 4621844, the Right Choice

To ensure reliability, purchase Mopar part # 4621844 Timing Belt. It is sometimes referred to as Timing Belt. The OEM parts should be used when the Mopar owners want to maximize their driving experience. The high-tech factories that produce these parts utilize sophisticated technology specifically designed to meet stringent factory requirements. Additionally, they are thoroughly tested and can thus be used with reliability by Mopar owners. This part fits specific Chrysler PT Cruiser, Sebring, and Town & Country models.

MoparPartsGiant.com is a leading supplier of genuine Mopar parts and accessories such as 4621844 Timing Belt. Wondering where to find exceptional quality and affordable OEM Mopar parts? You have already come to the right place. Our website boasts a huge selection of genuine Mopar parts at attractive prices. Further, all parts come with a manufacturer's warranty. For detailed Chrysler parts information, click here.

Why choose Mopar Parts Giant

  • Dedicated Service

    Your complete satisfaction is our #1 goal

  • Lowest Prices

    Best deals on genuine OE parts from dealerships

  • Fast Delivery

    Orders are processed and delivered promptly