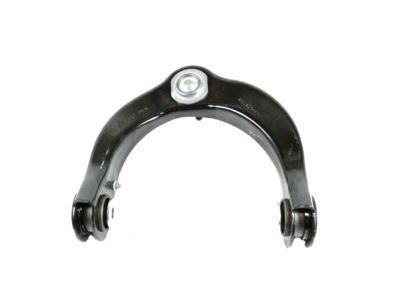
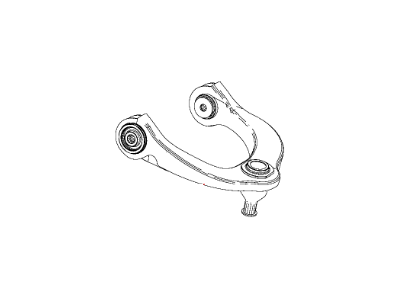
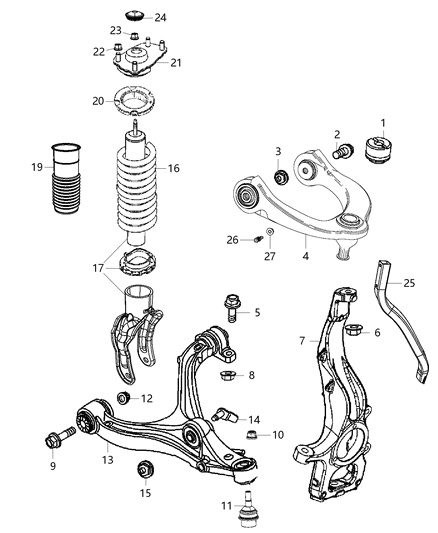
Chock the wheels on the side that is not going to be worked on, and raise the rear of the vehicle using the jack till it is securely supported by the jack stands. On the left side for the models of up to 2010, lower the fuel tank to remove the bolts of the control arm, then remove the bolts at the axle end of the upper control arm to eliminate it. Lower control arm: Lower fuel tank then the bolts and nuts securing the control arm at the axle and frame. Check for any signs of cracking or other damage in all the rubber bushings and replace all that are found to be so damaged. As with removal, the opposite procedure is used with tightness of all fixings having to be checked and tightened to the correct torque settings with the car at standard ride height. For the lateral control rod, free the wheel and lift the car with the hydraulic jack and secure the car on the jack-stand by undoing the wheel lug nuts. Lift off the wheels and should place the rear axle on a floor jack. Lateral control rod nut and bolt which is now joined to frame and axle bracket should be withdrawn then examine the rubber bushings of each for signs of wear and deterioration. The process is the opposite of removal, tightening of the control rod fasteners to the set torque while the vehicle is at normal height, followed by tightening of the wheel lug nuts to the set torque. For 2011 and more recent models, then, the rear wheels, the brake calipers and the wheel speed sensor need to be pulled off. Retract parking brake cable and take out the links provided over the lower control arm. Lift the rear coil spring with assistance from the lower control arm in the normal ride height and then remove the ball joint nut of the rear knuckle. If needed, drop the left side of the axle in order to access the lower control arm to body bolts; remove these bolts and then gently pull out the lower control arm. Fit new bushings and bolts, place in new control arm to fit the bolts and do not tighten the bolts. If the axle was lowered then raise it back to an upright position and then engage and torque the axle bolts. Screw in the ball joint and the nut with the rear knuckle; Coil spring and all the links previously removed should be assembled with screwing of the fasteners being done to the appropriate torque. Replace the cable for the parking brake and fit the brake caliper. Mount the wheels, lower the car and fasten the lower control arm-to-body bolts, to the required tightness. If necessary centre the rear wheels also and finally torque the wheel lug nuts to the specified levels. Last of all, ensure that all the parts installed are double checked and take the vehicle for a road test and then put it back into regular use. For the tension and camber links, you should unbolt the links at the body and the knuckle; the position of the cam bolt should be marked for assembly. Construction is done in the opposite manner by removal and nuts and bolts tightened to the standard tightness. In the toe link, first of all, should have the removal of all clips that hinder the toe link removal, next, the stabilizer bar bracket and fasteners, before finally marking the position of the toe link cam bolt before its removal. It is the process of putting back the components in the way that they were removed, with special emphases laid on tightening of the fasteners, to a certain torque level.