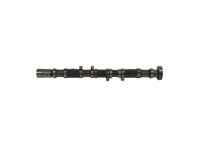
Make sure this part fits

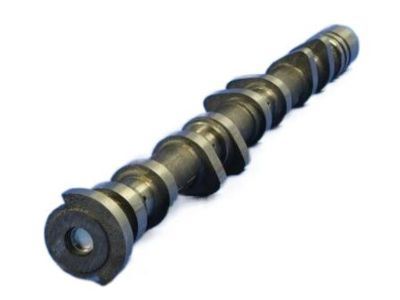
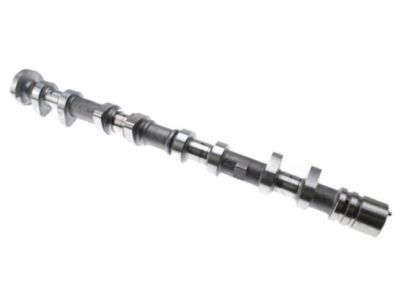
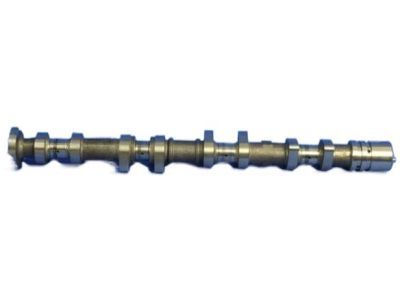
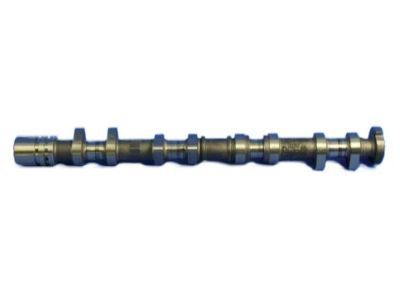
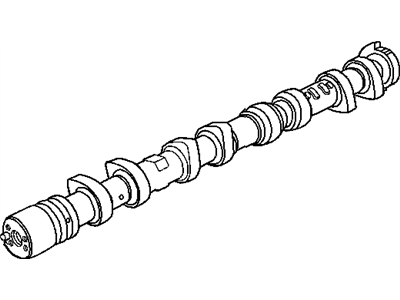
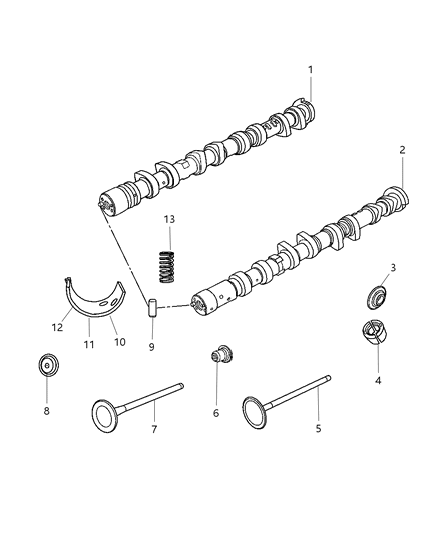
Jeep 4884736AC Engine Exhaust Camshaft

2007-2017 Jeep 4884736AC

Customer Questions & Expert Answers (8)
4884736AC Mopar Engine Exhaust Camshaft Product Photo 1 of 4
  • Part Description
    Camshaft-Exhaust
  • Replaces
    4884736AB
  • Manufacturer
    Mopar
Make sure this part fits
$219.41 MSRP: $457.00
You Save: $237.59 (52%)
1
ADD TO CART
  • Related Parts
  • Specifications
  • Fitment
  • Q&A
  • Product Specifications

    BrandGenuine Jeep
    Manufacturer Part Number4884736AC
    Part DescriptionCamshaft-Exhaust
    Other NamesCamshaft, Exhaust Camshaft
    Item Dimensions24.2 x 2.8 x 2.6 inches
    Item Weight5.10 Pounds
    ConditionNew
    Replaces4884736AB
    ManufacturerMopar
    SKU4884736AC
    WarrantyThis genuine Mopar part is guaranteed by Mopar's factory warranty.
    Shipping & ReturnShipping Policy Return Policy
    Warning: California's Proposition 65
  • Vehicle Fitment

    Year Make Model Engine Important vehicle option details
    2007-2017 Jeep Compass4 Cyl 2.0L, 4 Cyl 2.4LBase 4WD, Base FWD, Latitude 4WD, Latitude FWD, Limited 4WD, Limited FWD, Sport 4WD, Sport FWD
    2013-2017, 2010, 2007-2008 Jeep Patriot4 Cyl 2.0L, 4 Cyl 2.4LBase 4WD, Base FWD, Latitude 4WD, Latitude FWD, Limited 4WD, Limited FWD, Sport 4WD, Sport FWD
  • Customer Questions & Expert Answers

    Q:
    Is this part guaranteed to fit my truck ? Posted by MoparPartsGiant Specialist
    A:
    You can Select Your Vehicle to check if 4884736AC fits your vehicle.
    Posted by MoparPartsGiant Specialist
    Installation and Repair Tips
    Q:
    How to remove and install Camshaft in 3.5L V6 engine on Chrysler Sebring? Posted by Customer
    A:
    To dismantle different parts such as the valve cover, timing belt as well as the rocker arm, one must first take out the valve cover, then the timing belt and lastly the rocker arm. If the camshaft is having to be removed from the rear cylinder head, then the PCM must also be pulled. Lock the camshaft from rotating by placing the 1-7116 inch box end wrench on the sprocket, then torquing off the camshaft sprocket bolt and removing the sprocket from the lobe. At the other end of the cylinder head remove the camshaft thrust plate and O-ring seal, and gently pull out the camshaft being careful not to scratch the cam bearings or journals and the camshaft oil seal will also need to be removed. Following the removal of the camshaft, it is proper practice to clean it with a solvent, especially the bearing journals, which should be examined for uneven wear, pitting or seizure. In the event one is identified the cylinder head should also be checked. Take measurements on the bearing journals with the help of micrometer to know the magnititute-wear and out of round condition and similarly check the journal diameter on the cylinder head by using inside micrometer. Cam lobe heights-take the measurement of each cam lobe on the intake camshaft, take notes and observations of the measurements and compare them for excessive variance whose standard measurement is 0.001 inch (0.025mm) If the lobe heights are different by more then 0.010 inch (0.254 mm) the camshaft has to be replaced. Perform the same for the exhaust camshaft; it is crucial not to mix the intake and exhaust camshafts dimensions. The camshaft lobes should be inspected for signs of heat, cracks, chipped areas, pits and uneven wear; if the lobes are not damaged and the lobe lift variation figures are within acceptable range, the camshaft can be reused. For installation, it is advisable to apply camshaft installation lube on the camshaft bearing journals and the cams as well as applying some force to fit the camshaft into the cylinder head. Also, one should fit a new camshaft end seal at the front of the head by applying the use of a seal driver, or a deep socket. Last is to place the camshaft cover at the rear of the head but it needs a new O-ring before it is placed in the right position and that completes the process in a backward manner of the removal process.
    Posted by MoparPartsGiant Specialist
    Q:
    How to remove and install Camshaft in 2.7L V6 engine on Chrysler Sebring? Posted by Customer
    A:
    To remove the components, first disconnect the negative battery cable from the remote ground terminal, then remove the valve covers. Next, take out the primary timing chain and the primary camshaft sprockets, followed by the retaining bolts from the secondary timing chain tensioner. Verify the markings on the camshaft bearing caps, ensuring they are marked from 1 to 5 with an "I" or "E" for intake or exhaust, and check for arrow marks indicating the front of the engine. Loosen the camshaft bearing caps in reverse order of tightening, keeping them in order for reinstallation. Detach the bearing caps and remove the camshafts, secondary timing chain, and secondary tensioner as an assembly from the cylinder head, noting the differences between intake and exhaust camshafts. Remove the secondary tensioner and timing chain from the camshafts, then inspect the camshaft secondary sprockets for wear, along with the chains and tensioners for any signs of excessive wear that would necessitate replacement. After cleaning the camshaft, inspect the bearing journals for wear and damage, measuring them with a micrometer to check for excessive wear or out-of-round conditions. Measure the lobe height of each cam lobe on the intake camshaft and record the measurements, ensuring that variations do not exceed 0.010 inch (0.254 mm), and repeat the process for the exhaust camshaft. Check the camshaft lobes for any signs of heat discoloration, scoring, or uneven wear, and if they are in good condition, the camshaft can be reused. For installation, align the secondary timing chain(s) over the camshaft sprockets, ensuring the colored links face outward. Create a U-shaped tool from a paperclip to lock the secondary tensioner in place, then install it back between the camshafts and the secondary timing chain. Apply moly-based engine assembly lubricant to the camshaft lobes and journals, ensuring the rocker arms are properly seated. Install the camshafts, secondary tensioner, and timing chain as an assembly in their original position, with the marks on the sprockets and colored links facing up. Install the bearing caps and bolts, tightening them hand tight before following the proper torque sequence for the bearing cap bolts and tensioner mounting bolts. Finally, install the primary timing chain and camshaft sprockets, completing the installation in reverse order of removal.

    Posted by MoparPartsGiant Specialist
    Q:
    How to remove and install Camshaft in 3.6L V6 engine on Chrysler Sebring? Posted by Customer
    A:
    However, it is pointed out that the timing system is intricate and mistakes resulting in extreme punishments to the engine and thus this procedure is recommended for expert personnel only and if there is any doubt, consult an expert. Much attention should be paid to reviewing all the work before starting the engine. When the valve covers are off, the timing wheels that are magnetic also are exposed and any contact with magnet or magnetic field will require that they be replaced. Each camshaft timing chain can be disconnected in isolation if one has the tools for it; otherwise, the timing chain cover plus all the chains must be removed first. Start with the removal of the negative terminal of the battery, followed by loosening of the lug nuts of the right front wheel, lifting of the vehicle on the jackstands and then the removal of the right front wheel along with the drivebelt splash. Remove all the engine oil and coolant, and the drivebelt, air filter housing, resonator, and intake manifolds; also unplug all the components that are connected to the cylinder heads by using hoses and wires, and it is recommendable that all these be tagged and removed. Remove the ignition coils, take out the spark plugs, and then it is advisable to tag the ignition coils. Pop off the valve covers to get access to the magnetic timing wheels, make sure that these do not come in contact with any magnet. Twist the crankshaft clockwise in order to position the #1 piston at the optimum position of TDC on the exhaust stroke, with regard to the camshaft phaser marks. Loosen and set reference marks on those camshaft phasers that are fastened to the timing chains for easy reinstallation later on; thereafter, employ the use of the special tool that would hold the tensioner in place to enable removal of the camshaft phasers. The oil control valves should be slackened and then removed together with the phasers from the camshafts and the camshafts should be rotated to a position that is neutral before the bearing cap bolts are released and the caps are also removed. Remove the rocker arms together with hydraulic lash adjusters, and examine the camshaft bearing surfaces as well as the lobes for damages; do not forget to replace the damaged ones. To install the hydraulic lash adjusters, before being put in place, should be immersed in clean engine oil, while the rocker arm contact points should be greased, the camshaft bearing journals should be lubricated and these hydraulic lash adjusters should be equally fitted properly and carefully into the cylinder head. Put and secure the bearing caps in that order by revolving it around the arrow and check that alignment holes are in the neutral position. Slide the phasers onto the camshafts and fit the oil control valves to the bores in the camshafts-make sure the camshafts do not rotate as you do this. Lastly, turn the engine for another two full turns ensuring that the alignment marks are in correct position before offering the last touches for the installation processes and this should be done in a reverse manner of the removal processes.
    Posted by MoparPartsGiant Specialist
    Q:
    What are the steps, precautions, and tools required for removing and reinstalling camshafts and Lash Adjuster on Jeep Patriot? Posted by Customer
    A:
    Some care should be taken here as the timing system is a bit intricate and any mistake is likely to result in serious damage to the engine; it is strongly advised that only experts attempt this; where there is any doubt regarding ability, professional advice should be sought. All work should be checked for accuracy before the engine has been started again. The camshafts do not necessarily require the removal of the timing chain cover and the timing chain; although it has to be done if the necessary tools for removing the camshafts are not available. First and foremost, the engine cover has to be disconnected and then the negative , battery cable; a nut to the right front wheel has to be unscrewed; the vehicle should be raised on the jack stands, the right front wheel and the drivebelt splash shield to be extracted. After then, drain the engine oil and coolant and remove the drivebelt and the ignition coils and spark plugs and finally take off the valve cover. Turn the crankshaft until electrode No.1 is at TDC on its compression stroke and be sure that timing mark is aligned when timing chain is reinstalled, mark the camshaft phasers for their proper reassembly. Free the timing chain tensioner plug and pop up the plunger ratchet with the help of a pick, and to keep this ratchet, the special tool must be inserted. Slide in a chain holding tool between the two camshaft phasers, this is to ensure that during the phaser removal the holding tool is left in place to avoid 'unlocking' of the timing chain. The camshaft bearing caps are to be marked for right and left so that each one of them can be put in place in the proper direction and the bolts are to be loosened in the sequence in which they were tightened but in a reverse order. Take off the front camshaft bearing cap together with the remaining ones: first lift the intake camshaft upward and then, fix the chain to prevent from dropping. Remove the lower bearing from the exhaust camshaft journal and loosen and remove the bolt that holds the phaser on the camshaft and mark the Lash Adjusters so that you know in which position they go back in from which they come out. Check the condition of the camshaft bearing surfaces and the Lash Adjusters and, in the case of damage, replace the piece. This done by turning the crankshaft manually prior to starting the engine at least two revolutions and feel for any resistance. Screw the phasers onto the camshafts so that the marks face each other and tighten the bolts to the recommended turning moment. Submerge the Lash Adjusters in clean engine oil and then place them back in their proper position; it is also prime time to lubricate the camshaft bearing journals and lobes as well. Align the timing chain over the exhaust phaser sprocket and position the machined scribe lines parallel to the gasket surface, then install the camshafts over Cylinder head. There should now be no turn on the camshaft and so tighten the camshaft bearing cap and bolts in the manner prescribed with the camshaft bearing cap bolts to the specified torque. Make sure that all the marks are aligned, then, remove the Allen wrench and the holding tool of the chain, and turn the engine for two times to ensure that the marks on the camshaft are lined up. Last, apply antiseize on the timing chain tensioner plug then tighten it and end the process in the reverse taking down manner.
    Posted by MoparPartsGiant Specialist
    Q:
    What are the steps, precautions, and tools required for removing and reinstalling camshafts and Lash Adjuster on Jeep Compass? Posted by Customer
    A:
    Some care should be taken here as the timing system is a bit intricate and any mistake is likely to result in serious damage to the engine; it is strongly advised that only experts attempt this; where there is any doubt regarding ability, professional advice should be sought. All work should be checked for accuracy before the engine has been started again. The camshafts do not necessarily require the removal of the timing chain cover and the timing chain; although it has to be done if the necessary tools for removing the camshafts are not available. First and foremost, the engine cover has to be disconnected and then the negative , battery cable; a nut to the right front wheel has to be unscrewed; the vehicle should be raised on the jack stands, the right front wheel and the drivebelt splash shield to be extracted. After then, drain the engine oil and coolant and remove the drivebelt and the ignition coils and spark plugs and finally take off the valve cover. Turn the crankshaft until electrode No.1 is at TDC on its compression stroke and be sure that timing mark is aligned when timing chain is reinstalled, mark the camshaft phasers for their proper reassembly. Free the timing chain tensioner plug and pop up the plunger ratchet with the help of a pick, and to keep this ratchet, the special tool must be inserted. Slide in a chain holding tool between the two camshaft phasers, this is to ensure that during the phaser removal the holding tool is left in place to avoid 'unlocking' of the timing chain. The camshaft bearing caps are to be marked for right and left so that each one of them can be put in place in the proper direction and the bolts are to be loosened in the sequence in which they were tightened but in a reverse order. Take off the front camshaft bearing cap together with the remaining ones: first lift the intake camshaft upward and then, fix the chain to prevent from dropping. Remove the lower bearing from the exhaust camshaft journal and loosen and remove the bolt that holds the phaser on the camshaft and mark the Lash Adjusters so that you know in which position they go back in from which they come out. Check the condition of the camshaft bearing surfaces and the Lash Adjusters and, in the case of damage, replace the piece. This done by turning the crankshaft manually prior to starting the engine at least two revolutions and feel for any resistance. Screw the phasers onto the camshafts so that the marks face each other and tighten the bolts to the recommended turning moment. Submerge the Lash Adjusters in clean engine oil and then place them back in their proper position; it is also prime time to lubricate the camshaft bearing journals and lobes as well. Align the timing chain over the exhaust phaser sprocket and position the machined scribe lines parallel to the gasket surface, then install the camshafts over Cylinder head. There should now be no turn on the camshaft and so tighten the camshaft bearing cap and bolts in the manner prescribed with the camshaft bearing cap bolts to the specified torque. Make sure that all the marks are aligned, then, remove the Allen wrench and the holding tool of the chain, and turn the engine for two times to ensure that the marks on the camshaft are lined up. Last, apply antiseize on the timing chain tensioner plug then tighten it and end the process in the reverse taking down manner.
    Posted by MoparPartsGiant Specialist
    Q:
    What are the steps for the 2014 Chrysler 200 regarding the Camshaft phaser? Posted by Customer
    A:
    Slide the phaser onto the camshafts, install and tighten the bolt, dip the lifters in clean engine oil, lubricate the camshaft bearing journals, and set the timing chain over the exhaust phaser sprocket.
    Posted by MoparPartsGiant Specialist
    Q:
    What should be done with the valve cover, crankshaft, and Camshaft for the 2014 Dodge Avenger? Posted by Customer
    A:
    Remove the valve cover, rotate the crankshaft clockwise to place the no. 1 piston at TDC, and verify the timing marks are aligned, marking the camshaft phasers to the timing chains for reinstallation.
    Posted by MoparPartsGiant Specialist
    See Complete Installation and Repair Tips

Genuine Mopar Part 4884736AC, the Right Choice

To ensure reliability, purchase Mopar part # 4884736AC Engine Exhaust Camshaft. It is sometimes referred to as Camshaft. The OEM parts should be used when the Mopar owners want to maximize their driving experience. The high-tech factories that produce these parts utilize sophisticated technology specifically designed to meet stringent factory requirements. Additionally, they are thoroughly tested and can thus be used with reliability by Mopar owners. This part fits specific Jeep Compass and Patriot models.

MoparPartsGiant.com is a leading supplier of genuine Mopar parts and accessories such as 4884736AC Engine Exhaust Camshaft. Wondering where to find exceptional quality and affordable OEM Mopar parts? You have already come to the right place. Our website boasts a huge selection of genuine Mopar parts at attractive prices. Further, all parts come with a manufacturer's warranty. For detailed Jeep parts information, click here.

Why choose Mopar Parts Giant

  • Dedicated Service

    Your complete satisfaction is our #1 goal

  • Lowest Prices

    Best deals on genuine OE parts from dealerships

  • Fast Delivery

    Orders are processed and delivered promptly