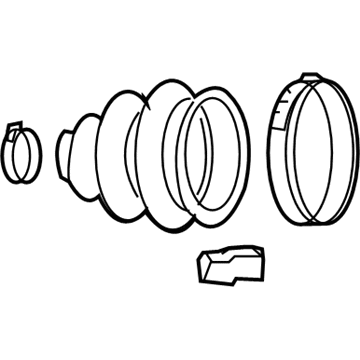
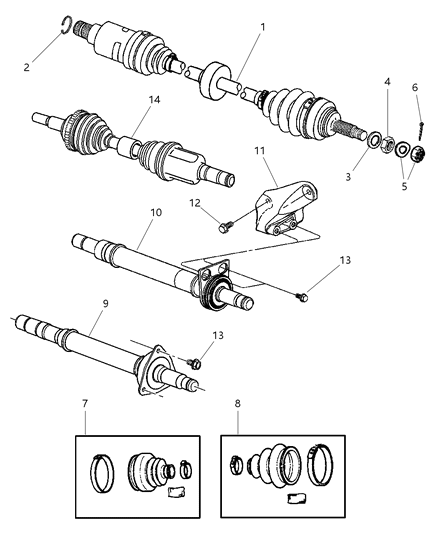
When the CV joints or boots have reached their end, one has to think through all the possibilities, because fully-constructed CV Boots may be purchased as an exchange, which will save considerable time. Prior to disassembling the vehicle it should be ensured to check on the cost and availability of parts. While the inner boots are either high temperature silicone or Hytrel thermoplastic, the outer boot is Hytrel thermoplastic; it is critical to correctly select the material when it comes to the CV joint boot replacement. Starting with the CV Boot by unbolting it and then fixing it onto a vise whose jaws should be wooden to avoid damaging it. All the CV joints must be checked for endplay and smooth running on the shaft; If a boot is damaged it should be removed with the joint to clean the parts carefully for any damage. Remove and junk the boot clamps and then gently remove the CV Boot to reveal the tripod spider. Break the spider assembly snap-ring and lay it aside and indicate the position of the tripod on the axleshaft for the reassembly. Strike the spider with a hammer using a brass drift in order to take out the spider assembly from the axleshaft, and after this, wash all the parts and then check for signs of wearage. In case one component of the inner CV joint is worn, the whole CV Boot assembly must be replaced. It is essential to wrap the splines on the inner end of the axleshaft with tape so as to protect the new boot, then install the tripod spider and snap-ring, ante greasing the areas of tripod assembly and housing. Place the sealing boot accurately in the right position that the raised bead should fit into the groove, if necessary, adjust the length of the CV joint. Even the pressure inside the boot and make sure that it is well seated at both ends. Insert the appropriate clamps to accommodate the new boot and the CV Boot is good to be fitted. For the outer CV joint, follow the disassembly of the joint, cleaning of the parts and examining it for signs of wear. Press a new sealing boot and clamp over the axleshaft, re-locate the circlip and fill the outer CV joint assembly with the grease. Synchronise the splines and force on the joint in place to the axleshaft while observing sufficient installation of the sealing boot without formation of dimples on its folds.