
My Garage
My Account
Cart
Genuine 1988 Dodge Daytona Cylinder Head
Head- Select Vehicle by Model
- Select Vehicle by VIN
Select Vehicle by Model
orMake
Model
Year
Select Vehicle by VIN
For the most accurate results, select vehicle by your VIN (Vehicle Identification Number).
5 Cylinder Heads found
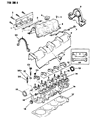 Product Specifications
- Other Name: Head, Cylinder w/EDM Injected Engine; Cylinder Head
- Item Weight: 28.80 Pounds
- Item Dimensions: 18.5 x 9.5 x 9.1 inches
- Condition: New
- Fitment Type: Direct Replacement
- SKU: 4387838
- Warranty: This genuine part is guaranteed by Mopar's factory warranty.
 Product Specifications
- Other Name: Head, Cylinder w/EDM Injected Engine
- Item Weight: 42.80 Pounds
- Item Dimensions: 19.5 x 10.5 x 10.5 inches
- Condition: New
- SKU: R0551067
- Warranty: This genuine part is guaranteed by Mopar's factory warranty.
- Product Specifications
- Other Name: Head, Cylinder w/EDM Injected Engine
- Item Weight: 42.00 Pounds
- Item Dimensions: 20.2 x 10.5 x 10.4 inches
- Condition: New
- SKU: R0552067
- Warranty: This genuine part is guaranteed by Mopar's factory warranty.
- Product Specifications
- Other Name: Head, Cylinder w/EDM Injected Engine
- Item Weight: 41.50 Pounds
- Item Dimensions: 19.5 x 10.2 x 10.6 inches
- Condition: New
- SKU: R0553077
- Warranty: This genuine part is guaranteed by Mopar's factory warranty.
- Product Specifications
- Other Name: Head, Cylinder w/EDM Injected Engine
- Item Weight: 39.50 Pounds
- Item Dimensions: 19.5 x 10.6 x 10.3 inches
- Condition: New
- Fitment Type: Direct Replacement
- SKU: R5522188
- Warranty: This genuine part is guaranteed by Mopar's factory warranty.
1988 Dodge Daytona Cylinder Head
On our website, we proudly offer genuine 1988 Dodge Daytona Cylinder Head at the market's great competitive prices. We are confident that choosing brand new OEM 1988 Dodge Daytona Cylinder Head from our site will save you both trouble and money.
1988 Dodge Daytona Cylinder Head Parts Questions & Experts Answers
- Q:How to install the Camshaft and Cylinder Head in 2.2L and 2.5L engine on 1988 Dodge Daytona?A:Before installing the cylinder head, ensure the number one piston is at top dead center, the timing belt sprockets are properly aligned, and the oil pump shaft slot is parallel to the crankshaft centerline. Position the head gasket on the engine block, pressing it into place over the alignment dowels, then place the cylinder head in position. Apply a thin coat of sealant to the threads of the head bolts and install them finger tight, noting that head bolts used in 1986 models are 11 mm in diameter and marked with an 11 on the bolt head; using 10 mm bolts from previous years can strip the threads. Tighten the head bolts to the specified torque, ensuring that the final 1/4-turn exceeds 90 ft-lbs on 1986 models, replacing any bolts that do not meet this requirement. Lubricate the valve lash adjusters with engine oil and insert them into the bores, then lightly lubricate the contact points of the valve stems and lash adjusters with assembly lube. Install the rocker arms, applying assembly lubricant to the cam lobe contact surfaces, and lubricate the top side of the rocker arms and the camshaft bearing surfaces in the head with assembly lube, wiping the camshaft with a clean, dry cloth. Lubricate the camshaft lobes with assembly lubricant and lower it into position with the sprocket keyway facing up, then apply a thin coat of assembly lubricant to the camshaft bearing caps and install them, using anaerobic-type sealant on the contact surfaces of the two end bearing caps while avoiding oil passages. Install the bearing cap nuts, tightening them evenly in 1/4-turn increments to the specified torque, and remove any excess sealant from the end bearing caps. Press the camshaft seals into the end bearing caps, seating them with a hammer and drift punch. The camshaft end play can be checked using a dial indicator or a feeler gauge; if using a feeler gauge, gently pry the camshaft toward the front of the engine and slip the gauge between the flange and the front bearing cap, comparing the measured end play to the specifications. If using a dial indicator, mount it at the front of the engine with the indicator stem touching the end of the camshaft, zero the indicator after prying the camshaft forward, then pry it in the opposite direction and observe the needle movement to determine the end play, comparing the reading to the specifications.
