
My Garage
My Account
Cart
Genuine 1997 Chrysler Cirrus Cylinder Head
Head- Select Vehicle by Model
- Select Vehicle by VIN
Select Vehicle by Model
orMake
Model
Year
Select Vehicle by VIN
For the most accurate results, select vehicle by your VIN (Vehicle Identification Number).
5 Cylinder Heads found
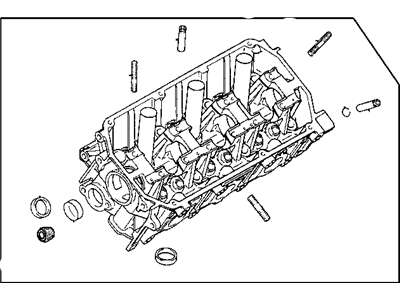
1997 Chrysler Cirrus Head Engine Cylinder
Part Number: MD307675$58.90 MSRP: $74.95You Save: $16.05 (22%)Product Specifications- Other Name: Head Cylinder; Cylinder Head
- Item Weight: 23.50 Pounds
- Condition: New
- Fitment Type: Direct Replacement
- SKU: MD307675
- Warranty: This genuine part is guaranteed by Mopar's factory warranty.
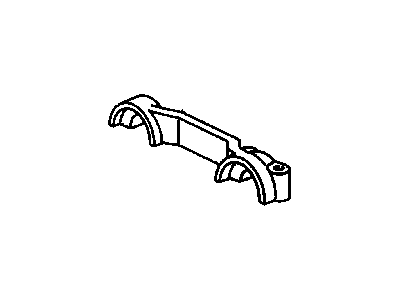
 Product Specifications
- Other Name: Head Cylinder; Cylinder Head
- Item Weight: 33.60 Pounds
- Item Dimensions: 27.3 x 9.8 x 8.9 inches
- Condition: New
- Fitment Type: Direct Replacement
- SKU: 4777541
- Warranty: This genuine part is guaranteed by Mopar's factory warranty.
- Product Specifications
- Other Name: Head Cylinder; Cylinder Head
- Item Weight: 23.70 Pounds
- Condition: New
- SKU: MD311707
- Warranty: This genuine part is guaranteed by Mopar's factory warranty.
 Product Specifications
- Other Name: Head Cylinder
- Item Weight: 41.10 Pounds
- Item Dimensions: 21.1 x 11.3 x 9.6 inches
- Condition: New
- SKU: R5420659
- Warranty: This genuine part is guaranteed by Mopar's factory warranty.
- Product Specifications
- Other Name: Head Cylinder
- Item Weight: 40.90 Pounds
- Item Dimensions: 26.8 x 13.0 x 9.7 inches
- Condition: New
- Fitment Type: Direct Replacement
- SKU: R5424650
- Warranty: This genuine part is guaranteed by Mopar's factory warranty.
1997 Chrysler Cirrus Cylinder Head
On our website, we proudly offer genuine 1997 Chrysler Cirrus Cylinder Head at the market's great competitive prices. We are confident that choosing brand new OEM 1997 Chrysler Cirrus Cylinder Head from our site will save you both trouble and money.
1997 Chrysler Cirrus Cylinder Head Parts Questions & Experts Answers
- Q:What Steps Should You Follow to Prepare and Reassemble the Cylinder Head After Valve Servicing on 1997 Chrysler Cirrus?A:Regardless of whether the head was sent to an automotive repair shop for valve servicing, ensure it is clean before beginning reassembly. If the head was sent out for valve servicing, the valves and related components will already be in place, allowing you to start the reassembly procedure directly. For a 2.0L four-cylinder engine, if the valve faces or seats have been ground, measure the valve stem tip-to-spring seat surface height without the spring or seat installed; if the dimension exceeds the tolerance, grind the valve stem as needed to achieve the correct measurement. Install the spring seats and new valve stem seals for V6 engines or the new valve seal/spring seat assembly for four-cylinder engines onto each valve guide, ensuring that on V6 engines, the silver-colored valve stem seals are placed on the intake valve guides and the black ones on the exhaust guides. Use a hammer and a deep socket or seal installation tool to gently tap each valve stem seal/spring seat assembly into place until fully seated, avoiding any twisting or cocking during installation to ensure proper sealing on the valve stems. Starting at one end of the head, apply moly-based grease or clean engine oil to the valve stem and install the first valve, followed by placing the spring over the valve guide and setting the spring and retainer in position, ensuring that on V6 engines, the enameled end of the valve springs is facing up. Compress the spring with a valve spring compressor and carefully install the keepers in the upper groove, then slowly release the compressor to ensure the keepers seat properly, applying a small dab of grease to each keeper if necessary to hold it in place. Repeat this procedure for the remaining valves, ensuring that all components are returned to their original locations without mixing them up. Finally, measure the installed valve spring height with a vernier or dial caliper; if the head was sent out for service work, the installed height should be correct, but it is important not to assume this is the case. If the height is greater, shims can be added under the spring seat to correct it, but caution must be taken not to shim the springs to a point where the installed height is less than specified.
Related 1997 Chrysler Cirrus Parts
 1997 Chrysler Cirrus Cylinder Head Gasket
 1997 Chrysler Cirrus Camshaft
 1997 Chrysler Cirrus Timing Cover
 1997 Chrysler Cirrus Cylinder Head Bolts
 1997 Chrysler Cirrus Rocker Arm
 1997 Chrysler Cirrus Rocker Arm Pivot