My Garage
My Account
Cart
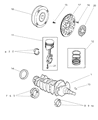
Genuine 2000 Chrysler Cirrus Crankshaft
Crank Shaft- Select Vehicle by Model
- Select Vehicle by VIN
Select Vehicle by Model
orMake
Model
Year
Select Vehicle by VIN
For the most accurate results, select vehicle by your VIN (Vehicle Identification Number).
1 Crankshaft found

 Product Specifications
- Item Weight: 50.30 Pounds
- Item Dimensions: 23.8 x 8.7 x 8.2 inches
- Condition: New
- SKU: 4621917
- Warranty: This genuine part is guaranteed by Mopar's factory warranty.
2000 Chrysler Cirrus Crankshaft
On our website, we proudly offer genuine 2000 Chrysler Cirrus Crankshaft at the market's great competitive prices. We are confident that choosing brand new OEM 2000 Chrysler Cirrus Crankshaft from our site will save you both trouble and money.
2000 Chrysler Cirrus Crankshaft Parts Questions & Experts Answers
- Q: How to install a crankshaft during engine reassembly on 2000 Chrysler Cirrus?A: Crankshaft installation comes immediately after dismantling of the engine with the assumption that the engine block and crankshaft need to be cleaned, inspected and repaired if necessary. Rotate the engine block so that its bottom end is up and extract the mounting bolts to send the main bearing cap assembly a trip to the junkyard. If possible, the original bearing inserts should be taken out from the block as well as the main bearing cap assembly and the bearing areas should be cleaned in order to accurately take the measurement of oil clearance. Machine all the new upper main bearing inserts bright and fit one in each main bearing saddle so the oil holes coincide. The thrust bearing insert or thrust washers must be fitted in the No. 3 bearing position with the grooving on the side of the crankshaft. The back sides of the lower main bearing inserts must be cleaned and then installed in the main bearing cap assembly without having to apply any lubrication, to fit properly. Scrub the faces of the bearing insert bores and crankshaft main bearingFDA journal bores, and get to note if the oils fholes are plugged by dirt FDA . After you have accomplished cleaning the crankshaft, position the crankshaft on the cylinder block of the car and ensure that if it is a 4 cylinder engine then the crankshaft position sensor has been taken out. For 2.0L engines, make sure that locating dowels are there to give the engine a right alignment. Take small strips of Plastigage and lay it down on each Crankshaft main bearing journal; clean the bearing insert faces in the main bearing cap assembly and fit it in place without removing the Plastigage. Use clean engine oil applying it to all bolt threads before installing them, while tightening the main bearing cap assembly bolts in order without turning the crankshaft. Loosen and take out the bolts in the reverse sequence and raise the main bearing cap assembly away and to compare the crushed Plastigage width to the scale to give oil clearance. If the clearance is too large, search for dir or oil interfering and if necessary, replace the bearing Inserts. Gently remove any more Plastigage, then raise the crankshaft and clean up the bearing insert flanks on the cylinder block-you might use a little moly-base grease or engine assembly lube here. Put a new oil filter passage O-ring seal for the 2.0 L engines and check whether the dowel are inserted or not. Remove the main bearing cap assembly and clean their mating surfaces, apply a bead of anaerobic sealer to the cylinder block foam. Place the crankshaft again in its position, than clean the faces of the bearing insert in the main bearing cap assembly, the application of the lubricant should not be in the mating surface. The main bearing cap assembly should bear on locating dowels and all the bolt threads of the caps should be lubricated with clean engine oil before they are tightened. A specific sequence of tightening is applied to the bolts of the 2.0L engines, while thrust bearing alignment must be done correctly in 2.4L engines and tighten them. For the V6 engines, the bolts are tightened in a sequence that is recommended according to an authorized manual then, lightly strike the crankshaft in the area of the main bearing and thrust faces. Spin the crankshaft and have the bearing caused binding; the crank shaft should rotate with an effort of 50 in-lbs or less; re-check the amount of crankshaft end play. Last of all, replace the new rear main oil seal.
Related 2000 Chrysler Cirrus Parts
 2000 Chrysler Cirrus Rod Bearing
 2000 Chrysler Cirrus Oil Pan
 2000 Chrysler Cirrus Camshaft
 2000 Chrysler Cirrus Piston Ring Set
 2000 Chrysler Cirrus Oil Pan Gasket
 2000 Chrysler Cirrus Crankshaft Thrust Washer Set
 2000 Chrysler Cirrus Oil Pump Gasket
 2000 Chrysler Cirrus Cam Gear
 2000 Chrysler Cirrus Crankshaft Pulley
 2000 Chrysler Cirrus Oil Pump