My Garage
My Account
Cart
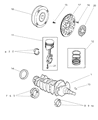
Genuine Chrysler Cirrus Crankshaft
Crank Shaft- Select Vehicle by Model
- Select Vehicle by VIN
Select Vehicle by Model
orMake
Model
Year
Select Vehicle by VIN
For the most accurate results, select vehicle by your VIN (Vehicle Identification Number).
1 Crankshaft found

Chrysler Cirrus Crankshaft
Chrysler Cirrus Crankshaft transforms the straight up and down thrust of the pistons into smooth rotary force that turns the transmission gears and finally the wheels, giving the car its forward motion. The Crankshaft, which sits deep in the engine block, has offset throws where the connecting rods are attached that allow the reciprocating energy to spin steadily on polished journals, just like in modern Cirrus models. Chrysler's early versions relied on rugged cast iron Crankshaft designs that managed everyday power while keeping cost low. When later Cirrus engines demand more output, the automaker switched to a forged steel style as it was much lighter yet far stronger, better resisting flex under high load, and this forged Crankshaft also curbed vibration at high revs. When clean oil flows freely, both types can last the life of the vehicle. But neglect lets grit scratch the journals, widen clearances, and invite metal-to-metal knock or harsh vibration. Rocks or debris that halt rotation may ruin the Chrysler component fast too. In this way, safeguarding the Crankshaft and acting on warning signs will prevent deeper Cirrus engine damage in the Chrysler powertrain.
Looking for affordable and high-quality auto parts? Then you have already arrived at the proper online shop. We offer all Chrysler Cirrus Crankshaft at great affordable prices. Moreover, all genuine Chrysler Cirrus Crankshaft come with a manufacturer's warranty. In the long run, you would realize you have saved a lot of trouble and money with OEM parts from here.
Chrysler Cirrus Crankshaft Parts Questions & Experts Answers
- Q: How should you inspect and repair a crankshaft on Chrysler Cirrus?A:Remove all burrs from the crankshaft oil holes using a stone, file, or scraper. Clean the crankshaft with solvent and dry it with compressed air if available, ensuring the oil holes are cleaned with a stiff brush and flushed with solvent. Check the main and connecting rod bearing journals for uneven wear, scoring, pits, and cracks. Rub a penny across each journal several times; if copper transfers to the journal, it indicates the surface is too rough and requires regrinding. Inspect the rest of the crankshaft for cracks and other damage, and have it magnafluxed to reveal hidden cracks. Measure the diameter of the main bearing and connecting rod journals with a micrometer, comparing the results to the tolerances, and check for out-of-roundness and taper by measuring at various points around each journal's circumference. If the journals are damaged, tapered, out-of-round, or worn beyond limits, regrinding by an automotive machine shop is necessary, along with obtaining and installing the correct size bearing inserts if reconditioned. Examine the oil seal journals at each end of the crankshaft for wear and damage; if a groove is present or if the journal is nicked or scratched, the new seal may leak upon reassembly. In some cases, an automotive machine shop may repair the journal by pressing on a thin sleeve, but if repair isn't feasible, a new or different crankshaft must be installed.

Related Chrysler Cirrus Parts
 Chrysler Cirrus Rod Bearing
 Chrysler Cirrus Oil Pan
 Chrysler Cirrus Camshaft
 Chrysler Cirrus Piston Ring Set
 Chrysler Cirrus Oil Pan Gasket
 Chrysler Cirrus Crankshaft Thrust Washer Set
 Chrysler Cirrus Oil Pump Gasket
 Chrysler Cirrus Cam Gear
 Chrysler Cirrus Crankshaft Pulley
 Chrysler Cirrus Oil Pump