My Garage
My Account
Cart
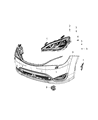
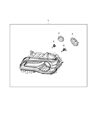
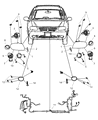
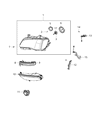
Genuine Chrysler Headlight
Headlamp- Select Vehicle by Model
- Select Vehicle by VIN
Select Vehicle by Model
orMake
Model
Year
Select Vehicle by VIN
For the most accurate results, select vehicle by your VIN (Vehicle Identification Number).
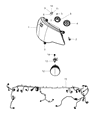
443 Headlights found


 Product Specifications
- Other Name: Headlamp Assembly
- Position: Passenger Side
- Replaces: 68342192AA, 68342192AB, 68342192AD, 68342192AC


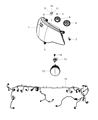
 Product Specifications
- Other Name: Headlamp
- Replaced by: 5182590AE
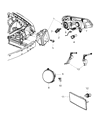
 Product Specifications
- Replaces: 68370845AA, 68370845AC, 68370845AB


 Product Specifications
- Replaces: 68370847AB, 68370847AA, 68370847AC


 Product Specifications
- Other Name: Headlamp
- Position: Passenger Side
- Replaces: 68088066AF


 Product Specifications
- Replaced by: 68085418AG


 Product Specifications
- Other Name: Headlamp-Headlamp
- Replaced by: 4857700AC


 Product Specifications
- Replaced by: 5182591AE


 Product Specifications
- Replaced by: 5182590AE
 Product Specifications
- Other Name: Headlamp; Composite Headlamp, Headlamp Assembly
- Position: Passenger Side
- Replaces: 5182590AD, 5182590AA, 5182590AB, 5182590AC
- Product Specifications
- Other Name: Composite Headlamp, Headlamp Assembly
- Position: Driver Side
- Replaces: 5182591AC, 5182591AB, 5182591AD, 5182591AA

 Product Specifications
- Replaced by: 68342192AE
 Product Specifications
- Replaced by: 68143003AC

 Product Specifications
- Other Name: Headlamp; Composite Assembly, Headlamp Assembly
- Position: Driver Side
- Replaces: 68269813AA, 68269813AC

Chrysler Headlight Passenger Replacement
Part Number: 4857700AC$236.41 MSRP: $488.00You Save: $251.59 (52%)Product Specifications- Other Name: Headlamp-Headlamp; Composite Headlamp, Headlamp Assembly
- Position: Passenger Side
- Replaces: 4857700AB

 Product Specifications
- Replaced by: 68196277AD
 Product Specifications
- Replaced by: 68143003AC

 Product Specifications
- Replaced by: 68370847AD
 Product Specifications
- Replaced by: 68342192AE
- Product Specifications
- Replaced by: 68214382AD
| Page 1 of 23 |Next >
1-20 of 443 Results
Chrysler Headlight
Our website has a huge selection of Chrysler Headlights at the optimal prices in the industry. If you need any genuine Chrysler Headlights, we ship them to your door step as we offer a fast delivery service. In addition, all OEM parts are backed by the manufacturer's warranty.
Chrysler Headlight Parts Questions & Experts Answers
- Q: How to properly adjust the fog light bulb and headlight assemblies on the Chrysler Cirrus?A:Many horizontal and vertical position headlights incorporated in assemblies have graduations that are factory set. Corrections should be carried out on a flat surface and better still, the fuel tank should be full and the vehicle should neither be over loaded nor under loaded. To set the suspension, jump up and down three times side to side, and bounce the front end three times up and down. Pop the hood to check the vertical indicators, the little bubble inside the vial must be over zero and it is permissible to be 0.75 degrees up or down. If needed, spin the vertical aim screw to come to the middle of the bubble without fiddling with the screw that is on the vial. Next, look on the horizontal indicators where at the adjuster you will find a arrow that must be pointing at zero in the gauge wheel. If it does not, turn the horizontal aiming screw the other way as a detrection to correct the problem. For alignment using a screen the ground should be level and the wall on which the screen will be set should be flat, the parking distance should be 25 feet. Slightly align a vertical masking tape line to the wall to the centerline and headlights of the vehicle and this can only be easily done if the vehicle is parked closely to the wall. Once again stabilise the suspension and record the distance from the floor to the center line of each headlight lens and scribe these dimensions on the wall using horizontal masking tape lines. Take a measuring tape and using the headlight lens as a point of reference, draw a vertical masking tape line along the wall up to a particular point. For the left head light the 2-inch square piece of tape should be located 8 inches below the horizontal that was drawn and 5 inches, to the right of the vertical line. For the right head light the 2-inch square piece of tape should be located 7 inches below the horizontal that was drawn and 9 inches to the right of the vertical line. If getting to turn on the low beam make adjustment up on the screws in a way that get to focus the hot spot of every headlight to its likely aims spot. If alignment problems remain or if the beam pattern looks wrong, consult the service section of a dealer or an authorized repair shop. Again, for fog light adjustment one has to park the vehicle 25 feet from a flat wall, suspend the fog light and measure the distance from the floor to the horizontal center line of each fog light lens and use a 3 feet horizontal tape along each of the fog lights. With the fog lights engaged, turn the screws until the extreme points of the projected fog light beam are about 4 inches below the horizontal tapes line.
- Q: How to remove and install the headlight housing on Chrysler PT Cruiser?A:Loosen the front wheel lug nuts, then raise the front of the vehicle and support it securely on jackstands. Remove the front wheel and the fender well splash shield, followed by the radiator grille. Take out the three bumper cover-to-fender fasteners on the side being worked on to create space for the headlight housing removal, and it may also be necessary to remove one or more bumper cover-to-radiator crossmember bolts. In the fenderwell, remove the retaining nuts that hold the headlight housing in place, detach the housing, and withdraw it from the vehicle. Disconnect the headlight and park/turn signal bulb electrical connectors. Installation is the reverse of removal, and be sure to check headlight adjustment afterward.

Related Chrysler Parts
 Chrysler Fog Light
 Chrysler Headlight Switch
 Chrysler Headlight Bulb
 Chrysler Bumper
 Chrysler Headlight Cover
 Chrysler Sunroof Cable