My Garage
My Account
Cart
Genuine Dodge Durango Car Batteries
Auto Battery- Select Vehicle by Model
- Select Vehicle by VIN
Select Vehicle by Model
orMake
Model
Year
Select Vehicle by VIN
For the most accurate results, select vehicle by your VIN (Vehicle Identification Number).
52 Car Batteries found


| Page 1 of 3 |Next >
1-20 of 52 Results
Dodge Durango Car Batteries
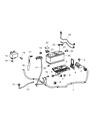
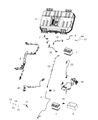
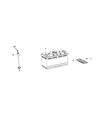
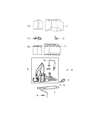
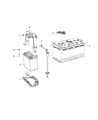
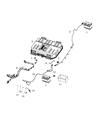
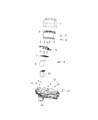
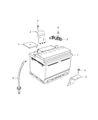
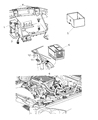
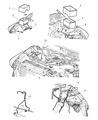
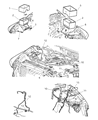
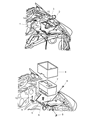
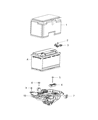
Car Batteries system is found in the Dodge Durango to assist in ignition of the engines as well as to power other electronics in the vehicle. First of all, the civil power in selected models of Dodge Durango consisted of one flooded lead-acid (FLA) Car Batteries that needed periodic, maintenance operations, including addition of distilled water. However, recent models have transitioned to using two batteries: A main Car Batteries and an auxiliary Car Batteries The Car Batteries holds and controls chambers, boilers, generators, electrical equipment and other components involved in the generating and distribution of power. The stop/start system gets an additional Car Batteries which is placed below the floor on the passenger side of the car and makes it more efficient. Newer batteries in the Dodge Durango are FLA batteries that use Absorbent Glass Mat (AGM) technology that has its advantages over the previous batteries. As for the advantages of using AGM batteries they are never required to be maintained, non-spilling, and are able to better handle shocks/vibrations. It also means that they are less receptive to constant charging and discharging processes which greatly enhances their performance life. This change, however, also corresponds with the evolution of Car Batteries technology as well as meets today's automotive needs in terms of greater durability and minimal need for maintenance.
Looking for affordable and high-quality auto parts? Then you have already arrived at the proper online shop. We offer all Dodge Durango Car Batteries at great affordable prices. Moreover, all genuine Dodge Durango Car Batteries come with a manufacturer's warranty. In the long run, you would realize you have saved a lot of trouble and money with OEM parts from here.
Dodge Durango Car Batteries Parts Questions & Experts Answers
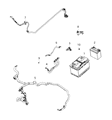
- Q: How to Effectively Test and Replace Car Batteries on Dodge Durango?A:With Durango models, start and finish your battery work by disconnecting the negative cable first to protect against battery damage. See how the top of your battery looks - if there's a green eye, your battery charge is between 75% and 100%; if there's a black eye, you're between 0% and 75%; and if the eye is clear, the electrolyte level is too low. Standard batteries in vehicles cannot be opened because they come sealed with non-removable caps. If you see the battery eye is clear, then it needs to be replaced. Simply add distilled water to the marked point when maintaining low-maintenance batteries. If your battery charges too much, it may indicate low electrolyte levels, so start by testing the Alternator's charging voltage after restoring the battery's power. Using a voltmeter, check the open voltage of your battery; it should read more than 12.4 volts when fully charged after wiping it clean. Only run a load test from a battery load tester when the charge is high enough. With the battery fully charged, place it on the tester and apply 50 percent of the battery's original CCA rating for fifteen seconds. Keep the result above 9.6 volts. To safely remove the battery, unbolt the negative terminal first, then disconnect the positive terminal, loose the hold-down clamp, lift out the battery, and look for corroded tray parts while doing so. First, scrub away any buildup with baking soda. Then, protect your battery from rust by spraying on paint that stops rust. When buying a new battery, make sure it has the same exact technical features as the one you take out. To remove the battery tray, start by undoing the clips that keep the heater hose, wiring harness, and ground cable in place. Then take off the right front wheel, followed by the clips from underneath the tray. Finally loosen and remove the mounting bolts. Installation is the reverse of removal.

Related Dodge Durango Parts

Browse by Year
2025 Car Batteries 2024 Car Batteries 2023 Car Batteries 2022 Car Batteries 2021 Car Batteries 2020 Car Batteries 2019 Car Batteries 2018 Car Batteries 2017 Car Batteries 2016 Car Batteries 2015 Car Batteries 2014 Car Batteries 2013 Car Batteries 2012 Car Batteries 2011 Car Batteries 2009 Car Batteries 2008 Car Batteries 2007 Car Batteries 2006 Car Batteries 2005 Car Batteries 2004 Car Batteries 2003 Car Batteries 2002 Car Batteries 2001 Car Batteries 2000 Car Batteries 1999 Car Batteries 1998 Car Batteries