
Why choose MoparPartsGiant
- Fast Delivery
Your Dodge Durango deserves only Dodge Durango genuine parts from MoparPartsGiant.com. There's zero risk involved when buying from us because all our Dodge Durango auto parts are expedited directly from authorized dealers and backed by the manufacturer's warranty. For years, we've been the #1 Dodge Durango online parts store. Interested in faster shipping? We offer expedited shipping on corresponding orders!
- Dedicated Service
Our outstanding customer service team is here to help you by email, live chat, or phone call with any inquiries regarding your purchase. Dedicated representatives are standing by to assist you with your shopping needs. With a complete Dodge Durango parts catalog and a full selection of inventory, your parts are ready to be expedited anywhere in the nation without delays.
- Unbeatable Prices
For any genuine Dodge Durango parts you need for standard maintenance or repair, we carry them. With our unbelievably low prices on Dodge Durango parts, you won't go anywhere else for Dodge Durango parts. We are your one-stop shop for Dodge Durango parts without breaking the bank!
Popular Genuine Dodge Durango Parts
- Engine Parts View More >
- Electrical Parts View More >
- Fuel Parts View More >
- Body - Sheet Metal Except Doors Parts View More >
- Cooling Parts View More >
- Steering Parts View More >
- Interior Trim Parts View More >
- Transmission Parts View More >
- Brakes Parts View More >
- Suspension & Drive Parts View More >
- Emission Systems Parts View More >
- Exhaust Parts View More >


Shop Genuine Dodge Durango Parts with MoparPartsGiant.com
The Dodge Durango is a mid-size sports utility vehicle, first introduced in 1998, and is currently in its third generation. This third-gen Durango shares its platform with the Jeep Grand Cherokee and is assembled at the Jefferson North Assembly Plant in Detroit, Michigan. Originally designed with eight seats, the Durango has evolved to accommodate a more practical third-row seating. The roof rack has been designed to conceal a raised roof for extra space. The Durango originally featured V6 and V8 engines, but by 2000, it moved exclusively to V8 powerplants, the most powerful being equipped in the high-performance R/T model. The second generation, introduced in 2004, featured significant mechanical updates such as four-wheel disc brakes, a coil-spring rear suspension, and a full-size rear axle with a Watt link. The third generation, launched in 2011, boasted of a longer wheelbase and three-row seating. This generation had a range of four engines, the base being a new V6 and the most powerful being a 6.2L supercharged Hemi V8 for the 2021 SRT Hellcat model, which was discontinued in 2022 due to emission requirements. In 2017, the Durango Limited was replaced with the GT trim level, and the GT Plus trim was added, offering additional features. The 2021 model introduced updated bodywork, new air intakes, and six new wheel designs, with the SXT and GT models coming with the new Uconnect 5 instrument cluster. Thus, the Dodge Durango, with its performance and versatility, has maintained a strong presence in the SUV market.
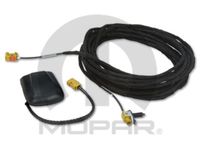
Dodge Durango owners may commonly encounter certain issues as the vehicle reaches higher mileage. One frequent problem is related to the braking system, where drivers have reported visible leakage of brake fluid upon applying the brakes. This issue is often accompanied by the illumination of the Brake Warning Light or Parking Brake Light. Additionally, the parking brake may fail to function effectively, and its pedal or lever may feel loose, thereby failing to secure the vehicle properly. In such cases, it's advisable to inspect the brake line and parking brake cable. Another prevalent concern is related to the cooling system. Instances of engine overheating are common, and the Low Coolant Light may frequently illuminate, necessitating constant coolant refills. In some cases, there may even be visible coolant leakage underneath the vehicle. This could indicate a collapsed or broken radiator hose, given that these are typical symptoms of a faulty radiator hose. For prolonged life and enjoyment of your Dodge Durango's features, it's crucial to maintain all its parts in good condition. For instance, the antenna and antenna mast, which ensure a relaxing infotainment experience, must be well-maintained to provide quality entertainment while driving.
All OEM parts are precisely engineered to the original part's exact specifications. They've met stringent official quality control standards during manufacturing, so you can be sure that they're of top quality. If you find yourself requiring new genuine Dodge Durango parts, like Doors, Door Mirrors And Related Parts, Air Conditioners & Heater, consider paying us a visit. We carry a vast inventory of OEM Dodge Durango parts, such as Wiper & Lock Cylinder And Keys, offered at the most competitive prices and highest quality, all with a manufacturer's warranty. Additionally, we take pride in our first-class customer service and speedy delivery.
Dodge Durango Parts Questions & Answers
- Q: How Should the Front Sway Bar Kit and Sway Bar Bushing Be Installed on Dodge Durango?A:Remove the upper nut from the sway bar kit link and separate it from the bar. Remove the lower nut from the link and separate it from the lower control arm. Remove the sway bar kit and rubber bushings. Inspect rubber bushings for wear and damage. Replace if cracked, torn, or deteriorated. Installation is the reverse of removal.
- Q: How to Remove and Install a front upper Control Arm on Dodge Durango?A:To remove the wheel, start by loosening the lug nuts and raising the vehicle securely on jackstands. Then, loosen the nut on the upper balljoint stud and disconnect the balljoint from the steering knuckle using a balljoint removal tool. If you don't have the proper tool, a picklefork type separator can be used, but it may damage the balljoint boot. Next, remove the control arm mounting fasteners and pull the upper arm from its frame brackets. To install, reverse the removal steps and tighten all fasteners to the specified torque values. However, don't tighten the pivot bolt nuts until the vehicle is at normal ride height. If necessary, simulate normal ride height by raising the outer end of the lower control arm with a floor jack. Finally, install the wheel, lower the vehicle, and tighten the lug nuts. Remember to have the front end alignment checked and adjusted if needed.
- Q: How to Remove and Install a Steering Knuckle on Dodge Durango?A:If you're working on a 4WD model, start by removing the driveaxle/hub nut. Next, loosen the wheel lug nuts and raise the vehicle, supporting it securely on jackstands. Remove the wheel and then proceed to remove the brake disc and wheel speed sensor. Disconnect the tie-rod from the steering knuckle and support the lower control arm with a floor jack. Separate the upper control arm from the steering knuckle, followed by separating the lower control arm from the steering knuckle. Carefully inspect the steering knuckle for cracks, especially around the steering arm and spindle mounting area, as well as the balljoint stud holes. If any cracks or elongated holes are found, replace the steering knuckle. Finally, for installation, reverse the removal steps and ensure that all suspension fasteners are tightened to the specified torque.


