My Garage
My Account
Cart
Genuine Dodge Durango Instrument Cluster
Speedometer Instrument Cluster- Select Vehicle by Model
- Select Vehicle by VIN
Select Vehicle by Model
orMake
Model
Year
Select Vehicle by VIN
For the most accurate results, select vehicle by your VIN (Vehicle Identification Number).
80 Instrument Clusters found


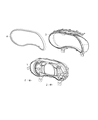
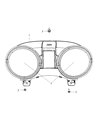
Dodge Durango Instrument Cluster Lens
Part Number: 68216990AA$199.66 MSRP: $295.00You Save: $95.34 (33%)

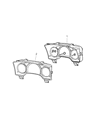
Dodge Durango Instrument Panel Cluster
Part Number: 68454260AA$687.04 MSRP: $1020.00You Save: $332.96 (33%)

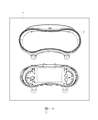
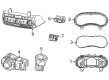
Dodge Durango Instrument Panel Cluster
Part Number: 5091310AG$1009.09 MSRP: $1490.00You Save: $480.91 (33%)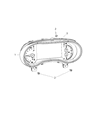
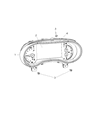
Dodge Durango Instrument Panel Cluster
Part Number: 68352392AC$1014.74 MSRP: $1515.00You Save: $500.26 (34%)Dodge Durango Instrument Panel Cluster
Part Number: 68352895AC$701.73 MSRP: $1040.00You Save: $338.27 (33%)

Dodge Durango Instrument Panel Cluster
Part Number: 68248454AB$1032.82 MSRP: $1540.00You Save: $507.18 (33%)

Dodge Durango Instrument Panel Cluster
Part Number: 68302780AC$1570.70 MSRP: $2340.00You Save: $769.30 (33%)
Dodge Durango Instrument Panel Cluster
Part Number: 56054327AA$343.14 MSRP: $502.00You Save: $158.86 (32%)

Dodge Durango Instrument Panel Cluster
Part Number: 5172875AF$735.63 MSRP: $1100.00You Save: $364.37 (34%)
Dodge Durango Instrument Panel Cluster
Part Number: 68331890AC$902.87 MSRP: $1360.00You Save: $457.13 (34%)Dodge Durango Instrument Panel Cluster
Part Number: 68302781AC$1010.22 MSRP: $1515.00You Save: $504.78 (34%)
Dodge Durango Instrument Panel Cluster
Part Number: 56054328AA$327.12 MSRP: $484.00You Save: $156.88 (33%)
Dodge Durango Instrument Panel Cluster
Part Number: 68537375AC$539.22 MSRP: $793.00You Save: $253.78 (32%)Dodge Durango Instrument Panel Cluster
Part Number: 68537374AC$608.76 MSRP: $896.00You Save: $287.24 (33%)
| Page 1 of 4 |Next >
1-20 of 80 Results
Dodge Durango Instrument Cluster
The Instrument Cluster of the Dodge Durango is a very vital part of car placed behind the Steering Wheel, with functional purpose of delivering out information pertaining to the state of the car while on the road. They include the speedometer, tachometer and fuel meter among others, additional lights including warning lights and other signs, all of which serve to provide the driver with various performance statistics and signals regarding safety. The scout Durango has changed its styles over the years in its Instrument Clusters ranging from the basic captioned analog to more complex illustrated digital. Such advancements increase functionality, to give real time updates on driving efficiency and fuel consumption. The Instrument Cluster should always be kept in a very good condition to be able to display the right readings, failure to which there may be a need to change the factory cluster with a re-manufactured one.
Looking for affordable and high-quality auto parts? Then you have already arrived at the proper online shop. We offer all Dodge Durango Instrument Cluster at great affordable prices. Moreover, all genuine Dodge Durango Instrument Cluster come with a manufacturer's warranty. In the long run, you would realize you have saved a lot of trouble and money with OEM parts from here.
Dodge Durango Instrument Cluster Parts Questions & Experts Answers
- Q: What Steps Are Involved in Removing and Installing the Instrument Cluster on Dodge Durango?A:This procedure is tough for home mechanics because there are hidden bolts, hard to reach space which requires much angle induction and many connecting wires to be labeled and removed. This should reckon done at a dealership or a qualified shop. First they should make front wheels aligned to the straight ahead position, lock the steering column, remove the negative terminal of car battery, and also disable the airbag. In this one loosen the right and left side cowl trim panels using a trim tool and pull up the front end of the door sill plates, and finally the instrument panel end caps using a trim panel tool. Following this, get rid of the instrument panel top cover, glove box, cluster, bolster, knee bolster reinforcement, as well as the instrument cluster. Pull down the steering column for better access, and remove the large electrical bulkhead connector and the two large connectors on either side of it which are accessible from under the driver's side of the instrument panel. When under the panel, tag and disconnect all the other electrical connection but be watchful of the ground straps. Pull the parking brake rod away from the release lever and then unplug the brake light switch and finally remove the three screws that are provided for the pedal support bracket. Disconnect harness connectors to the Occupant Restraint Controller; pull out the center console. To remove the carpet, pull back and disconnect the wire harness that is connected at the bottom of the floor pan, then proceed to the right hand side and detach the antenna, and take out the amplifier. If there are any other electrical connectors remaining, disconnect them, then take out all the instrument panel retaining screws / bolts and the IP from the car. Installation process takes a reverse order to the removal one.

Related Dodge Durango Parts
 Dodge Durango Antenna
 Dodge Durango Car Speakers
 Dodge Durango Dome Light
 Dodge Durango Antenna Cable
 Dodge Durango Antenna Mast
 Dodge Durango Ashtray
 Dodge Durango Cigarette Lighter
 Dodge Durango Cup Holder
 Dodge Durango Glove Box
Browse by Year
2024 Instrument Cluster 2023 Instrument Cluster 2022 Instrument Cluster 2020 Instrument Cluster 2019 Instrument Cluster 2018 Instrument Cluster 2017 Instrument Cluster 2016 Instrument Cluster 2015 Instrument Cluster 2014 Instrument Cluster 2013 Instrument Cluster 2012 Instrument Cluster 2011 Instrument Cluster 2009 Instrument Cluster 2008 Instrument Cluster 2007 Instrument Cluster 2006 Instrument Cluster 2005 Instrument Cluster 2004 Instrument Cluster 2003 Instrument Cluster 2000 Instrument Cluster 1999 Instrument Cluster