Make sure this part fits

Mopar 4777541 Cylinder Head

1997-2000 Mopar 4777541

Customer Questions & Expert Answers (9)
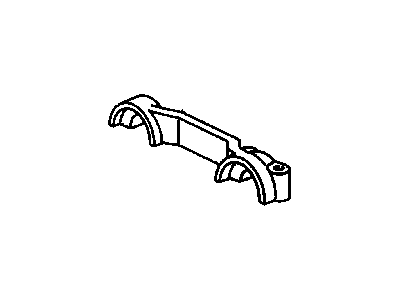
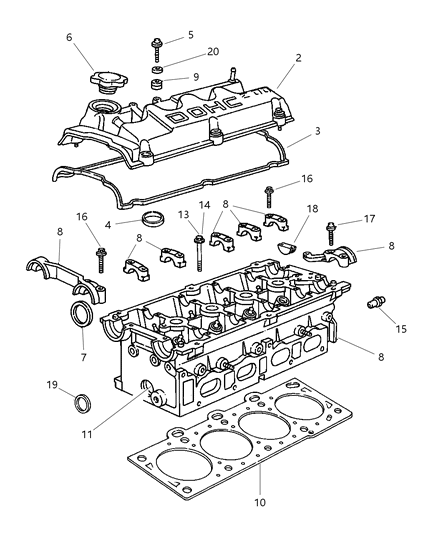
4777541 Mopar Cylinder Head Illustration 1 of 1
  • Part Description
    Head Cylinder
  • Manufacturer
    Mopar
  • Manufacturer's Notes
    This part is discontinued.
Make sure this part fits
  • Related Parts
  • Specifications
  • Fitment
  • Q&A
  • Product Specifications

    BrandGenuine Mopar
    Manufacturer Part Number4777541
    Part DescriptionHead Cylinder
    Other NamesCylinder Head
    Item Dimensions27.3 x 9.8 x 8.9 inches
    Item Weight33.60 Pounds
    ConditionNew
    Fitment TypeDirect Replacement
    ManufacturerMopar
    SKU4777541
    WarrantyThis genuine Mopar part is guaranteed by Mopar's factory warranty.
    Shipping & ReturnShipping Policy Return Policy
    Warning: California's Proposition 65
  • Vehicle Fitment

    Year Make Model Engine Important vehicle option details
    1997-2000 Chrysler Cirrus4 Cyl 2.4LLX, LXi
    2000 Chrysler Grand Voyager
    1997-1999 Chrysler Sebring4 Cyl 2.4LJX, JXi
    1998-2000 Chrysler Town & CountryLX FWD, SX
    2000 Chrysler Voyager4 Cyl 2.4LBase
    1997-2000 Dodge Caravan4 Cyl 2.4LBase, LE, SE
    1997-2000 Dodge Grand Caravan4 Cyl 2.4LBase, LE FWD, SE FWD
    1997-1999 Dodge Neon4 Cyl 2.0L2 Door Base, 2 Door High Line , 2 Door Sport, 4 Door High Line, 4 Door Sport
    1997-2000 Dodge Stratus4 Cyl 2.4LBase, ES, SE
  • Customer Questions & Expert Answers

    Q:
    Is this part guaranteed to fit my truck ? Posted by MoparPartsGiant Specialist
    A:
    You can Select Your Vehicle to check if 4777541 fits your vehicle.
    Posted by MoparPartsGiant Specialist
    Installation and Repair Tips
    Q:
    What precautions should be taken before beginning the cylinder head removal procedure in V6 engine on Chrysler Cirrus? Posted by Customer
    A:
    Allow the engine to cool completely before beginning this procedure. Disconnect the negative battery cable from the ground stud on the left shock tower. Position the number one piston at Top Dead Center. Remove the upper and lower intake manifolds, drain the cooling system, and remove the spark plugs and spark plug wires, leaving the plug wires attached to the distributor cap. If removing the right (rear) cylinder head, remove the distributor. Remove the thermostat housing from the rear of the cylinder heads and the rocker arm shaft assemblies. If removing the right (rear) cylinder head, remove the bolts securing the power steering reservoir and hoses to the cylinder head and position them out of the way. Disconnect the power steering pump bracket from the engine and remove the exhaust manifold(s). If removing the left (front) cylinder head, remove the EGR solenoid/transducer assembly and EGR valve from the rear of the cylinder head. Remove the timing belt and camshaft sprocket(s). Clearly label and disconnect any hoses, lines, brackets, or electrical connections that may interfere with cylinder head removal. Loosen the cylinder head bolts, 1/4-turn at a time, in the reverse order of the tightening sequence until they can be removed by hand. Carefully lift the cylinder head straight up and place it on wood blocks to prevent damage to the sealing surfaces. If the head sticks to the engine block, dislodge it by placing a wood block against the head casting and tapping the wood with a hammer or by prying the head with a prybar placed carefully on a casting protrusion. Remove all traces of old gasket material from the block and head, using special gasket removal solvents available at auto parts stores. Be very careful not to gouge the sealing surfaces of the aluminum cylinder head. When working on the block, place clean shop rags into the cylinders to help keep out debris and use a vacuum to remove any contamination from the engine. Use a tap of the correct size to chase the threads in the engine block and clean and inspect all threaded fasteners for damage. Inspect the cylinder head bolt threads for "necking," where the diameter of threads narrow due to bolt stretching; if any cylinder head bolt exhibits damage or necking, it must be replaced. Using a precision straightedge and feeler gauge, check all gasket surfaces for warpage; if the warpage on any surface exceeds the limits, the discrepant component must be replaced or resurfaced by an automotive machine shop. Install the camshaft(s) if removed and place a new gasket on the engine block, ensuring all passages in the block align with the holes in the gasket. Use no sealer unless indicated by the gasket manufacturer and note any directions printed on the gasket such as "Front" or "This side up." Place the cylinder head(s) in position on the engine block, install the washers onto the cylinder head bolts, apply clean engine oil to the cylinder head bolt threads, and install them into the cylinder head. Tighten the cylinder head bolts in the sequence shown, progressing in three stages to the torque. The remaining installation steps are the reverse of removal. Refill the cooling system and check all fluid levels as necessary. Start the engine and let it run until normal operating temperature is reached, checking for leaks and proper operation.

    Posted by MoparPartsGiant Specialist
    Q:
    Why might it be more practical for a home mechanic to purchase a replacement Cylinder Head for the 1999 Chrysler Cirrus? Posted by Customer
    A:
    Because specialized tools are necessary for disassembly and inspection, and replacement parts may not be readily available.
    Posted by MoparPartsGiant Specialist
    Q:
    What should be ensured while repeating the valve installation procedure for the Cylinder Head of the 1997 Chrysler Cirrus? Posted by Customer
    A:
    Ensure that all components are returned to their original locations without mixing them up.
    Posted by MoparPartsGiant Specialist
    Q:
    What should be inspected on the Cylinder Head for the 1998 Chrysler Cirrus? Posted by Customer
    A:
    Inspect the head for cracks, coolant leakage, and other damage, consulting an automotive machine shop if necessary.
    Posted by MoparPartsGiant Specialist
    Q:
    What should be marked on the Cylinder Head before the final pass of tightening for the 2000 Chrysler Cirrus? Posted by Customer
    A:
    Mark the bolts in relation to the cylinder head and place another mark 90-degrees clockwise from the starting mark.
    Posted by MoparPartsGiant Specialist
    Q:
    How should the Cylinder Head be placed after removal for the 1998 Dodge Grand Caravan? Posted by Customer
    A:
    Place the head on blocks of wood to protect the gasket surfaces.
    Posted by MoparPartsGiant Specialist
    Q:
    What if the head was sent out for valve servicing for the 1997 Dodge Grand Caravan? Posted by Customer
    A:
    If the head was sent out for valve servicing, the valves and related components will already be in place, allowing you to start the reassembly procedure.
    Posted by MoparPartsGiant Specialist
    Q:
    How can corrosion and thread sealant be removed from the threaded holes in the Cylinder Head of the 1999 Dodge Grand Caravan? Posted by Customer
    A:
    An appropriate size tap should be used in each threaded hole to remove corrosion and thread sealant, and compressed air should be employed to clear debris while wearing eye protection.
    Posted by MoparPartsGiant Specialist
    See Complete Installation and Repair Tips

Genuine Mopar Part 4777541, the Right Choice

To ensure reliability, purchase Mopar part # 4777541 Cylinder Head. It is sometimes referred to as Cylinder Head. The OEM parts should be used when the Mopar owners want to maximize their driving experience. The high-tech factories that produce these parts utilize sophisticated technology specifically designed to meet stringent factory requirements. Additionally, they are thoroughly tested and can thus be used with reliability by Mopar owners. This part fits specific Chrysler Cirrus, Sebring, and Town & Country models. It fits Dodge Caravan, Grand Caravan, Neon.

MoparPartsGiant.com is a leading supplier of genuine Mopar parts and accessories such as 4777541 Cylinder Head. Wondering where to find exceptional quality and affordable OEM Mopar parts? You have already come to the right place. Our website boasts a huge selection of genuine Mopar parts at attractive prices. Further, all parts come with a manufacturer's warranty. For detailed Dodge parts information, click here.

Why choose Mopar Parts Giant

  • Dedicated Service

    Your complete satisfaction is our #1 goal

  • Lowest Prices

    Best deals on genuine OE parts from dealerships

  • Fast Delivery

    Orders are processed and delivered promptly