Why choose MoparPartsGiant
- Fast Delivery
Your Dodge Avenger deserves only Dodge Avenger genuine parts from MoparPartsGiant.com. There's zero risk involved when buying from us because all our Dodge Avenger auto parts are expedited directly from authorized dealers and backed by the manufacturer's warranty. For years, we've been the #1 Dodge Avenger online parts store. Interested in faster shipping? We offer expedited shipping on corresponding orders!
- Dedicated Service
Our outstanding customer service team is here to help you by email, live chat, or phone call with any inquiries regarding your purchase. Dedicated representatives are standing by to assist you with your shopping needs. With a complete Dodge Avenger parts catalog and a full selection of inventory, your parts are ready to be expedited anywhere in the nation without delays.
- Unbeatable Prices
For any genuine Dodge Avenger parts you need for standard maintenance or repair, we carry them. With our unbelievably low prices on Dodge Avenger parts, you won't go anywhere else for Dodge Avenger parts. We are your one-stop shop for Dodge Avenger parts without breaking the bank!
Popular Genuine Dodge Avenger Parts
- Engine Parts View More >
- Electrical Parts View More >
- Fuel Parts View More >
- Body - Sheet Metal Except Doors Parts View More >
- Cooling Parts View More >
- Steering Parts View More >
- Interior Trim Parts View More >
- Brakes Parts View More >
- Transmission Parts View More >
- Suspension & Drive Parts View More >
- Emission Systems Parts View More >
- Exhaust Parts View More >




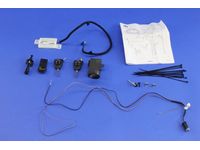
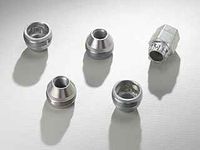
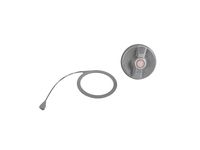
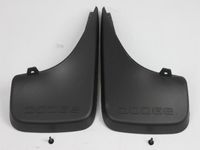
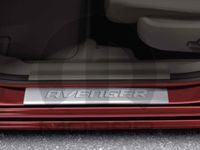
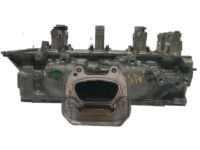
Shop Genuine Dodge Avenger Parts with MoparPartsGiant.com
The Dodge Avenger, a front-wheel-drive mid-size sedan, made its debut in North America in 1994 as a two-door coupe, being produced until 2000. The model was reintroduced in 2007 as a four-door sports sedan, representing a compact sports car's principles: multifunctionality, power, and economy. Available with a 2.0L four-cylinder or a 2.5L V6, the Avenger offered versatility in power. The four-cylinder model could be paired with either a five-speed manual transmission or a four-speed automatic, while the V6 exclusively paired with the A604 automatic transmission. Boasting a wheelbase of 103.7 inches, the Avenger featured dual independent suspension and adjustable steering. Notable trim levels included the basic Highline and ES models. The exterior, designed by Ryan Nagode, came in a Café Latte color scheme, while the interior, designed by Ben S. Chang, was black-grey. The model also had integrated safety measures such as a vapor recovery system and a new generation of driver and passenger airbags. The power was evident in its DOHC straight-six engine producing 158 hp and 141 lb-ft of torque, while the DOHC four-cylinder engine had a displacement of 2.4L, all in an aluminum block with a cast-iron cylinder liner.
Dodge Avenger, with its stealthy good looks, spacious interior, and easy handling, can encounter common problems over time. According to CarComplaints.com, engine failure may occur around 50,000 miles, signaled by unusual engine sounds, decreased performance, stalling, excessive oil consumption, and starting problems. A lit Check Engine Light should prompt immediate inspection of the spark plug, air filter, oil filter, engine mount, and fuel tank. Suspension failure, while less severe, can still lead to serious issues. Avenger drivers have reported hearing clunking, rattling, or scraping sounds from underneath the vehicle, followed by uneven and excessive tire wear and a tilting vehicle. Prolonged neglect can result in a shaky, loose steering wheel and intense vehicle vibration, hindering control. Ensuring that the drive shaft, wheel bearing, shock absorber, and sway bar bushing are always functioning properly can prevent these issues. Regular maintenance is crucial to nip potential dangers in the bud. The cabin air filter, responsible for filtering contaminants from the air, requires frequent cleaning to protect occupants, especially those with respiratory issues. The windshield wiper, fog light, headlight, and antenna also need regular upkeep to ensure optimal performance.
Choosing OEM parts guarantees top-tier quality and durability. They are carefully designed to adhere to the strict specifications of the official factory and undergo thorough quality control inspections during production, ensuring long-lasting resilience and an impeccable fit. Our website is your one-stop destination for OEM Dodge Avenger parts, like Doors, Door Mirrors And Related Parts, Air Conditioners & Heater, all competitively priced to give you the best value for your money. Every genuine Dodge Avenger part, such as Wiper & Washers And Cylinder & Keys, Differential And Drive Line we offer is backed by the assurance of the manufacturer's warranty. Rest assured, we have an easy and straightforward return policy to ensure a hassle-free process for you. Additionally, we pride ourselves on our swift delivery service, ensuring you get your parts in a timely manner. Feel confident shopping with us!
Dodge Avenger Parts Questions & Answers
- Q:What precautions and steps should be taken when replacing a cylinder head in 2.7L V6 engine on Dodge Avenger?A:This process should only be done when the engine is cool to touch and is best done at the weekend when you do not have to use the car. First of all, it is necessary to take off the primary timing chain and supply with sprockets. However, ensure that you do not move the crankshaft from around the alignment marks in the remainder of the entire process of the strop. Then it is time to take out the camshafts from the cylinder head, rocker arms accompanied by hydraulic lash adjusters, and remember to put labels and numbers to the removed parts to facilitate correct reinstallment of all of them in required positions. Then, it is time to uninstall the lower intake manifold and exhaust manifold(s)-if your car comes equipped with them. If remaining label and remove any coolant fittings, ground straps, cables, hoses, wires, or brackets that are connected to the cylinder head including the water outlet housing by loosing the heater supply tube retaining bolts. Apply a breaker bar and the specific socket that fits the specific bolt, and then turn the bolts in a quarter-turns to unscrew them until you are able to remove them by hand; this should be done in the reverse sequence as the tightening sequence in order to avoid warping or cracking of the head. Remove the cylinder head along with the exhaust manifold bolted on it, in case it is stuck then use a pry bar. All externals should be detached from the cylinder head in order to clean and examine before engaging a professional automotive machine shop for servicing. The mating surfaces of the cylinder head and block must be free from any deposit when the head is fitted. Scrape surfaces of the cylinder head and engine block with gasket scraper to remove all carbon and old gasket material without damaging the surfaces After scraping wash the surfaces with lacquer thinner or acetone. Any residual oil that remains on the corresponding surfaces of the head after the installation of the gasket maybe insufficient to make a good seal thus resulting in leakage. Before the cylinder is filled with the material, use clean shop rags to pack it in order to minimize accumulation of debris inside the cylinder and for the removal of any material that may have fallen inside the cylinder, a vacuum cleaner is used. Inspect shoulder of block/head for nicks, scratches, or other signs of wear; maximum allowable dimension is 0.025mm; if beyond this, a file may be used to remove the material or you must machine it. What is left can be removed with compressed air This is done by using a tap of the right size to chase the threads of the head bolt holes. Inspect each cylinder head bolt for stretch by taking a metal ruler or a straightedge and laying it on the threads; the fact is that the diameter of the threads of such bolts tends to be necked down somewhere, in which case the bolts are to be replaced. In any case it is recommended that the head bolts are replaced with new ones irrespective of the state they are in. Using a precision straightedge and a set of feeler gauges, check the cylinder head for warpage; if the same is more than the allowable limit, have the head mugged. Replace the head bolts and nuts, trim the 'riblet' edged gasket along with the flange face of the head, and place the new cylinder head gasket over the dowel pins present on the block and placing the head over the dowels without further upsetting the position of the gasket. These bolts should be then lubricated with little proportions of clean engine oils before fixing them in position with the chamfered side facing the bolt head and the hardened washers going round the cylinder head. Replace the bolts back to their original positions and fasten them a little and then turn the bolts in stages up to the required torque. Place the lash adjusters and rocker arms in their rightful positions in the cylinder head and fit the camshafts and then fit the primary timing chain and sprockets. The rest of the installation process is, in fact, the reverse of removal. Last but not the least, add more coolant in the cooling system and replace the engine oil along with the oil filter, and crank the engine and inspect for the presence of any oil or coolant leakage.