My Garage
My Account
Cart
Genuine Jeep Compass Instrument Cluster
Speedometer Instrument Cluster- Select Vehicle by Model
- Select Vehicle by VIN
Select Vehicle by Model
orMake
Model
Year
Select Vehicle by VIN
For the most accurate results, select vehicle by your VIN (Vehicle Identification Number).
148 Instrument Clusters found

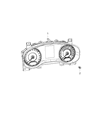
Jeep Compass Instrument Panel Cluster
Part Number: 6QR57DX9AB$705.12 MSRP: $1040.00You Save: $334.88 (33%)
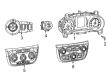
Jeep Compass Instrument Panel Cluster
Part Number: 68449344AL$926.60 MSRP: $1370.00You Save: $443.40 (33%)

Jeep Compass Instrument Panel Cluster
Part Number: 6RX38DX9AC$396.72 MSRP: $585.00You Save: $188.28 (33%)

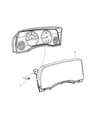
Jeep Compass Instrument Panel Cluster
Part Number: 68080412AB$174.84 MSRP: $259.00You Save: $84.16 (33%)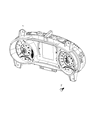
Jeep Compass Instrument Panel Cluster
Part Number: 6RX38DX9AK$396.72 MSRP: $585.00You Save: $188.28 (33%)

Jeep Compass Instrument Panel Cluster
Part Number: 68233460AE$484.50 MSRP: $713.00You Save: $228.50 (33%)
Jeep Compass Instrument Panel Cluster
Part Number: 68080404AF$648.66 MSRP: $954.00You Save: $305.34 (33%)Jeep Compass Instrument Panel Cluster
Part Number: 6RX36DX9AC$705.12 MSRP: $1040.00You Save: $334.88 (33%)Jeep Compass Instrument Panel Cluster
Part Number: 68233468AE$349.98 MSRP: $513.00You Save: $163.02 (32%)Jeep Compass Instrument Panel Cluster
Part Number: 6QR59DX9AC$614.46 MSRP: $903.00You Save: $288.54 (32%)Jeep Compass Instrument Panel Cluster
Part Number: 7TD38DX9AB$644.10 MSRP: $942.00You Save: $297.90 (32%)
Jeep Compass Instrument Panel Cluster
Part Number: 68067707AA$171.46 MSRP: $254.00You Save: $82.54 (33%)Jeep Compass Instrument Panel Cluster
Part Number: 68628708AC$1259.95 MSRP: $1885.00You Save: $625.05 (34%)Jeep Compass Instrument Panel Cluster
Part Number: 5172705AA$156.79 MSRP: $232.00You Save: $75.21 (33%)Jeep Compass Instrument Panel Cluster
Part Number: 68080411AB$164.69 MSRP: $244.00You Save: $79.31 (33%)Jeep Compass Instrument Panel Cluster
Part Number: 68080410AB$165.82 MSRP: $245.00You Save: $79.18 (33%)Jeep Compass Instrument Panel Cluster
Part Number: 5172706AA$165.82 MSRP: $245.00You Save: $79.18 (33%)Jeep Compass Instrument Panel Cluster
Part Number: 68080413AB$166.94 MSRP: $247.00You Save: $80.06 (33%)
Jeep Compass Instrument Panel Cluster
Part Number: 68080405AF$173.71 MSRP: $257.00You Save: $83.29 (33%)
Jeep Compass Instrument Panel Cluster
Part Number: 68080405AD$173.71 MSRP: $257.00You Save: $83.29 (33%)
| Page 1 of 8 |Next >
1-20 of 148 Results
Jeep Compass Instrument Cluster
The Instrument Cluster of Jeep Compass vehicles are one of the most important interiors parts situated behind the steering wheel, which is intended to give drivers various relevant data on road conditions. These include, the speedometer, tachometer, fuel gauge and other warning lights and signals whose major role is to inform the driver about the operational status of the vehicle, its engine and general safety status. Through the production years, Jeep Compass has had the use of various styles of Instrument Clusters that have developed from simple analog bits to advanced digital screen. These advancements increase capability, to provide real-time updates on various metrics concerning a vehicle. Preserving the Instrument Cluster at its finest is essential for proper functioning and specific complications may force one to shift for a refurbished factory-built gauge.
Looking for affordable and high-quality auto parts? Then you have already arrived at the proper online shop. We offer all Jeep Compass Instrument Cluster at great affordable prices. Moreover, all genuine Jeep Compass Instrument Cluster come with a manufacturer's warranty. In the long run, you would realize you have saved a lot of trouble and money with OEM parts from here.
Jeep Compass Instrument Cluster Parts Questions & Experts Answers
- Q: How to remove and install the instrument cluster on Jeep Compass?A:The instrument panel removal and installation procedure can be very difficult and is not recommended for novice mechanics; ensure comfort with mechanical abilities before starting. Begin by disconnecting the cable from the negative battery terminal. Next, remove the driver's side and passenger's side instrument panel end caps, followed by the center console and floor shifter housing. Proceed to remove the transmission shifter assembly, door sill panels, kick panels, knee bolster, HVAC control assembly, radio, defroster trim panel, and under-glove box closeout panel. Disconnect the blower motor and resistor electrical connectors, then remove the A-pillar trim panels and the steering column. Disconnect the electrical connectors from the A-pillars and the radio antenna connector from the passenger's side kick panel area. Detach the center wiring harness from the retaining clips, and in the driver's side kick panel area, disconnect the main wiring harness connectors and release the on-board diagnostic connector port from the bracket below. Remove the instrument panel center mounting bolts from the radio opening, followed by the side mounting bolts from both sides of the vehicle, and the lower-center support bolts. Finally, remove the upper bolts and, with assistance, carefully guide the instrument panel out of the vehicle, ensuring all electrical connections are disconnected and wiring harness clips are detached. Installation is the reverse of removal.

Related Jeep Compass Parts
 Jeep Compass Antenna
 Jeep Compass Dome Light
 Jeep Compass Antenna Cable
 Jeep Compass Antenna Mast
 Jeep Compass Ashtray
 Jeep Compass Car Speakers
 Jeep Compass Cigarette Lighter
 Jeep Compass Cup Holder
 Jeep Compass Glove Box
Browse by Year
2025 Instrument Cluster 2024 Instrument Cluster 2023 Instrument Cluster 2022 Instrument Cluster 2021 Instrument Cluster 2020 Instrument Cluster 2019 Instrument Cluster 2018 Instrument Cluster 2017 Instrument Cluster 2016 Instrument Cluster 2015 Instrument Cluster 2014 Instrument Cluster 2013 Instrument Cluster 2012 Instrument Cluster 2011 Instrument Cluster 2010 Instrument Cluster 2009 Instrument Cluster 2008 Instrument Cluster 2007 Instrument Cluster