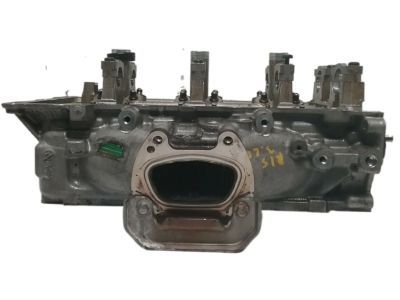
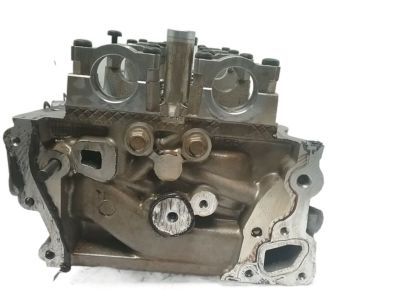
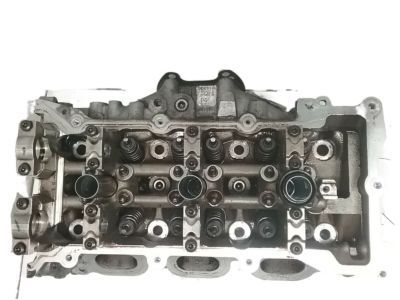
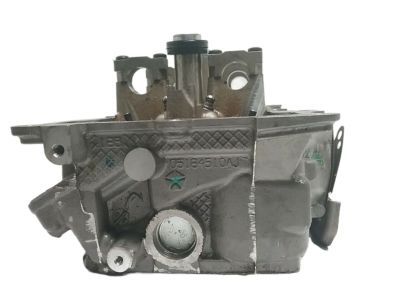
Make sure this part fits

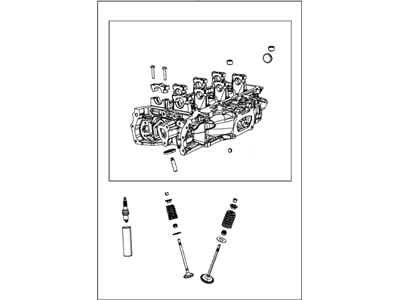
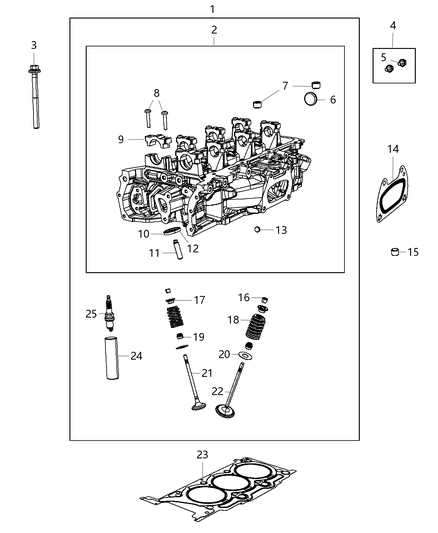
Mopar RL141353AC Cylinder

2011-2013 Mopar RL141353AC

Customer Questions & Expert Answers (13)
RL141353AC Mopar Cylinder Product Photo 1 of 4
  • Part Description
    Head Cylinder With Valves
  • Replaced By
    68141353AC
  • Manufacturer
    Mopar
Make sure this part fits
$981.05 MSRP: $1190.00
You Save: $208.95 (18%)
Core Charge: $150.00
1
ADD TO CART
  • Related Parts
  • Specifications
  • Fitment
  • Q&A
  • Product Specifications

    BrandGenuine Mopar
    Manufacturer Part NumberRL141353AC
    Part DescriptionHead Cylinder With Valves
    Item Dimensions9.6 x 12.9 x 21.2 inches
    Item Weight38.00 Pounds
    ConditionNew
    Fitment TypeDirect Replacement
    ManufacturerMopar
    SKURL141353AC
    WarrantyThis genuine Mopar part is guaranteed by Mopar's factory warranty.
    Shipping & ReturnShipping Policy Return Policy
    Warning: California's Proposition 65
  • Vehicle Fitment

    Year Make Model Engine Important vehicle option details
    2013, 2011 Chrysler 2006 Cyl 3.6LLimited Convertible, Limited Sedan, LX Sedan, S Convertible, S Sedan, Touring Convertible, Touring Sedan
    2011 Chrysler 3006 Cyl 3.6LBase RWD, Limited RWD
    2011 Chrysler Town & Country6 Cyl 3.6LGold, Limited, LX, Touring, Touring L
    2013, 2011 Dodge Avenger6 Cyl 3.6LExpress, LUX, Mainstreet, R/T FWD, SE, SXT
    2011 Dodge Challenger6 Cyl 3.6LR/T, SE, SRT8
    2011 Dodge Charger6 Cyl 3.6LPolice RWD, SE RWD
    2011 Dodge Durango6 Cyl 3.6LCitadel AWD, Citadel RWD, Crew AWD, Crew RWD, Express AWD, Express RWD, Heat AWD, Heat RWD
    2011 Dodge Grand Caravan6 Cyl 3.6LC/V, Crew, Express, LUX, Mainstreet, R/T
    2013 Dodge Journey6 Cyl 3.6LCrew AWD, Crew FWD, R/T FWD, R/T Rallye AWD, SXT AWD, SXT FWD
    2011 Jeep Grand Cherokee6 Cyl 3.6LLaredo 2WD, Laredo 4WD, Limited 2WD, Limited 4WD, Overland 2WD, Overland 4WD
    View More
  • Customer Questions & Expert Answers

    Q:
    Is this part guaranteed to fit my truck ? Posted by MoparPartsGiant Specialist
    A:
    You can Select Your Vehicle to check if RL141353AC fits your vehicle.
    Posted by MoparPartsGiant Specialist
    Installation and Repair Tips
    Q:
    How to remove and install Cylinder Head in four cylinder engine on Chrysler 200? Posted by Customer
    A:
    To remove the components, begin by loosening the lug nuts on the right front wheel, raising the vehicle, and securing it on jackstands. Remove the right front wheel, splash shields, and inner fender liner. Position the number one piston at Top Dead Center and disconnect the negative battery cable from the remote ground terminal. Remove the engine cover, drain the cooling system, and take out the spark plugs. Next, remove the air filter housing, coolant reservoir, and power steering reservoir without disconnecting the lines. Remove the drivebelts and the intake manifold, covering the intake ports with duct tape. Detach the power steering hose bracket bolt and secure the pump out of the way without disconnecting the hoses. Remove the exhaust manifold, ignition coils, and spark plugs, followed by the valve cover. Take off the water pump pulley, air conditioning compressor, and bracket, then remove the timing chain cover and timing chain. Remove the camshaft bearing caps, camshafts, and lifters, storing the lifters for reinstallation in their original locations. For 2015 and later models, remove the WAA assembly. Loosen the cylinder head bolts in reverse of the tightening sequence until they can be removed by hand, taking notes on their locations. Carefully lift the cylinder head straight up, placing it on wood blocks to prevent damage. If it sticks, dislodge it gently. After removal, use needle nose pliers to take out the WT filter from the engine block and clean all old gasket material from the block and head, ensuring no debris falls into the engine. For installation, place a new or cleaned WT filter into the cylinder block, apply RTV sealant at the timing chain side ends, and position a new gasket and the cylinder head. Check the head bolt threads for gaps and apply clean engine oil before installation. Place washers on the first two head bolts, install the head bolts, and tighten them in stages according to the recommended sequence. Ensure to identify the type of cylinder head bolts for proper torque. The final tightening requires a specific number of degrees, which can be measured with an angle-torque gauge. Reinstall the timing chain and cover, then follow the reverse order for the remaining installation steps. Refill the cooling system, change the engine oil and filter, and rotate the crankshaft clockwise through six complete revolutions, rechecking the camshaft timing marks. Finally, start the engine and run it until normal operating temperature is reached, checking for leaks and proper operation.

    Posted by MoparPartsGiant Specialist
    Q:
    How to remove and install a cylinder head in 3.6L V6 engine on Dodge Avenger? Posted by Customer
    A:
    When replacing the cylinder head the following is done, relieve fuel pressure and disconnect negative battery terminal. Remove the lug nuts and jack up the right front wheel, placing it on jackstands, and the removing the right front wheel and drivebelt splash shield. Remove the engine oil and the coolant, then also slacken the drivebelt. Second, remove the air filter housing and the resonator, after that the intake manifolds can also be removed. All wires and vacuum hoses should be disconnected from the cylinder heads and should be labeled for their correct reconnection. First, you have to uninstall the ignition coils and spark plugs; second, the catalytic converter(s) as several as the number of cylinders, and the valve covers. Counter inlay and take off both the crankshaft balancer and the oil pans. When doing work on front side of cylinder head, the alternator, Oil dipstick tube and air conditioning compressor should be removed as well as removal of the main engine harness connectors. For the rear cylinder head, all the power steering pump and heater core tube fasteners must be removed. Take off the timing chain cover, use the crankshaft to bring the #1 piston to the top dead centre on the exhaust side and double check the orientation of the cam phaser arrows. Take out the timing chain, oil controlling valves, timing chain tensioner, guides, camshafts, rocker arms and Lash adjusters though ensure that the rocker arms and the Lash adjusters are arranged in a particular order. Relax the cylinder head bolts in the reverse order that was used while tightening them, and then carefully lift the cylinder head off the block by placing a wooden block on the head then striking it gently with a hammer so that the head is not spoilt. The cylinder head should be checked and worked on by an automotive machine shop that is competent. For installation, therefore, the mating surfaces have to be clean through use of a gasket scraper and brake cleaner. Throw shop rags on the lifter valley to minimize on the entry of debris into the engine compartment and inspection on the mating surfaces for any sign of damage. Align the new gasket over the dowel pins and the cylinder head should be lowered over the engine block and new cylinder head bolts must be tightened in the recommended procedure. The rest of the steps are therefore reflected in the opposite order and entails oil and filter changes as well as topping up the cooling system and the final start up to look for any sign of leakage and other mechanical irregularities.
    Posted by MoparPartsGiant Specialist
    Q:
    What precautions and steps should be taken when replacing a cylinder head in 2.7L V6 engine on Dodge Avenger? Posted by Customer
    A:
    This process should only be done when the engine is cool to touch and is best done at the weekend when you do not have to use the car. First of all, it is necessary to take off the primary timing chain and supply with sprockets. However, ensure that you do not move the crankshaft from around the alignment marks in the remainder of the entire process of the strop. Then it is time to take out the camshafts from the cylinder head, rocker arms accompanied by hydraulic lash adjusters, and remember to put labels and numbers to the removed parts to facilitate correct reinstallment of all of them in required positions. Then, it is time to uninstall the lower intake manifold and exhaust manifold(s)-if your car comes equipped with them. If remaining label and remove any coolant fittings, ground straps, cables, hoses, wires, or brackets that are connected to the cylinder head including the water outlet housing by loosing the heater supply tube retaining bolts. Apply a breaker bar and the specific socket that fits the specific bolt, and then turn the bolts in a quarter-turns to unscrew them until you are able to remove them by hand; this should be done in the reverse sequence as the tightening sequence in order to avoid warping or cracking of the head. Remove the cylinder head along with the exhaust manifold bolted on it, in case it is stuck then use a pry bar. All externals should be detached from the cylinder head in order to clean and examine before engaging a professional automotive machine shop for servicing. The mating surfaces of the cylinder head and block must be free from any deposit when the head is fitted. Scrape surfaces of the cylinder head and engine block with gasket scraper to remove all carbon and old gasket material without damaging the surfaces After scraping wash the surfaces with lacquer thinner or acetone. Any residual oil that remains on the corresponding surfaces of the head after the installation of the gasket maybe insufficient to make a good seal thus resulting in leakage. Before the cylinder is filled with the material, use clean shop rags to pack it in order to minimize accumulation of debris inside the cylinder and for the removal of any material that may have fallen inside the cylinder, a vacuum cleaner is used. Inspect shoulder of block/head for nicks, scratches, or other signs of wear; maximum allowable dimension is 0.025mm; if beyond this, a file may be used to remove the material or you must machine it. What is left can be removed with compressed air This is done by using a tap of the right size to chase the threads of the head bolt holes. Inspect each cylinder head bolt for stretch by taking a metal ruler or a straightedge and laying it on the threads; the fact is that the diameter of the threads of such bolts tends to be necked down somewhere, in which case the bolts are to be replaced. In any case it is recommended that the head bolts are replaced with new ones irrespective of the state they are in. Using a precision straightedge and a set of feeler gauges, check the cylinder head for warpage; if the same is more than the allowable limit, have the head mugged. Replace the head bolts and nuts, trim the 'riblet' edged gasket along with the flange face of the head, and place the new cylinder head gasket over the dowel pins present on the block and placing the head over the dowels without further upsetting the position of the gasket. These bolts should be then lubricated with little proportions of clean engine oils before fixing them in position with the chamfered side facing the bolt head and the hardened washers going round the cylinder head. Replace the bolts back to their original positions and fasten them a little and then turn the bolts in stages up to the required torque. Place the lash adjusters and rocker arms in their rightful positions in the cylinder head and fit the camshafts and then fit the primary timing chain and sprockets. The rest of the installation process is, in fact, the reverse of removal. Last but not the least, add more coolant in the cooling system and replace the engine oil along with the oil filter, and crank the engine and inspect for the presence of any oil or coolant leakage.
    Posted by MoparPartsGiant Specialist
    Q:
    How to remove the cylinder head in diesel engine on Ram 1500? Posted by Customer
    A:
    Disconnect the negative terminals of battery and drain coolant to remove cylinder head. Disengage exhaust tube from turbocharger, take off fan drive assembly and support engine with support or hoist. Take out right engine mount through bolt and the mount. Disconnect turbo oil drain fitting and close openings. Remove air intake temperature sensor wiring, take away air filter housing with snorkel, tape open turbo port. Disengage heater hoses, oil supply line, and coolant lines from turbocharger and seal openings. Get rid of EGR cooler, exhaust manifold with turbo attached, fan and shroud assembly, drive belt; lower the alternator; disconnect upper radiator hose; label each wire on cylinder head and disconnect all electrical connections to it. Remove engine oil dipstick tube bolt; air intake housing; pump-to-fuel rail line; fuel rail-to-head lines; fuel line shield then remove fuel injectors and rocker housing. Unscrew banjo bolt, the sealing washers and rear fuel line from the head followed by removing fuel injectors after that remove rocker housing together with gasket. Loosen head bolts in reverse order of tightening sequence placing each removed bolt into a cardboard template for tracking purposes only otherwise use assistant or lift engine lifting hoist if available lift off cylinder head from its assembled position breaking its gasket seal by carefully prying between block & head assembly (with an assistant or using an engine lifting hoist). Inspect head for remaining harnesses/cables as they may be found still connected thereupon remove all such cables/harnesses if any then clean both mating surfaces making sure nicks and scratches are removed properly after checking warp-age using a straight edge & feeler gauge subsequently clean injector nozzle seats as well as deck area on block surface assuring it's within prescribed limits go ahead chase threads in holes where bolts pass via tapping/die set measuring their lengths so you can know whether these bolts have stretched beyond allowable send them for replacement if so after that reinstall rocker housing/ fuel injectors if not in place already. When fitting new head gasket put it over dowels in block without disturbing gasket, and place cylinder head over it applying oil to the threads of bolts and under bolt heads. Assemble the bolts on original positions and tighten them as per recommended sequence with specified torque for each one Finally, you can complete other steps of installation like replacing oil/fuel filter, refilling cooling system & priming fuel filter before starting engine.
    Posted by MoparPartsGiant Specialist
    Q:
    What is the removal and installation procedure for cylinder heads in 3.7L V6 and 4.7L V8 engine on Ram 1500? Posted by Customer
    A:
    Regarding the cylinder heads, this removal and installation technique focuses on leaving the camshaft(s) as it is and retaining the exhaust manifold(s). First of all, the intake manifold should be removed before taking off timing chains, sprockets and guides. Then we go under the front part of the car securely supporting it before unbolting exhaust pipes from exhaust manifolds. Any other things like coolant fittings, cables or brackets connected to a head must be detached after they are properly identified. The cylinder head bolts should be loosened in an opposite order to their tightening sequence so that warping or cracking will not develop. It is important that when lifting off the engine block, any external components should be taken away for complete cleansing and inspection; at this point also include any other attached parts such as hoses and wires. On reinstallation make sure that each surface between cylinder head and block is perfectly clean without carbon deposits old gasket remnants or oil traces which can influence gasket sealing action. To do this use a gasket scraper and wipe with lacquer thinner or acetone. Shop rags may have been stuffed into blocked cylinders in order to avoid falling debris while a vacuum cleaner may be used to remove anything that might go inside there during material pouring out. Moreover, surfaces where both block meets head must also be seen for checks about nicks as well as deep scratches needing filling up or even machining it if necessary. Also chase I through with tap and blow them out with air hose till dry.Cylinder head bolts could stretch; therefore if one side does not touch straight edge, replace it.All warped cylinder heads including those of head gasket as well as intake/exhaust manifolds will require confirmation from automotive machine shop.The lash adjusters, camshaft should then start putting back what was removed from the Head.Firstly new cylinder head gasket should carefully placed over dowel pins on block noting its orientation.Should now take it and carefully have the gasket in place without interfering with the dowels.When installing head bolts, clean engine oil should be applied to M10 bolt threads with chamfered side of washers facing bolt heads if used.M8 thread on sealant is to be applied on head bolts.Install the bolts in their original locations, finger-tighten and then using an angle meter measure torque plus degrees. Lastly install timing chain guides, timing chains and timing sprockets while refilling cooling system change oil filter and add oil before starting engine for leaks of oil or coolant.
    Posted by MoparPartsGiant Specialist
    Q:
    What components should be removed after the exhaust manifold and before the Cylinder Head for the 2011 Dodge Challenger? Posted by Customer
    A:
    Next, remove the valve covers, rocker arms, and pushrods, keeping all parts organized for reinstallation.
    Posted by MoparPartsGiant Specialist
    Q:
    How should the Cylinder Head bolts be loosened for the 2011 Dodge Challenger? Posted by Customer
    A:
    Loosen the cylinder head bolts in reverse order of tightening and lift the cylinder head off the block, using a wood block and hammer if necessary, while avoiding damage to the surfaces.
    Posted by MoparPartsGiant Specialist
    Q:
    What should be done to the coolant passages in the Cylinder Head during the cleaning process for the 2011 Dodge Grand Caravan? Posted by Customer
    A:
    Built-up scale from the coolant passages must be removed, and a stiff wire brush should be run through various holes to eliminate any deposits.
    Posted by MoparPartsGiant Specialist
    Q:
    What is the first step in the removal process for the Cylinder Head of the 2011 Dodge Grand Caravan? Posted by Customer
    A:
    Disconnect the negative battery cable from the battery.
    Posted by MoparPartsGiant Specialist
    Q:
    What should be avoided during the installation of valve seals for the 2011 Dodge Grand Caravan? Posted by Customer
    A:
    Avoid twisting or cocking the seals during installation to ensure proper sealing on the valve stems.
    Posted by MoparPartsGiant Specialist
    Q:
    What should be done after reassembling the engine and installing the Cylinder Head for the 2011 Jeep Grand Cherokee? Posted by Customer
    A:
    Refill the cooling system and change the engine oil and filter.
    Posted by MoparPartsGiant Specialist
    Q:
    What should be checked on the mating surfaces of the Cylinder Head before installation for the 2011 Jeep Grand Cherokee? Posted by Customer
    A:
    Check for any damage on the mating surfaces.
    Posted by MoparPartsGiant Specialist
    See Complete Installation and Repair Tips

Genuine Mopar Part RL141353AC, the Right Choice

To ensure reliability, purchase Mopar part # RL141353AC Cylinder. It is sometimes referred to as Cylinder Head. The OEM parts should be used when the Mopar owners want to maximize their driving experience. The high-tech factories that produce these parts utilize sophisticated technology specifically designed to meet stringent factory requirements. Additionally, they are thoroughly tested and can thus be used with reliability by Mopar owners. This part fits specific Chrysler 200, 300, and Town & Country models. It fits Dodge Charger, Durango, Grand Caravan. It also fits Jeep Grand Cherokee. This also fits Ram 1500.

MoparPartsGiant.com is a leading supplier of genuine Mopar parts and accessories such as RL141353AC Cylinder. Wondering where to find exceptional quality and affordable OEM Mopar parts? You have already come to the right place. Our website boasts a huge selection of genuine Mopar parts at attractive prices. Further, all parts come with a manufacturer's warranty. For detailed Jeep parts information, click here.

Why choose Mopar Parts Giant

  • Dedicated Service

    Your complete satisfaction is our #1 goal

  • Lowest Prices

    Best deals on genuine OE parts from dealerships

  • Fast Delivery

    Orders are processed and delivered promptly