My Garage
My Account
Cart
Genuine Dodge Durango Oil Pump
Oil Fluid Pump- Select Vehicle by Model
- Select Vehicle by VIN
Select Vehicle by Model
orMake
Model
Year
Select Vehicle by VIN
For the most accurate results, select vehicle by your VIN (Vehicle Identification Number).
25 Oil Pumps found


| Page 1 of 2 |Next >
1-20 of 25 Results
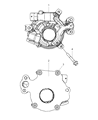
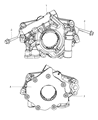
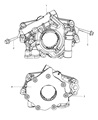
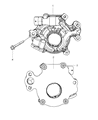
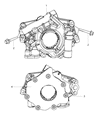
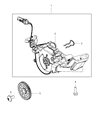
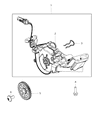
Dodge Durango Oil Pump
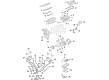
This paper aims at discussing the responsibilities of the Oil Pump in Dodge Durango vehicles particularly the internal combustion engine. It pumps the oil under pressure to help lubricate and cool vital parts of the engine that includes the bearings and pistons besides serving the role of hydraulic fluid for small actuators. The typical oil pump system that the Dodge Durango incorporates in its system is mechanical oil pumps that are driven by the crankshaft or the camshaft which are very reliable. It is worth to mention gear, trochoid and vane oil pumps which may be used in different models of the Dodge Durango. The oiling system pump sucks the oil in from the sump, filters it and then circulates it through the engine as it maintains the needed oil pressure necessary for the engine. The finesse of the Dodge Durango's power train mandated the periodic change of oil and filter and to dislodge the system clogs for the engine to savor its deserving longevity.
Looking for affordable and high-quality auto parts? Then you have already arrived at the proper online shop. We offer all Dodge Durango Oil Pump at great affordable prices. Moreover, all genuine Dodge Durango Oil Pump come with a manufacturer's warranty. In the long run, you would realize you have saved a lot of trouble and money with OEM parts from here.
Dodge Durango Oil Pump Parts Questions & Experts Answers
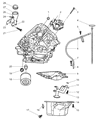
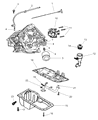
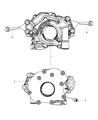
- Q: What precautions should be taken when handling the oil pressure relief valve and oil pump assembly in 5.7L V8 engine on Dodge Durango?A:In this type of engine, the oil pressure relief valve cannot be taken out of the oil pump housing; if that is done, it is necessary to replace the oil pump assembly with a new one. It should be pointed out that on the Hemi engine the oil pump is available only in sets. First, remove the cable from the negative terminal of the battery after that, drain the engines cooling system. Subsequently, the timing chain cover and the Oil Pan have to be pulled off. Next there is a bolt to be disconnected right from the pick-up tube assembly and can be put down from the path of oil pump, finally the mounting bolts of oil pump have to be pulled to separate the pump from the block of the engine. To fit, place the pump on the engine so that the rotor of the pump is in the proper relation the crankshaft drive, and tighten the bolts that hold the oil pump firmly into place while using the correct torque. A new O-ring is then placed on the stick of the oil pump pick-up tube; the stick is then joined to the pump and the bolt is tightened to the recommended measure of torque. The rest of the installation is performed on the reversal of the process of removal. Last, add the correct amount and type of engine oil to crankcase, change the oil filter, and add the correct type of fluid in the cooling system. Start the engine and ensure that there is sufficient oil pressure and also ensure that there is no oil leakage.

Related Dodge Durango Parts
 Dodge Durango Oil Filter
 Dodge Durango Rod Bearing
 Dodge Durango Oil Pan
 Dodge Durango Oil Cooler
 Dodge Durango Oil Pressure Switch
 Dodge Durango Dipstick Tube
 Dodge Durango Dipstick
 Dodge Durango Drain Plug
 Dodge Durango Crankshaft Pulley
 Dodge Durango Piston Ring Set
 Dodge Durango Crankshaft Thrust Washer Set
 Dodge Durango Drain Plug Washer
Browse by Year
2025 Oil Pump 2024 Oil Pump 2023 Oil Pump 2022 Oil Pump 2021 Oil Pump 2020 Oil Pump 2019 Oil Pump 2018 Oil Pump 2017 Oil Pump 2016 Oil Pump 2015 Oil Pump 2014 Oil Pump 2013 Oil Pump 2012 Oil Pump 2011 Oil Pump 2009 Oil Pump 2008 Oil Pump 2007 Oil Pump 2006 Oil Pump 2005 Oil Pump 2004 Oil Pump 2003 Oil Pump 2002 Oil Pump 2001 Oil Pump 2000 Oil Pump 1999 Oil Pump 1998 Oil Pump