
Why choose MoparPartsGiant
- Fast Delivery
Your Dodge Challenger deserves only genuine parts from MoparPartsGiant.com. There's zero risk involved when buying from us because all our Dodge Challenger parts are expedited directly from authorized dealers and backed by the manufacturer's warranty. For years, we've been the #1 online parts store. Interested in faster shipping? We offer expedited shipping on corresponding orders!
- Dedicated Service
Our outstanding customer service team is here to help you by email, live chat, or phone call with any inquiries regarding your purchase. Dedicated representatives are standing by to assist you with your shopping needs. With a complete Dodge Challenger parts catalog and a full selection of inventory, your parts are ready to be expedited anywhere in the nation without delays.
- Unbeatable Prices
For any genuine parts you need for standard maintenance or repair, we carry them. With our unbelievably low prices on parts, you won't go anywhere else for Dodge Challenger parts. We are your one-stop shop for Dodge Challenger parts without breaking the bank!
Popular Genuine Dodge Challenger Parts
- Engine Parts View More >
- Electrical Parts View More >
- Fuel Parts View More >
- Body - Sheet Metal Except Doors Parts View More >
- Cooling Parts View More >
- Steering Parts View More >
- Interior Trim Parts View More >
- Transmission Parts View More >
- Brakes Parts View More >
- Exhaust Parts View More >
- Doors, Door Mirrors And Related Parts View More >
- Suspension & Drive Parts View More >


Shop Genuine Dodge Challenger Parts with MoparPartsGiant.com
The Dodge Challenger, an American classic, has seen three distinct generations of production since its introduction. The first generation, from 1970 to 1974, was developed on the Chrysler Electronics platform as a hardtop convertible, sharing components with the Plymouth Barracuda. Carl Cameron, who also designed the 1966 Dodge Charger, was responsible for this iconic design. The second generation, spanning from 1978 to 1983, was a transformed version of the Mitsubishi Galant Lambda, serving as an economical coupe. The inaugural Challenger, launched in 1969, was one of two Chrysler vehicles using electronic bodywork. The 1970 model featured a grille design based on an early prototype of the 1966 Charger and was initially planned to have a turbocharged engine. Despite its late entry into a declining Pony Car segment, the Challenger found its niche with distinctive features like a fiberglass front spoiler, vibrant identification graphics, and thick dual side stripes. A unique offering for the 1970 model year was the race-ready Dodge Challenger T/A, built for the Sports Car Club of America's Trans American Sedan championship. The road versions utilized a 340 Six Pack engine, with three two-liter carburetors mated to an aluminum intake manifold, while race versions were equipped with a downsized 340. Notably, the Challenger has always stood for performance, its longevity proving its enduring appeal.
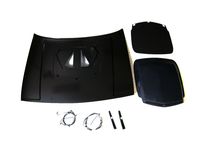
Dodge Challenger owners often encounter cooling system and electrical issues over time. As mileage accumulates, the cooling system may fail, leading to frequent coolant leakages and resulting in engine overheating, with steam often visible from the radiator. The water pump should be inspected in such cases, checking for a loose pulley or worn-out gasket. The Challenger also faces electrical problems, such as difficulty starting, electrical components ceasing to work, or the key getting stuck in the ignition. These symptoms indicate potential issues with the ignition lock assembly or ignition switch, and high-usage parts like the door lock actuator or headlight switch may also wear out. Moreover, a malfunctioning hood that closes slowly or unexpectedly, or fails to stay up, suggests the need to check the hood latch. Regular maintenance of these issues can prolong the lifespan of your Dodge Challenger.
Every OEM component is subjected to rigorous quality checks, assuring its safety, resilience, and performance that aligns with your original parts. Looking for cost-effective OEM Dodge Challenger parts, such as Air Conditioners & Heater, Differential And Drive Line? Look no further than our extensive inventory of genuine Dodge Challenger parts. Priced competitively, our parts are protected by the manufacturer's warranty, ensuring value for your money. Enjoy a seamless shopping experience with our quick delivery service and hassle-free return policy. We invite you to shop with certainty and satisfaction.
Dodge Challenger Parts Questions & Answers
- Q: How to remove and reinstall Oil Pan in V8 engine on Dodge Challenger?A:To remove the engine, first disconnect the cable from the negative terminal of the battery, ensuring that on 2015 and later models with an Intelligent Battery Sensor, the IBS connector is disconnected first. Drain the cooling system, raise the vehicle securely on jackstands, and drain the engine oil while replacing the oil filter. Remove the engine oil dipstick and the engine splash shield, then disconnect the exhaust pipes from the exhaust manifolds. Next, remove the intake manifold and, for 2012 and later models with 5.7L engines, the Variable Valve Timing solenoid. Remove the engine cooling fans and shroud, then take out the power steering gear from the crossmember without disconnecting the intermediate shaft coupler or tie rod ends, positioning the assembly down and away from the engine. Connect an engine hoist to the engine, remove the left and right side engine mount-to-subframe nuts and studs, and raise the engine slightly. Remove all oil pan bolts, lower the pan from the engine, and if it sticks, strike it with a rubber mallet to break the gasket seal, ensuring all bolts are removed first. Slide the oil pan out carefully, noting that the M10 horizontal bolts are longer than the vertical ones, and mark them for correct reinstallation. Remove the windage tray, which is integral to the oil pan gasket and must be replaced as an assembly. For installation, place a new gasket and windage tray, wash out the oil pan with solvent, and clean the mounting surfaces of old gasket material and sealer. If the oil pan is distorted, straighten it by supporting it from below and tapping the bolt holes. Apply RTV sealant to the corners where the timing chain cover meets the block and attach the one-piece oil pan gasket with gasket adhesive. Ensure the alignment studs are correctly positioned, lift the pan into place, and install several bolts finger tight without disturbing the gasket. Check that the gasket is properly aligned, then install the oil pan nuts onto the studs and tighten the fasteners following the correct torque sequence. The remainder of the installation is the reverse of removal. Finally, add the proper type and quantity of oil, change the oil filter, refill the cooling system, start the engine, and check for leaks before returning the vehicle to service.
- Q: How to properly install an intake manifold in 3.5L V6 engine on Dodge Challenger?A:First step of refueling involves, reducing the pressure on fuel system and then unhook the negative end of the car battery. Second, unbolt and take out the air filter housing, mark all the hoses and electrical connectors connected to the intake manifold and throttle body, and the bolt that passes through the EGR pipe and secured to the upper intake manifold. After that, unbolt the brackets from the throttle body and the right side of the upper intake manifold, then unbolt the upper intake manifold from the outer bolt and work towards the inside, then lift up the upper intake manifold from the engine. Scrub the contact surfaces of the lower intake manifold and the upper manifold and check condition of the rubber O-ring gasket, if it is still used it will be adequate. Place the gasket into the groove in the upper intake manifold and then, put the upper intake manifold in position on the lower intake manifold tighten the bolts on the circular pattern starting with the center bolts. For the lower intake manifold, have the cooling system drained, pull off the upper intake manifold, further disconnection of hose that may hinder the process of pulling off of the lower intake manifold, further removal of the fuel rail and injectors. Then, drain the coolant and fix the heater hoses and the coolant hoses, then unscrew the remaining manifold mounting bolts/nuts in turns until you can unscrew them manually, and in avoiding prying between the manifold and the heads to avoid damaging gasket sealing surfaces. Flipping the manifold over, then, specify the heater supply tube and replace the O-ring with 'a new one.' Taking much care gently scrape off any remaining gasket debris as well as the sealants, from the manifold and heads before cleaning the joints. Rear cylinder head water passages should be sealed with an RTV before fitting in new gaskets and add the intake manifold gaskets to the cylinder heads and again apply RTV sealant to the manifold side of the gaskets round the water passages. Locate the manifold into position whilst incorporating the gaskets and aligning the manifold over the ports of the cylinder heads, put the fuel rail with injectors onto the lower manifold, afterwards attach the manifold mounting bolts. Tightening sequence-tighten nuts/bolts in several steps to the desired torque with the help of step by step sequence with the help of torque wrench. Last finish bottom up then put coolant in the radiator and crank the car up and look for any fuel, vacuum, or coolant leaks.

